
Loading the Mat for Cutting or Drawing
Transfer the data to the machine. (Transferring Data Created with Artspira)
- In Artspira’s Preview screen, tap [Settings], and then make sure that [Use Mat] is switched on before transferring data.
- Before starting your project, we recommend performing a test cut on the material you are using.
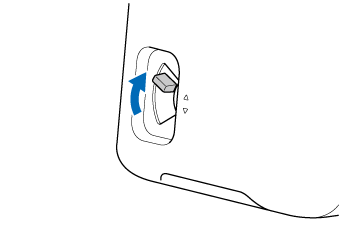
Set the mode change lever on the left side of the machine to the ▲ position.
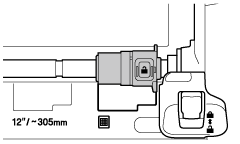
Make sure that the position of the feed roller is adjusted to
 (Cutting Mat).
Adjusting the Feed Roller Position
Align the mat to the arrow in the left corner (1) and insert the mat under the feed rollers.
Insert the end of the mat marked with an arrow into the machine.
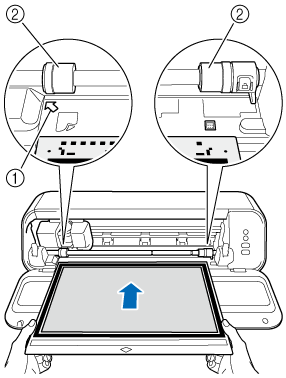
- Arrow for aligning mat
- Feed Roller
While holding the mat level, press
 (Feed Button).
When the mat stops moving, the material is ready for cutting or drawing.
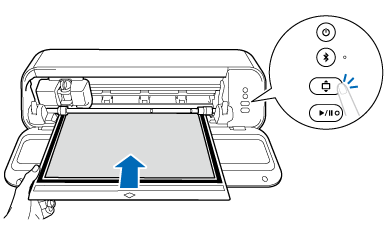 IMPORTANTDo not forcefully push or pull the mat while it is being fed, or you may damage the feed rollers.
Press
 (Start/Stop Button).
Before the machine cuts or draw, it feeds the mat backward and forward to check that the material size is sufficient for the pattern size.
If the LED on the Start/Stop button is off, data transfer from the app is not finished.When cutting or drawing is finished, press
(Feed Button) to eject the mat.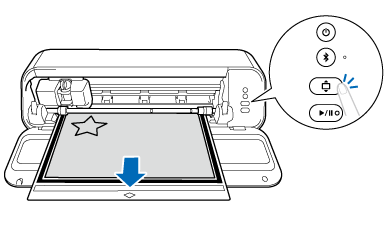 IMPORTANTDo not forcefully push or pull the mat while it is being ejected, or you may damage the feed rollers.
Use the included spatula to carefully peel off the material.
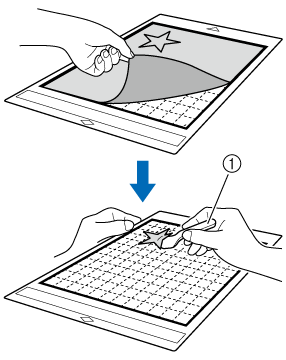
- Spatula
When peeling off the material, insert the spatula as level as possible into the space between the material and mat. Strongly rubbing the adhesive side of the mat may damage it.