
Changing Embroidery Foot “UH+” with LED Pointer
 CAUTION
- When attaching an embroidery foot, always touch
 on the screen. You may accidentally press the “Start/Stop” button and possibly cause injury.
 - Be sure to use the embroidery foot “UH+” with LED pointer when doing embroidery. Using another embroidery foot may cause the needle to strike the embroidery foot, causing the needle to break and possibly causing injury.
Removing
Press
 (Needle position button) to raise the needle.
Touch
to lock all keys and buttons.If the message [OK to automatically lower the presser foot?] appears on the LCD screen, touch [OK] to continue.
Raise the presser foot lever.
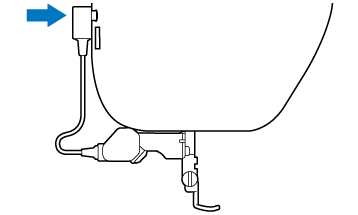
Remove the connector of the embroidery foot “UH+” with LED pointer from the connector on the back of the machine.
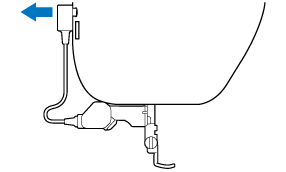
Use the included disc-shaped screwdriver to loosen the screw for the embroidery foot, and then remove the embroidery foot “UH+” with LED pointer.
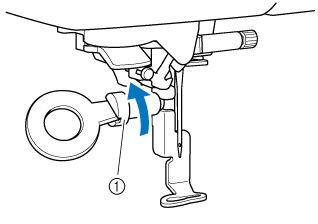
- Screw for embroidery foot
Attaching
Position the embroidery foot “UH+” with LED pointer on the presser foot bar by aligning the notch of the presser foot to the screw for embroidery foot.
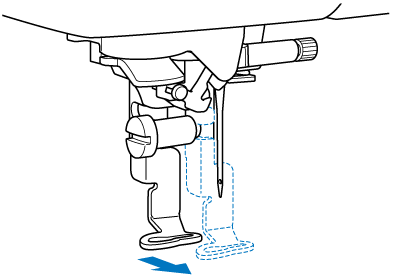
Hold the embroidery foot in place with your right hand, and then use the disc-shaped screwdriver to securely tighten the screw for the embroidery foot.
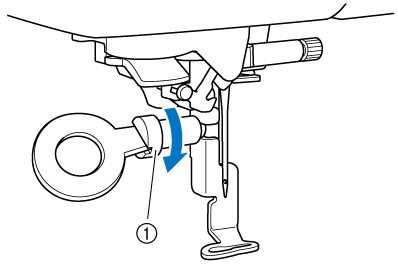
- Screw for embroidery foot
CAUTIONUse the disc-shaped screwdriver to firmly tighten the screw for the embroidery foot. If the screw is loose, the needle may strike the embroidery foot and break, possibly cause injury.
Plug the connector of the embroidery foot “UH+” with LED pointer into the jack on the back left side of your machine.
Touch
 to unlock all keys and buttons.
- All keys and operation buttons are unlocked, and the previous screen is displayed.