
MY CUSTOM STITCH
Designing a Stitch
By using the MY CUSTOM STITCH function, you can register stitches you have created yourself. You can also sew designs combining MY CUSTOM STITCH creations with built-in characters.
Stitches that you create with MY CUSTOM STITCH can be a maximum of 7 mm (approx. 9/32 inch) wide and 37 mm (approx. 1-1/3 inches) long.
Draw the stitch design on the grid sheet.
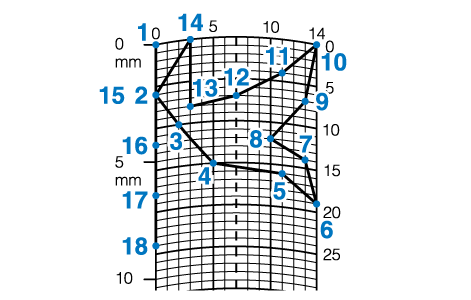
Place points where the stitch pattern intersects with the grid, and connect all the points with a line.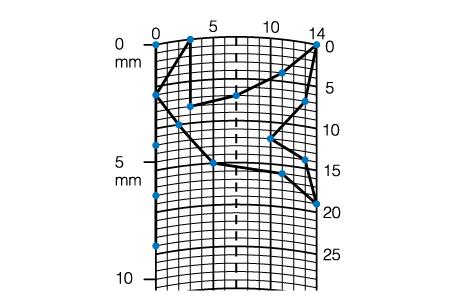
Simplify the design so that it can be sewn as a continuous line. For a more attractive stitch, close the design by intersecting lines.

If the design is to be repeated and linked, the start point and end point of the design should be at the same height.
Determine the x and y coordinates of each of the marked points.
MY CUSTOM STITCH Screen
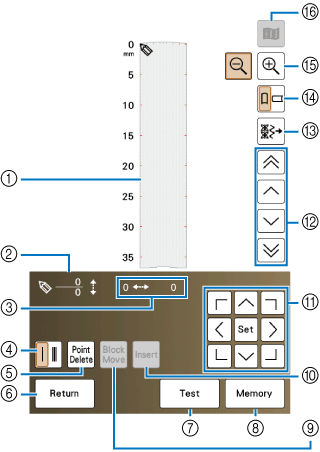
- This area displays the stitch being created.
- Displays the number of the present set point over the total number of points in the stitch.
- Displays the y-coordinate of
 over the x-coordinate of .
 - Single/triple stitching key
Touch this key to select whether one or three stitches will be sewn between two points.
- Point delete key
Touch this key to delete a selected point.
- Return key
Touch this key to exit the entering stitch data screen.
- Test key
Touch this key to sew a test of the stitch.
- MY CUSTOM STITCH memory key
Touch this key to store the stitch being created.
- Block move key
Touch this key to group points together and move them together.
- Insert key
Touch this key to insert new points on the stitch design.
- Arrow keys and set key
Use these keys to move
over the display area, and touch the set key in the center to set a point on the stitch design. - Point-to-point key
Use these keys to move
from point to point on the stitch, or to the first or last point entered on the stitch. - Stitch edit key
Touch this key to edit the utility stitches in the machine.
- Grid direction key
Touch this key to change the direction of the grid sheet.
- Enlarger key
Touch this key to see an enlarged version of the stitch being created.
- Image key
Touch this key to view an image of the stitch.
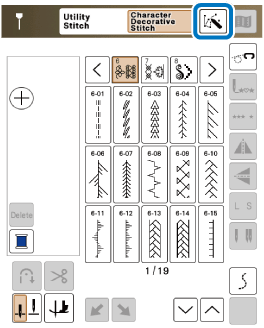
Touch
 and then
  .
.Touch
 .
.
Use
 to move to the coordinates of the first point on the grid.
Touch
 to add the point indicated by .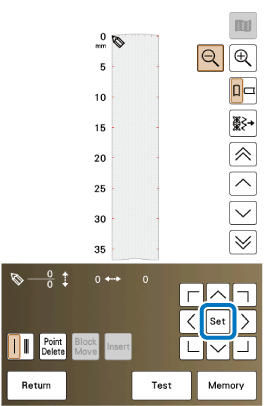
Select whether single stitch or triple stitches will be sewn between the first two points.
To sew three stitches, touch the key so that it appears as
 .
.Repeat the steps for each point that you have drawn on the grid sheet until the stitch design is drawn on the screen as a continuous line.
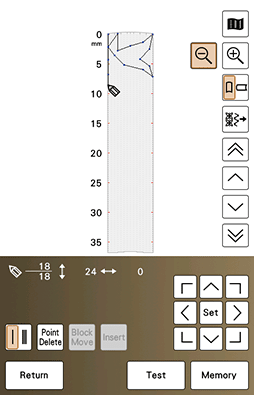
Once you finish entering the stitch data, touch
 to save the stitch pattern.
Moving a Point
Touch
 or
or  to move to the point that you want to move.
Use
to move the point.
Moving Part or All of the Design
Touch
or to move to the first point of the section that you want to move.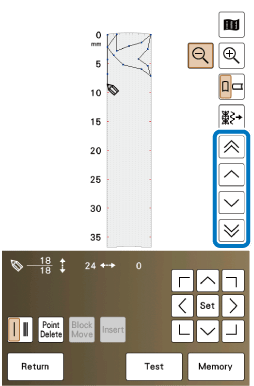
To move
to the first point, touch  .
.To move
to the last point, touch  .
.Touch
 .
.- The selected point and all points that were entered after it are selected.
Touch
 or
or  to move the section and touch .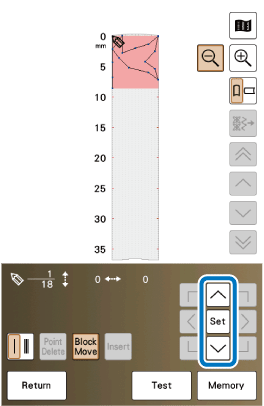
- The section will be moved.
Inserting New Points
Touch
or to move to a place on the design where you want to add a new point.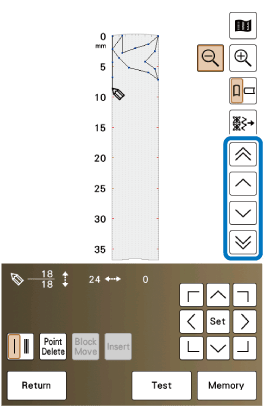
To move
to the first point, touch .To move
to the last point, touch .Touch
 to insert a new point.
Use
to move the point.