| | |
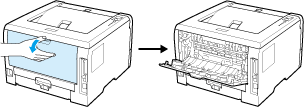
| 1 | Open the back cover (back output tray). | ||||||||||
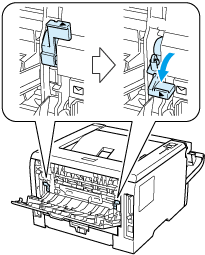
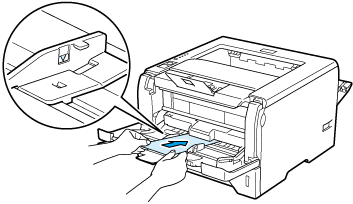
| 2 | <For printing envelopes only>
Pull down the two grey levers, one on the left-hand side and one on the right-hand side, toward you as shown in the illustration below.
| ||||||||||
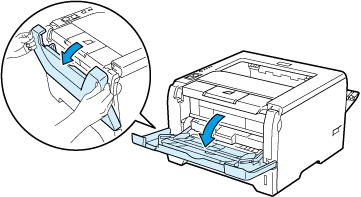
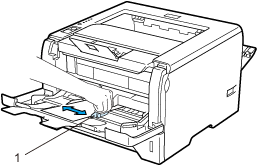
| 3 | Open the MP tray and lower it gently. | ||||||||||
| 4 | |||||||||||
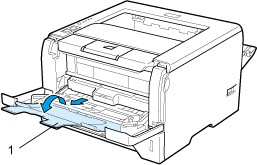
| 5 | Put paper in the MP tray. Make sure that the paper stays under the maximum paper mark ( | ||||||||||
| 6 | |||||||||||
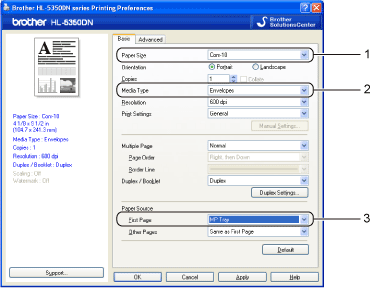
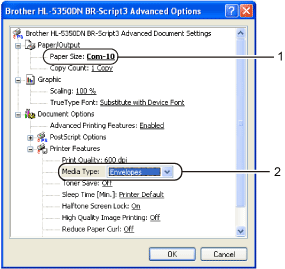
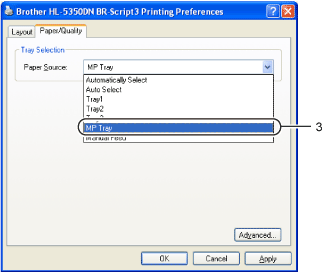
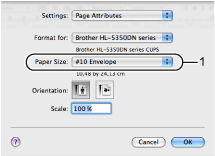
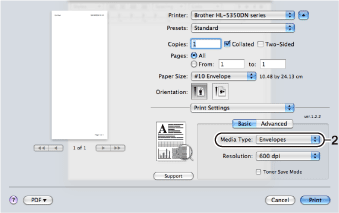
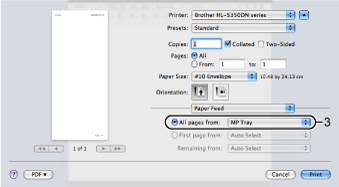
| 7 | Choose the following from the printer driver: and any other settings you may want to make. (See Driver and Software.)
For other envelopes which are not listed in the printer driver, such as Envelope #9 or Envelope C6, choose Custom Page Sizes. (For more information on envelope sizes, see Paper size.) | ||||||||||
| 8 |
Send the print data to the printer. |
||||||||||
| 9 | <For printing envelopes only>
When you have finished printing, reset the two grey levers which are pulled down at step 2 back to the original position.
|
| | |