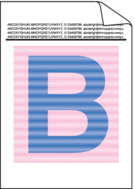
| Printed pages are compressed, horizontal stripes appear, or characters in the top, bottom, left, or right margins are cut off | Adjust the print margins in your document's application and reprint the job. |
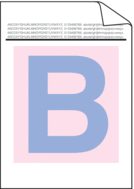
| Colors are light or faint on the whole page | Use the machine's LCD to perform calibration.See Related Information: Calibrate Color Output. Make sure Toner Save mode is off in the LCD or the printer driver. See Related Information: Reduce Toner Consumption. Make sure the media type setting in the printer driver matches the type of paper you are using. Shake all four toner cartridges gently. Wipe the windows of all four LED heads with a dry, soft lint-free cloth. See Related Information: Clean the LED Heads. |
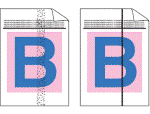
| Vertical white streaks or bands appear on the page | Wipe the windows of all four LED heads with a dry, soft lint-free cloth. Make sure foreign material such as a torn piece of paper, sticky notes, or dust is not inside the machine or around the toner cartridge and drum unit assemblies. |
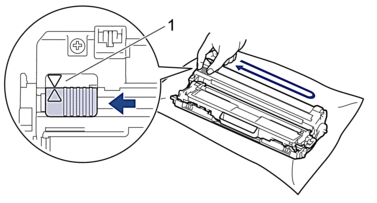
| Vertical colored streaks or bands appear on the page | Clean all four corona wires (one for each color) inside the drum unit by sliding the green tab. Make sure the green tab of the corona wire is in the home position (1). Replace the toner cartridge that matches the color of the streak or band. To identify the color of the toner cartridge, visit the Brother Solutions Center at support.brother.com and view the FAQs & Troubleshooting page for your Brother model. See Related Information: Replace the Toner Cartridge. Install a new drum unit. See Related Information: Replace the Drum Unit. |
| Horizontal colored lines appear on the page | Identify the color causing the problem and replace the toner cartridge that matches the color of the line. To identify the color of the toner cartridge, visit the Brother Solutions Center at support.brother.com to see the FAQs & Troubleshooting page. See Related Information: Replace the Toner Cartridge. Install a new drum unit. See Related Information: Replace the Drum Unit. |
| White spots | Make sure the media type setting in the printer driver matches the type of paper you are using. Check the machine’s environment. Conditions such as high humidity and high temperatures may cause this print quality problem. If the problem is not solved after printing a few pages, the drum may have foreign material, such as glue from a label, stuck on the drum surface. Clean the drum unit. See Related Information: Clean the Drum Unit. Install a new drum unit. See Related Information: Replace the Drum Unit. |
| Blank page or some missing colors | Identify the color causing the problem and install a new toner cartridge. To identify the color of the toner cartridge, visit the Brother Solutions Center at support.brother.com to see the FAQs & Troubleshooting page. See Related Information: Replace the Toner Cartridge. Install a new drum unit. See Related Information: Replace the Drum Unit. |
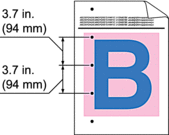
| Colored spots at 3.7 in. (94 mm) | If the problem is not solved after printing a few pages, the drum may have foreign material, such as glue from a label, stuck on the drum surface. Clean the drum unit. See Related Information: Clean the Drum Unit. Install a new drum unit. See Related Information: Replace the Drum Unit. |
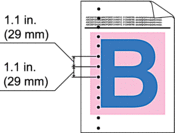
| Colored spots at 1.1 in. (29 mm) | Identify the color causing the problem and install a new toner cartridge. To identify the color of the toner cartridge, visit the Brother Solutions Center at support.brother.com to see the FAQs & Troubleshooting page. See Related Information: Replace the Toner Cartridge. |
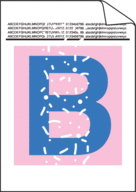
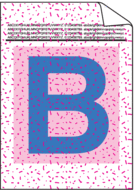
| Toner scatter or toner stain | Check the machine’s environment. Conditions such as high humidity and high temperatures may cause this print quality problem. Identify the color causing the problem and put in a new toner cartridge. To identify the color of the toner cartridge, visit the Brother Solutions Center at support.brother.com to see the FAQs & Troubleshooting page. See Related Information: Replace the Toner Cartridge. Install a new drum unit. See Related Information: Replace the Drum Unit. |
| The color of your printouts is not what you expected | |
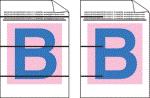
| Color offset | |
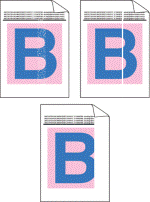
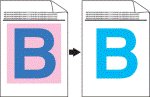
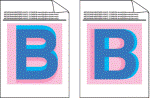
| Uneven color density across the page | |
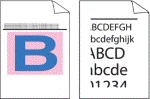
| Missing thin lines in images | Make sure Toner Save mode is off in the LCD or the printer driver. Change the print resolution. If you use a Windows printer driver, select Improve Pattern Printing in Print Setting of the Basic tab. |
| Wrinkled printout | |
| Ghosting images | Check the machine’s environment. Conditions such as low humidity and low temperatures may cause this print quality problem. Make sure the media type setting in the printer driver matches the type of paper you are using. Make sure the two gray levers inside the back cover are in the up position. Install a new drum unit. See Related Information: Replace the Drum Unit. |
| Toner smears easily | |
| Curled or wavy image | Select Reduce Paper Curl mode in the printer driver. If the problem is not solved, select Plain Paper in the media type setting. If you are printing an envelope, select Env. Thin in the Media Type Setting of the printer driver. If you do not use the machine often, the paper may have been in the paper tray too long. Turn over the stack of paper in the paper tray. Also, fan the paper stack and then rotate the paper 180° in the paper tray. Store the paper where it will not be exposed to high temperatures and high humidity. Open the back cover (Face up output tray) to let the printed paper exit onto the Face up output tray. |
| Envelope creases | Make sure the envelope levers inside the back cover are pulled down to the envelope position when you print envelopes. - NOTE
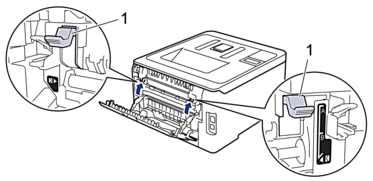
- When you have finished printing, open the back cover and reset the two gray levers back to their original position (1) by lifting them up until they stop.
|