


| | |
| 1 | Connect the P-touch to be configured to the computer. | ||||||||||||||||||
| 2 |
For Windows 10
From the Start menu, click [Printer Setting Tool] under [Brother].
For Windows 8/ Windows 8.1 / Windows Server 2012/2012 R2
On the [Apps] screen, click [Printer Setting Tool].
For Windows Vista / Windows 7 / Windows Server 2008/2008 R2
From the Start menu, click [All Programs] - [Brother] - [Label & Mobile Printer] - [Printer Setting Tool].
The main window appears. | ||||||||||||||||||
| 3 | Select the P-touch to be configured from the [Printer] drop-down list and then click [Device settings]. The [Device settings] window appears. | ||||||||||||||||||
| 4 | Specify or change the settings. 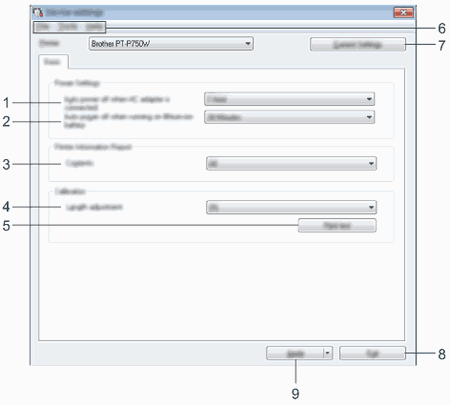
| ||||||||||||||||||
| 5 | After changing the settings, click [Apply] - [Exit], and then click [Exit] in the main window to finish specifying settings. |
| | |