- Brother support website
- Brother Support for IT Administrators
- I want BRAdmin Professional 4 to connect to Microsoft Azure so I can manage my printer fleet on multiple networks.
I want BRAdmin Professional 4 to connect to Microsoft Azure so I can manage my printer fleet on multiple networks.
- Before connecting BRAdmin Professional 4 to Microsoft Azure, make sure you have created the Table and Blob Storage containers in Microsoft Azure.
For more information, see I want to create an Azure Table and Blob Storage to connect BRAdmin Professional 4 and Microsoft Azure. - For each Azure profile, complete setup in this order:
1. Master
2. Client/Cloud Connection using the same Table and Blob Storage containers
Configure the Master
Click the video link below for a step-by-step guide on how to connect BRAdmin Master to Microsoft Azure.
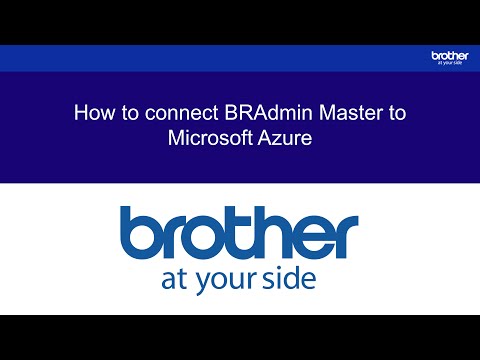
*This video is being streamed from YouTube.
-
Go to the Downloads page on the Brother support website to download BRAdmin Professional 4 for Microsoft Azure (Windows only).
-
Run the installer and follow the on-screen installation instructions.
-
When finished, launch BRAdmin Professional 4.
-
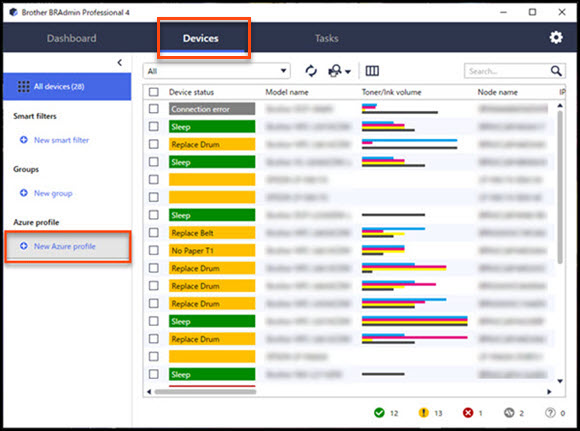
From the Master, click the Devices tab, and then select New Azure profile in the left navigation bar.
-
Copy and paste the SAS key in the Blob URI and Table URI fields, and then click OK.

-
Configure the Azure polling periods, and then click Upload.
When the upload is complete, BRAdmin Professional 4 is set up as the Master.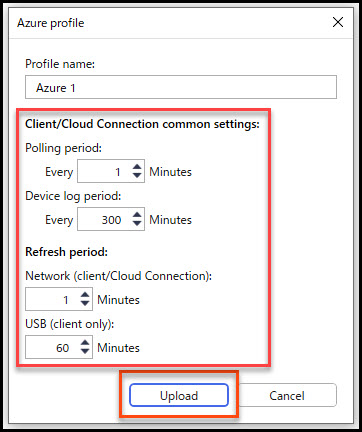
NOTE:
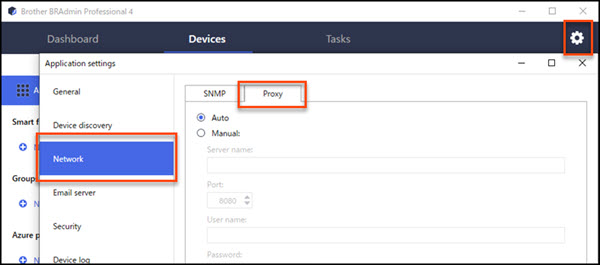
Depending on your network environment, you may need to configure your proxy server settings. If so, click Application settings
 > Network > Proxy.
Configure Cloud Connection settings using Web Based Management >
Configure the Client
Click the video link below for a step-by-step guide on how to package and install the BRAdmin Client.

*This video is being streamed from YouTube.
-
Make sure the Master has been set up. If not, return to Configure the Master and complete the setup.
-
If BRAdmin Professional 4 is already installed on your computer, see this HINT to convert the Client settings to the existing BRAdmin Professional 4.
Prepare a separate computer to use for the Client. The Master and the Client cannot be run on the same computer.
-
Make sure you are in the Master so that you can set up the Client.
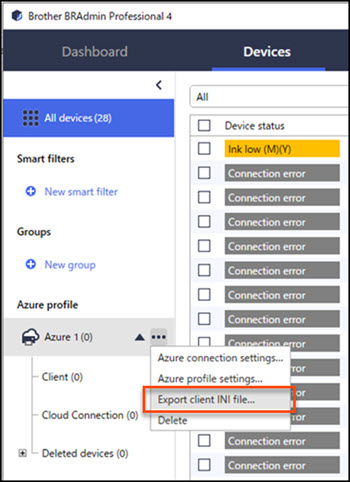
Launch BRAdmin Professional 4, click the Devices tab, and then click the menu button in the Azure profile that you created earlier.
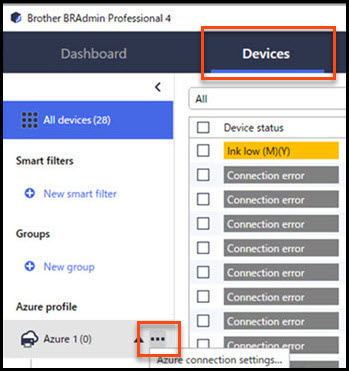
-
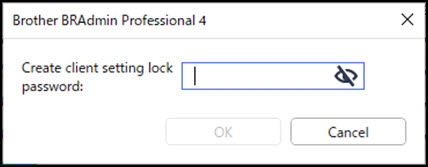
Click Export client INI file… to create a Client setting lock password (between 1-255 ASCII characters). This password is required to unlock the Client setting lock.
-
Go to the Downloads page on the Brother support website to download BRAdmin Professional 4 (Windows only).
IMPORTANT:
Save the downloaded BRAdmin Professional 4 installer (the same installer as the Master) and the INI file that was exported in the previous step in the same folder on the Client computer. -
Run the installer and follow the on-screen instructions to complete the installation.
-
When finished, launch BRAdmin Professional 4.
-
BRAdmin Professional 4 Client will automatically search for and discover devices according to the configuration in the settings INI file.
Click the discovery button in the Master to discover the Client devices.
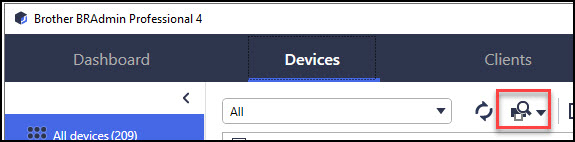
NOTE:
Depending on your network environment, you may need to configure your proxy server settings. If so, click
Application settings > Network > Proxy.
HINT:
To convert an existing installation of BRAdmin Professional 4 to a Client:
-
Update BRAdmin Professional 4 on your computer, and then import the Client settings INI file that you just exported from the Master.
Click Application settings, and then click
Back up/Restore in the left navigation bar.In the Back up application settings section, click Import backup file.
This overwrites any existing BRAdmin Professional 4 Client configuration in the INI file. You may need to reconfigure the INI file settings to their original values.

Start BRAdmin Professional 4 Client, and then click the discovery button
to discover devices.On the computer hosting the Master, click the discovery button
in the Master to discover the Client devices.[ Back To Top ]
Cloud Connection settings using Web Based Management
-
To connect your Brother device and Microsoft Azure directly, go to your product's Downloads page on the Brother support website to download the latest firmware.
-
To configure Microsoft Azure connection settings, start your web browser and make sure your Brother device is turned on.
-
Type "https://device's IP address" in your browser's address bar, for example: https://192.168.1.2.
-
In the Login field, type the password, and then click

-
The default login password to manage device settings is one of the following:
- initpass
or
- the password located on the back or bottom of the device and marked "Pwd". -
If you previously changed the password, type the updated password.
-
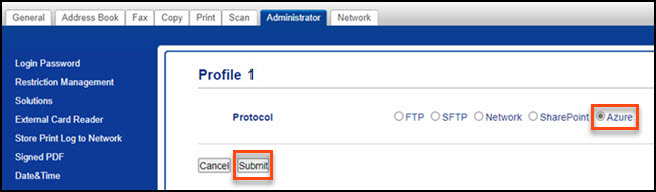
Click the Administrator tab, click Network Profile in the left navigation bar, and then click FTP next to Profile 1.
-
Select the Azure radio button, and then click Submit.
-
Copy and paste the Blob URI and Table URI, change the Profile Name if needed, and then click Submit.
-
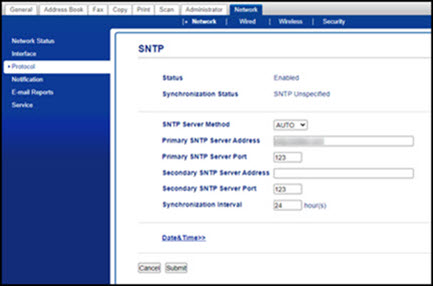
Click Date&Time in the left navigation bar and configure the date and time. Select the Synchronize with SNTP server checkbox, and then click SNTP. We recommend using SNTP to unify the time for your printer fleet.

Go to the digicert® website to download the DigiCert Global Root G2 (PEM file), which will allow you to access Microsoft Azure storage. If any other certificates are required by your environment, apply them as well.
HINT:
To configure the CA certificates:
-
Click the Network tab, click the Security sub-tab, and then click CA Certificate in the left navigation bar.
Click Import CA Certificate.
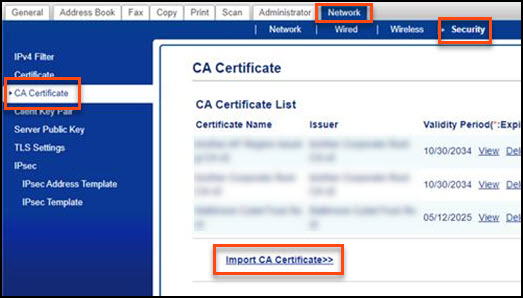
Select the CA certificate file, and then click Submit.
-
Click the Network tab, and then click Protocol in the left navigation bar.
Make sure the Proxy checkbox is selected, and then click Submit.
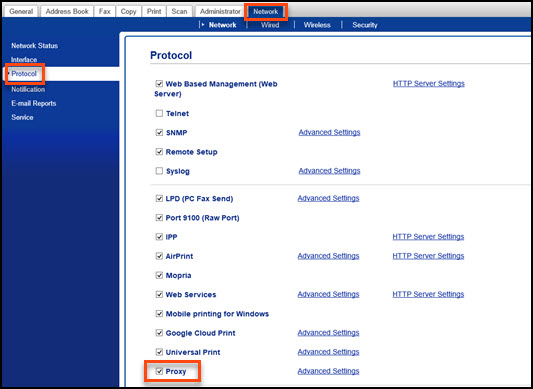
Click Advanced Settings next to the Proxy checkbox you just selected.
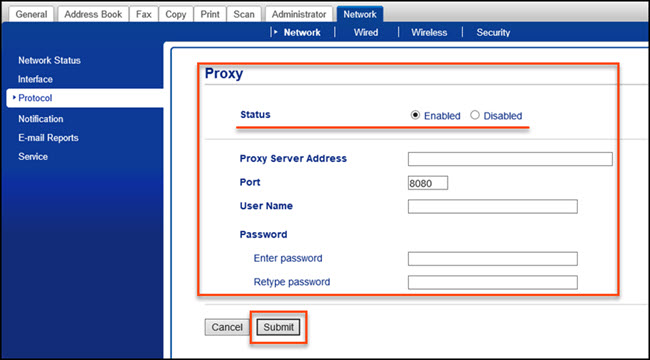
In the Proxy screen, make sure the Enabled radio button next to Status is selected.
Configure the proxy server information, and then click Submit.
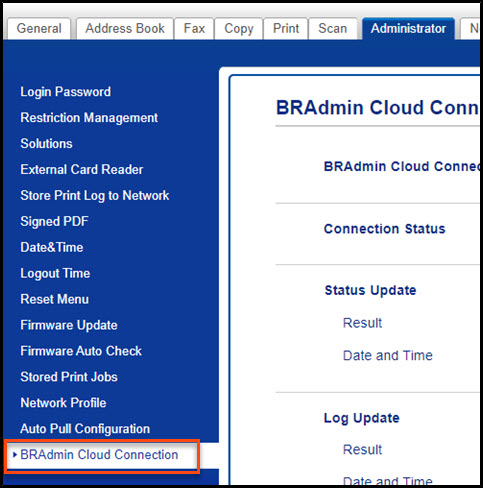
Click the Administrator tab, and then click BRAdmin Cloud Connection in the left navigation bar.
Next to BRAdmin Cloud Connection, select the On radio button, select the profile that you configured in the previous step, and then click Submit.
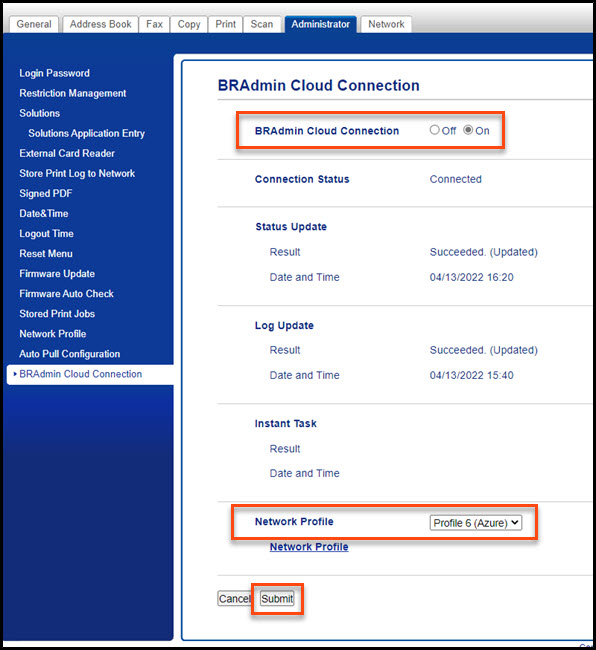
You can view the status of the connection next to Connection Status.
Click the discovery button
in the Master to discover the Cloud Connection devices.Click the video link below for a step-by-step guide on how to complete the BRAdmin Azure setup.

*This video is being streamed from YouTube.
[ Back To Top ]
NOTE:
Depending on your network environment, you may need to configure your proxy server settings. If so:
NOTE:
Make sure the Master has been set up. If not, see Configure the Master and complete the setup before you begin.
HINT:


-
NOTE:
-