
- Brother support website
- Brother Support for IT Administrators
- I want to create an Azure Table and Blob Storage to connect BRAdmin Professional 4 and Microsoft Azure.
I want to create an Azure Table and Blob Storage to connect BRAdmin Professional 4 and Microsoft Azure.
-
To connect BRAdmin Professional 4 and Microsoft Azure, you need a Microsoft Azure account. If you do not have a Microsoft Azure account, open a new account first.
-
This procedure may change if the software is updated by Microsoft™.
For the latest information, visit the Microsoft Azure website. -
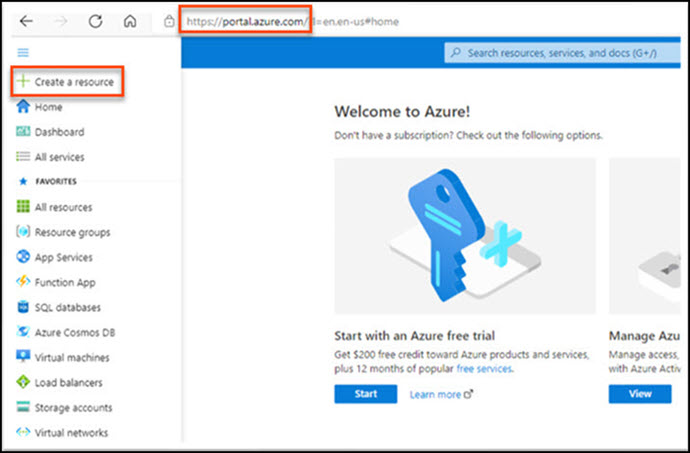
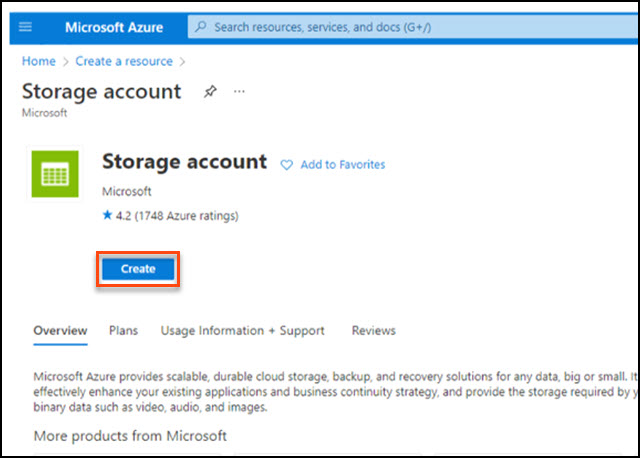
Open your web browser, go to the Microsoft Azure portal website, and then click Create a resource.
-
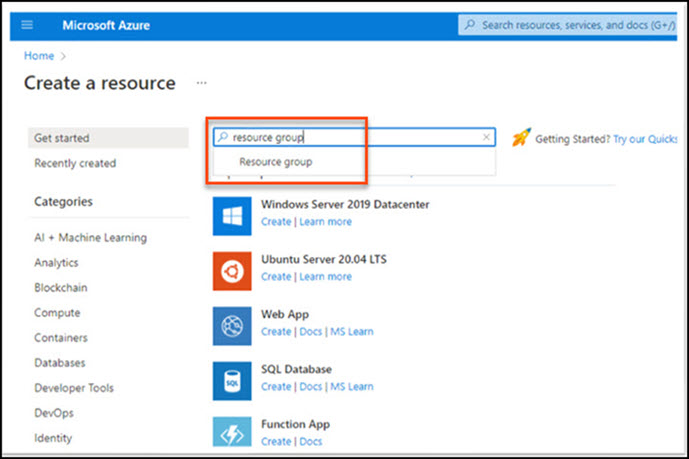
Type "resource group" in the search box, and then select Resource group from the drop-down list.
-
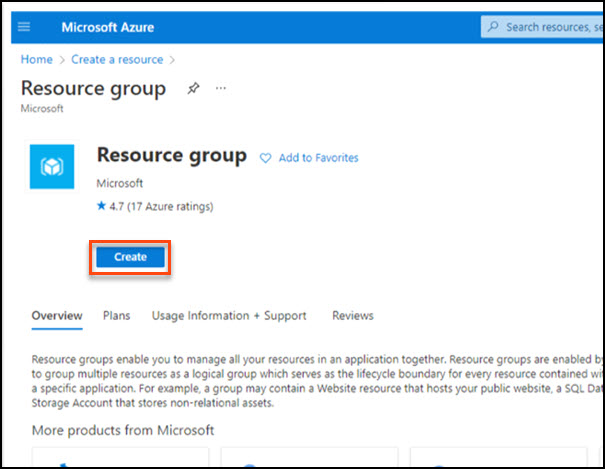
Click Create.
-
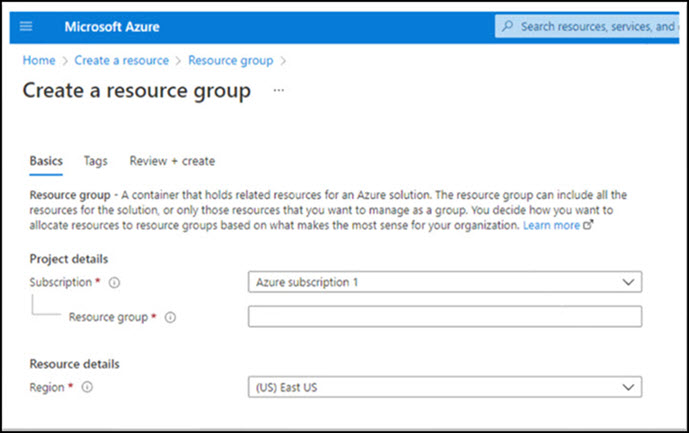
The Create a resource group screen appears.
-
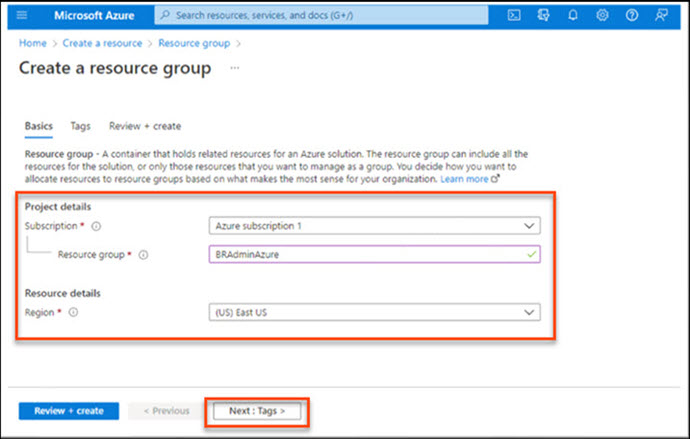
Select your Azure subscription, and then specify the resource group name in the Project details section. After selecting your region in the Resource details section, click Next: Tags.
-
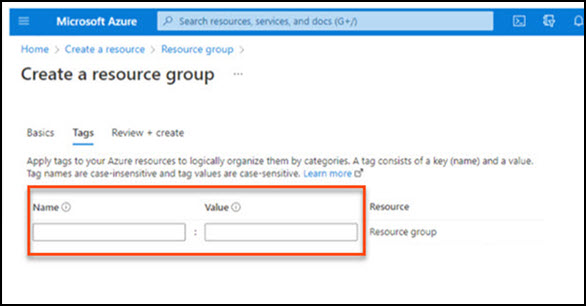
Specify the Name and Value tags of your Azure resource group if needed.
-
Confirm your settings is correct, and then click Create.
-
When the Resource group screen appears, click
 in the upper left corner of the screen and select Create a resource.
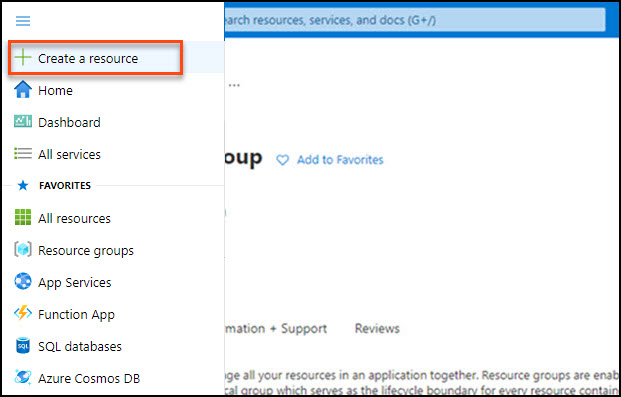
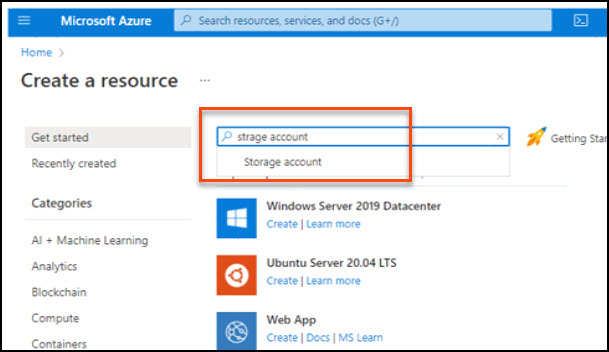
Type "storage account" in the search box, and then select Storage account from the drop-down list.
Click Create.
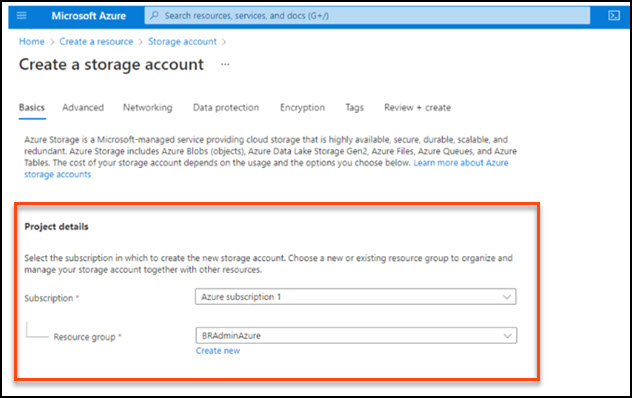
Select the subscription you created earlier, and then select your resource group from the drop-down list in the Project details section.
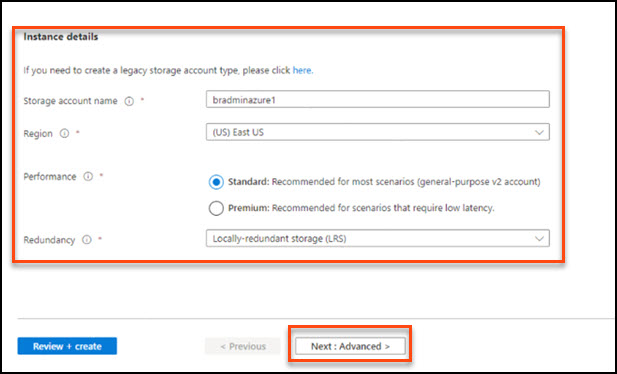
Scroll down the page and specify each setting in the Instance details section, and then click Next: Advanced.
HINT:
To avoid errors, make sure your storage account name is different from your resource group name.
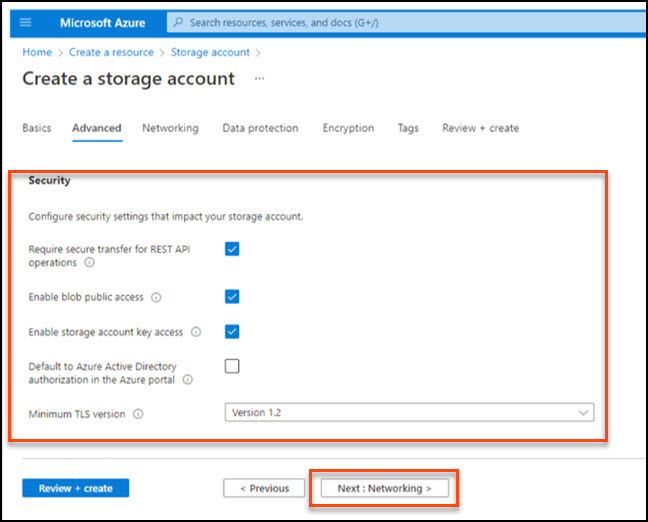
Specify the settings in the Security section, and then click Next : Networking.
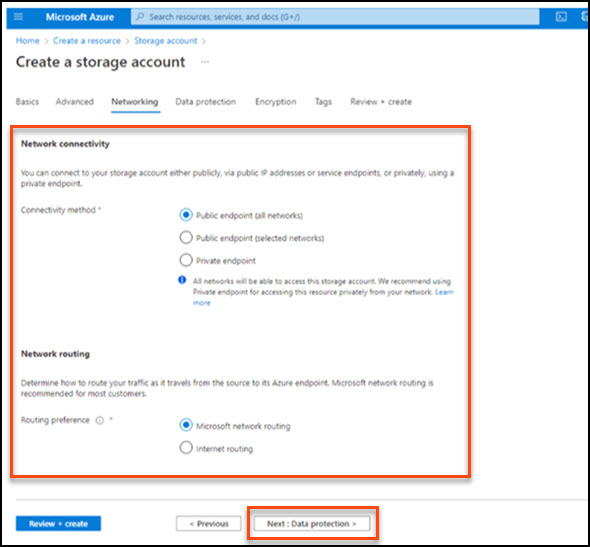
Specify the settings in the Network connectivity and Network routing sections, and then click Next : Data protection.
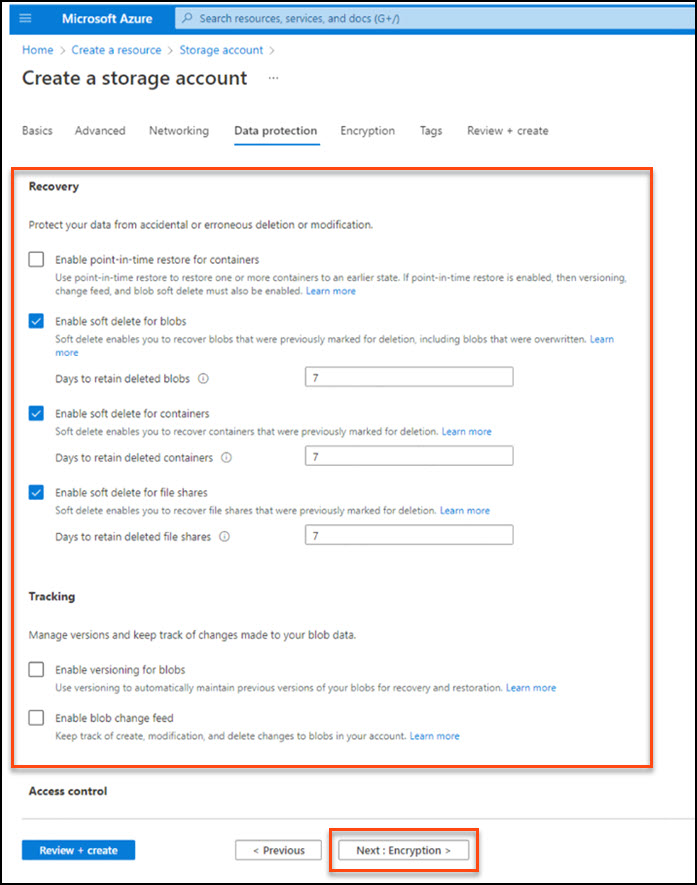
Specify the settings in the Recovery and Tracking sections, and then click Next : Encryption.
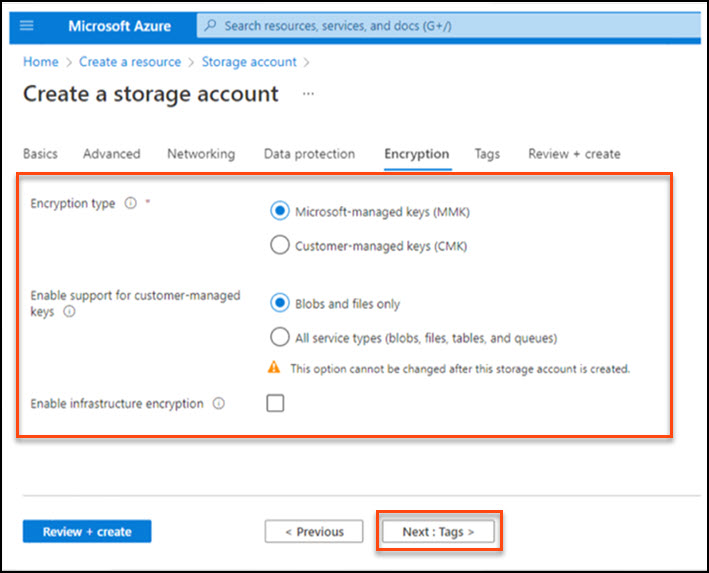
Specify the Encryption settings, and then click Next : Tags.
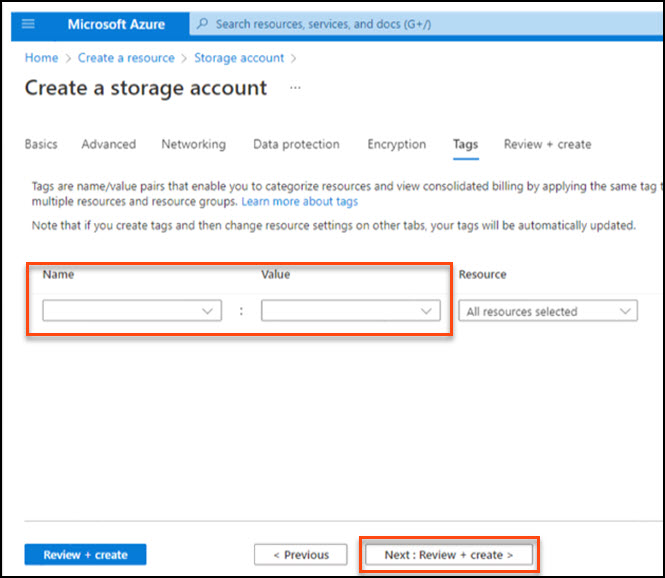
Type the Name and Value tags of your Azure storage account if needed, and then click Next : Review + create.
Confirm your settings, and then click Create.
When the "Your deployment is complete" screen appears, click Go to resource.
 [
[ Back To Top ]
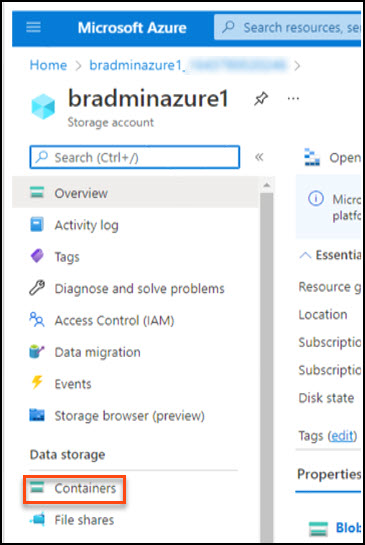
Create a Container (Blob Storage)
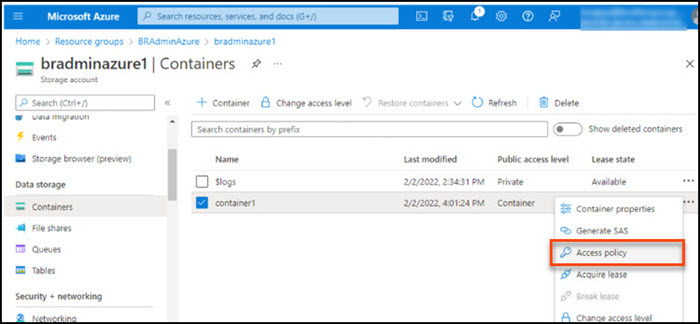
Click Containers in the left navigation bar.
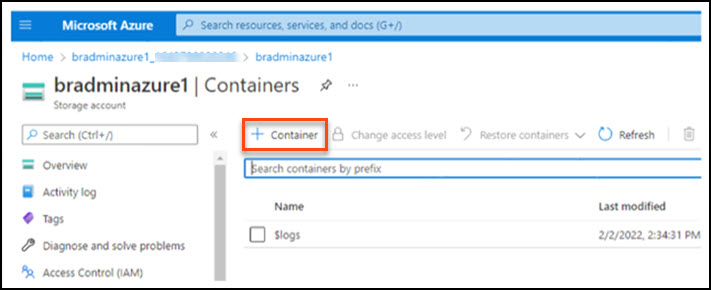
Click the + Container tab.
When the New container window appears in the Name field, type the container's name.
In the Public access level drop-down list, select "Private (no anonymous access)”, and then click Create.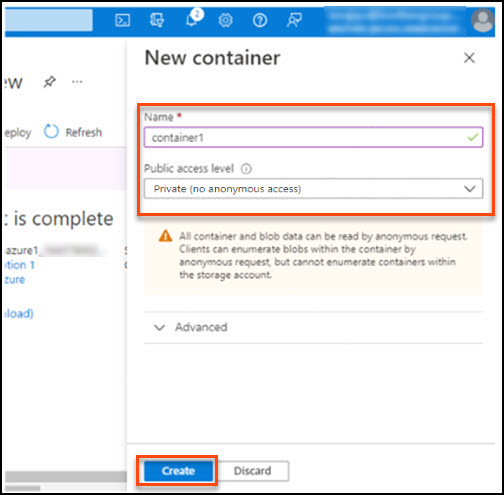
Confirm that the new container is listed, and then click
 next to it to add the access policy.
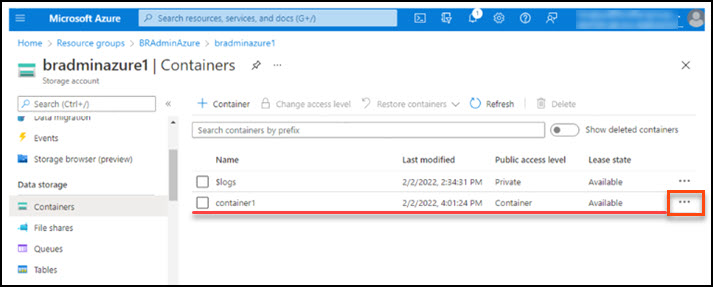 [ Back To Top ]
Add an access policy for Blob Storage
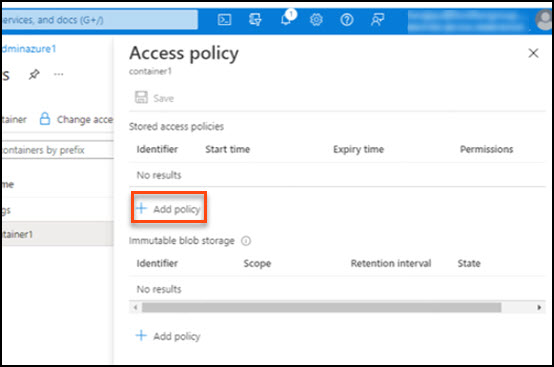
Select Access policy from the drop-down list.
Click + Add policy.
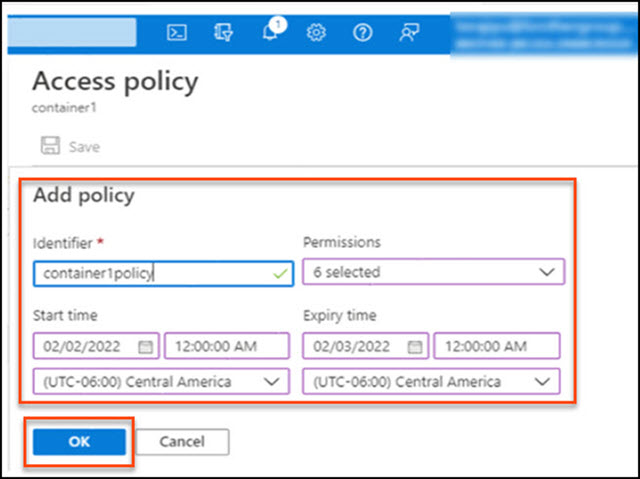
Type an Identifier, select Permissions from the drop-down list, specify Start Time and Expiry time, and then click OK.
NOTE:
Select all checkboxes in the Permissions drop-down list.
If the access policy time expires, reactivate it by extending the Expiry time.
-
Confirm your settings, and then click Save.
 [ Back To Top ]
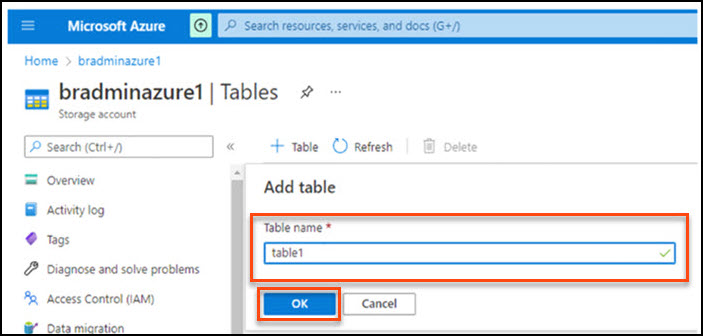
Create the table
Click Tables in the left navigation bar.

Click the +Table tab.
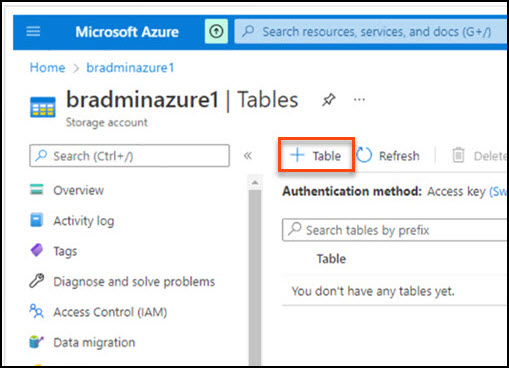
Type the table name, and then click OK.
 [ Back To Top ]
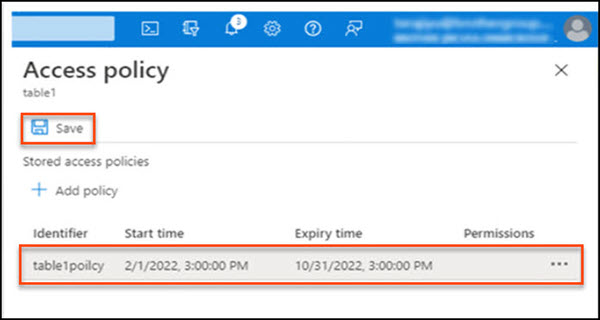
Add an access policy for a table
When the new table appears in the list, click
next to it to add the access policy.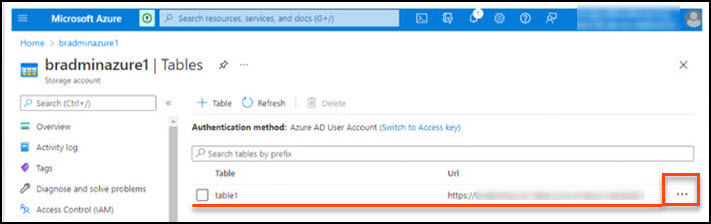
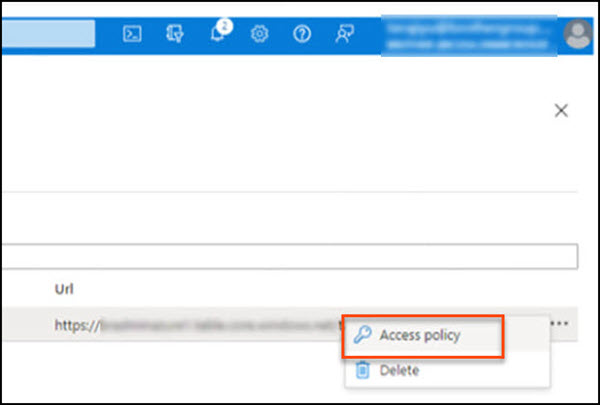
Select Access policy from the drop-down list.
Click +Add policy.

Type an Identifier, select Permissions from the drop-down list, specify Start Time and Expiry time, and then click OK.
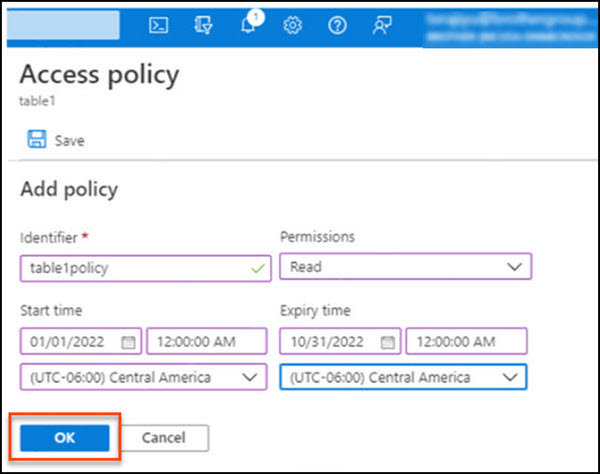
NOTE:
Select all checkboxes in the Permissions drop-down list.
If the access policy time expires, reactivate it by extending the Expiry time.
Confirm your settings, and then click Save.
 [ Back To Top ]
Create an SAS key for Blob Storage and Table
NOTE:
You must use Microsoft Azure Storage Explorer to complete this step. If you do not have a storage account, create one by following the steps in the "Create a storage account" section. Download the Microsoft Azure Storage Explorer tool from the Microsoft Azure website and connect to a storage account.
Complete the proxy setup, and then connect to Microsoft Azure.
-
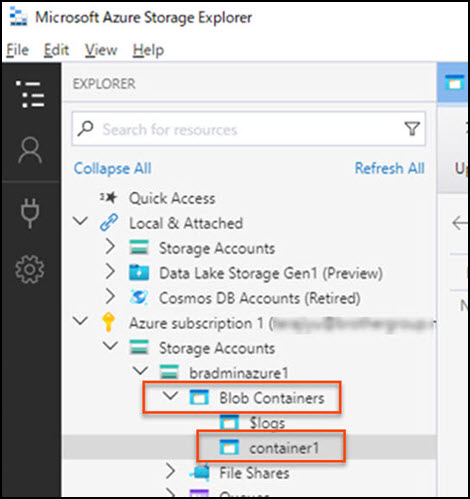
Start Microsoft Azure Storage Explorer. Click Storage Accounts or Tables, and then click the account name or table name you created earlier. For Blob Storage, go to the next step. For Tables, go to Step 38.
Blob Storage Table 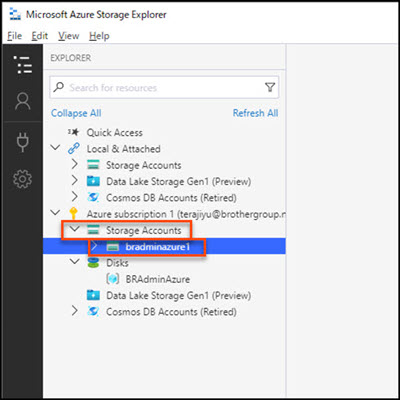
-
Click Blob Containers, and then click the blob container you created earlier.
-
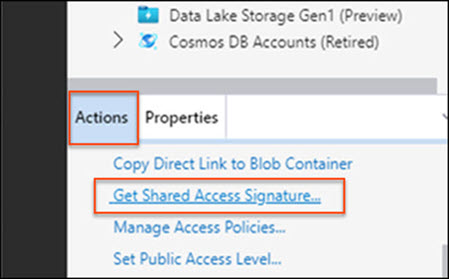
Click the Actions tab, and then click Get Shared Access Signature…
-
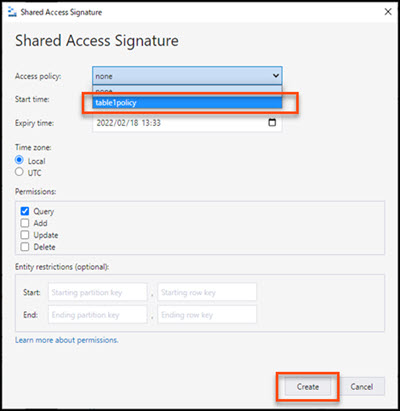
In the Shared Access Signature window, click the Access Policy drop-down arrow and select the access policy you created earlier, and then click Create.
Blob Storage Table 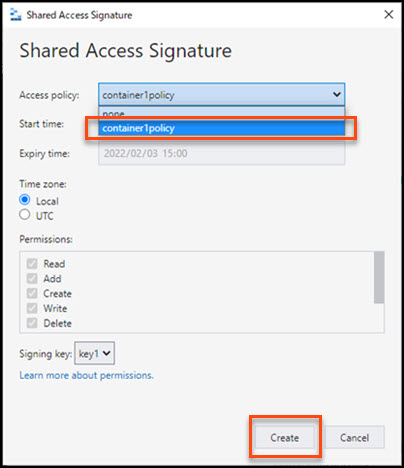
-
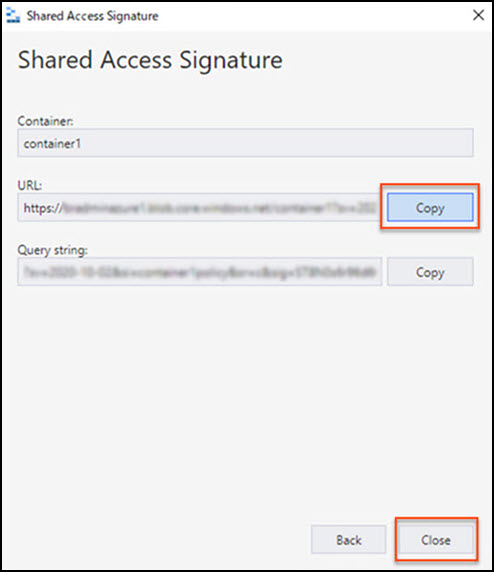
Click Copy to copy the URL shown in the Shared Access Signature window and save it for later use when you configure the BRAdmin Professional 4 and Microsoft Azure connection. Click Close.
HINT:
You can also right-click on the account or table name to view these configuration options.
[ Back To Top ]
NOTE:
Create a Container (Blob Storage) >
Add an access policy for Blob Storage >
Add an access policy for a table >
Create an SAS key for Blob Storage and Table >
Create a resource group
Click the video link below for a step-by-step guide on how to create resources in Azure for BRAdmin to remotely manage Brother devices.
*This video is being streamed from YouTube.
