- Brother support website
- Brother Support for IT Administrators
- I want users to access the device only by entering their Active Directory credentials
I want users to access the device only by entering their Active Directory credentials.
- Use the Active Directory Authentication feature to block unauthorized access to Brother device settings.
- Ensure that print data is securely held at the device until released by an authenticated user.
- Configure Active Directory Authentication using Web Based Management.
To use Active Directory Authentication, your organization must use Microsoft Active Directory.
The screens and available settings may differ depending on the Brother model and operating system.
To check if your device supports the Active Directory Authentication feature, see your model's Online User's Guide.
NOTE:
We recommend using HTTPS when configuring settings using Web Based Management.
When you use HTTPS to access Web Based Management, your browser may display a security dialog box.
-
Start your web browser.
-
Type "https://machine's IP address" in your browser's address bar (where "machine's IP address" is the device's IP address).
For example:
https://192.168.1.2
NOTE:
If you are using a Domain Name System or enable a NetBIOS name, you can type another name, such as "SharedPrinter" instead of the IP address.
- For example:
http://SharedPrinter
If you enable a NetBIOS name, you can also use the node name.
- For example:
https://brn123456abcdef/
The NetBIOS name can be found in the Network Configuration Report.
For Mac, access Web Based Management by clicking the device's icon on the Status Monitor screen. -
In the Login field, type the password, and then click

NOTE:
The default login password to manage machine settings is either:
- the character set marked "Pwd" located on a sticker on the back or base of the device.
or
- initpass
-
Click the Administrator tab.
If you have not yet set your own password, change the default login password.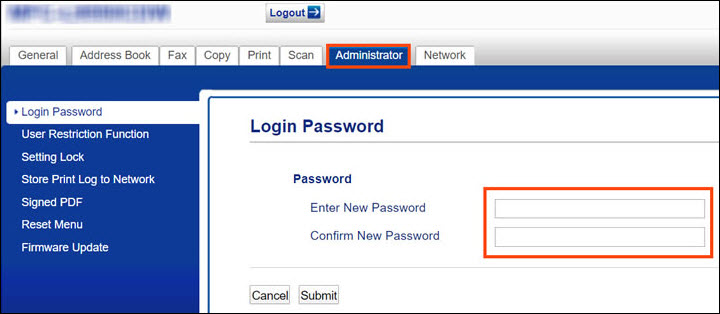
-
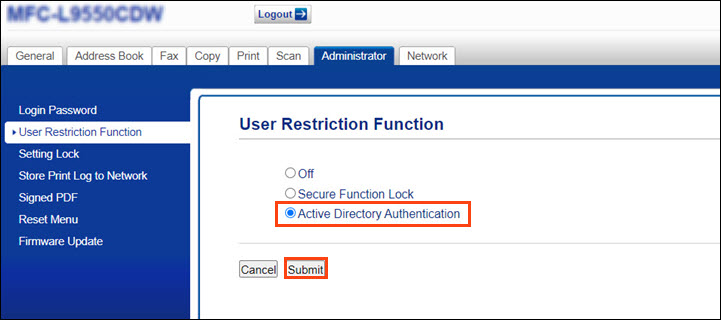
Depending on your model, click User Restriction Function or Restriction Management in the left navigation bar.
-
Select the Active Directory Authentication radio button.
-
Click Submit.
-
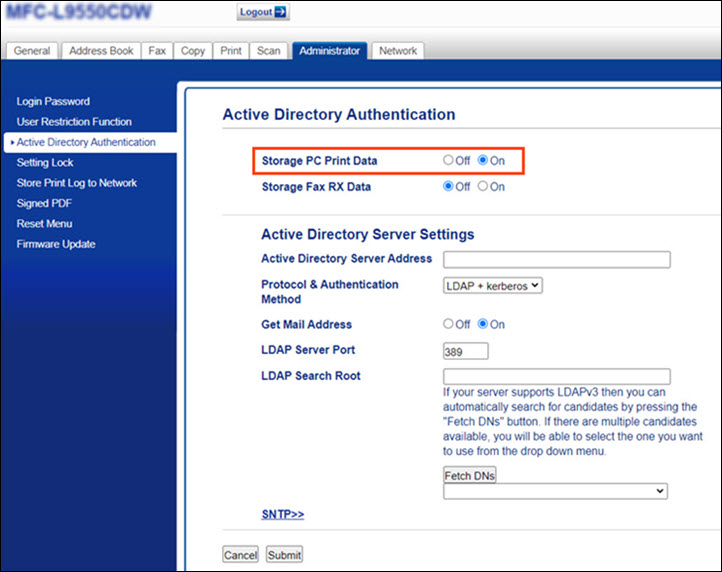
Click Active Directory Authentication in the left navigation bar.
-
Select the On radio button after Storage PC Print Data.
-
Configure the Active Directory server settings for your environment, and then click Submit.
-
When finished, log out of Web Based Management and close your browser.
-
On the device's control panel, enter your Active Directory Domain (if necessary), User ID, and Password.
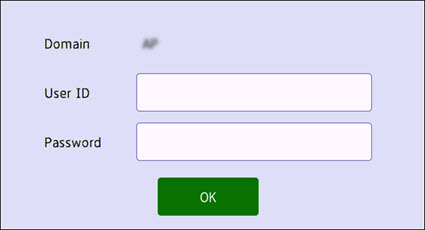
NOTE:
- When Active Directory Authentication is enabled, the device's control panel will be locked and print jobs will be stored in the device until the user authenticates at the device.
- This feature is available only for print data created by a Brother native printer driver.
- Print data will be deleted after the job is printed or if the device is powered off.
-
Press OK.
-
When authentication is successful, the device's control panel unlocks and the stored data prints automatically.