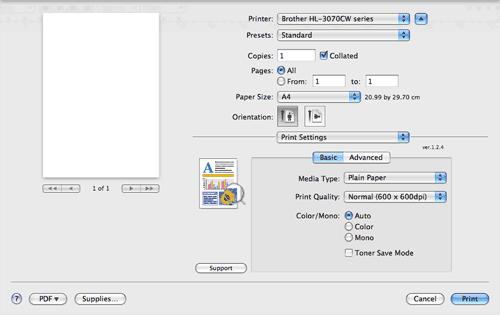
Features in the printer driver (for Macintosh)

This printer supports Mac OS X 10.3.9 or greater.
Note Note
The screens in this section are basically from Mac OS X 10.5.x. The screens on your Macintosh will vary depending on your operating system.

Choosing page setup options

1
From an application such as Apple TextEdit, click File, then Page Setup. Make sure HL-XXXX (where XXXX is your model name) is chosen in the Format for pop-up menu. You can change the settings for Paper Size, Orientation and Scale, then click OK.
Screen
2
From an application such as Apple TextEdit, click File, then Print to start printing.
For Mac OS X 10.3.9 and 10.4.x
Screen
For Mac OS X 10.5.x
For more page setup options, click the disclosure triangle (Bsymbol.dtri) beside the Printer pop-up menu.
Screen
Screen

Choosing printing options

To control special printing features, choose the options in the Print dialog box.
Screen

Cover Page

You can make the following cover page settings:
Screen
Print Cover Page
If you want to add a cover page to your document, use this function.
Cover Page Type
Choose a template for the cover page.
Billing Info
If you want to add the billing information to the cover page, enter text in the Billing Info box.

Layout

Screen
Pages per Sheet
Choose how many pages will appear on each side of the paper.
Layout Direction
When you specify the pages per sheet, you can also specify the direction of the layout.
Border
If you want to add a border, use this function.
Reverse Page Orientation (Mac OS X 10.5.x only)
Check Reverse Page Orientation to reverse the data from up to down.

Secure Print

Screen
Secure Print: Secure documents are documents that are password protected when they are sent to the printer. Only the people who know the password will be able to print them. Since the documents are secured at the printer, you must enter the password using the control panel of the machine to print them.
If you want to create a secure print job, check the Secure Print box. Enter a user name, job name and password, then click Print. (For more information about the secure print function, see Printing Secure data.)
Note Note
Check the Secure Print check box if you want to prevent other people from printing your data.

Print Settings

You can change settings by choosing a setting in the Print Settings list:
Basic tab
Screen
Media Type
You can change the media type to one of the following:
Plain Paper
Thin Paper
Thick Paper
Thicker Paper
Bond Paper
Recycled Paper
Envelopes
Env. Thick
Env. Thin
Label
Print Quality
You can choose the following print quality settings.
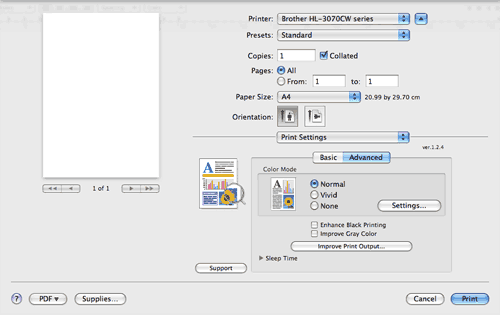
Normal
600 dpi class. Recommended for ordinary printing. Good print quality with good print speeds.
Fine
2400 dpi class. The finest print mode. Use this mode to print precise images such as photographs. Since the print data is much larger than in normal mode, processing time, data transfer time and printing time will be longer.
Note Note
The print speed will change depending on what print quality setting you choose. Higher print quality takes longer to print, while lower print quality takes less time to print.
(HL-3040CN only) If you choose Fine, the LCD may show Out of Memory because the printer’s memory is full. If you still get the same error message after you try printing several times, add more memory. (See Installing extra memory.)
Color/Mono
You can choose the following color mode:
Color
Selecting Color mode prints your documents in color.
Mono
Selecting Mono mode prints your documents in greyscale.
Auto
The printer checks the content of your documents for color. If color is detected, it prints in color. If no color content is detected, it prints in monochrome. The total printing speed may become slower.
Note Note
If the Cyan, Magenta or Yellow toner reaches the end of its life, choosing Mono will allow you to keep printing as long as the Black toner does not reach the end of its life.
Toner Save Mode
You can conserve toner use with this feature. When you set Toner Save Mode to On, print appears lighter. The default setting is Off.
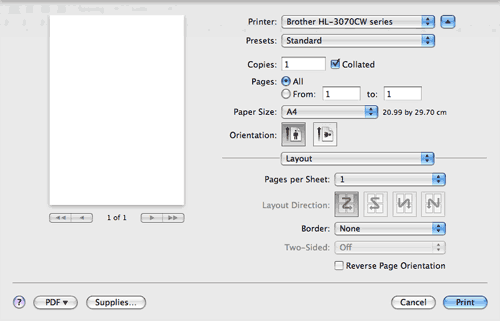
Note Note
We do not recommend Toner Save for printing Photo or Grey Scale images.
Reverse Printing (Mac OS X 10.3.9 and 10.4.x only)
Check Reverse Print to rotate the data by 180 degrees.
Advanced tab
Screen
Color Mode
You can change the color mode as follows:
Normal
This is the Default color mode.
Vivid
The color of all elements are adjusted to become a more vivid color.
None
Enhance Black Printing
If a black graphic cannot be printed correctly, choose this setting.
Improve Grey Color
You can improve the image quality of shaded areas by ticking the Improve Grey Color check box.
Improve Print Output
This feature allows you to improve a print quality problem.
Reduce Paper Curl
If you choose this setting, the paper curl may be reduced.
If you are printing only a few pages, you do not need to choose this setting. We recommend that you change the printer driver setting in Media Type to a thin setting.
Note Note
This operation make the temperature of the printer’s fusing process lower.
Improve Toner Fixing
If you choose this setting, the toner fixing on paper may be improved. If this selection does not provide enough improvement, select Thicker paper in Media type settings.
Note Note
This operation make the temperature of the printer’s fusing process upper.
Sleep Time
When the printer does not receive data for a certain period of time, it enters sleep mode. In sleep mode, the printer acts as though it were turned off. When you choose Printer Default the timeout setting has been set to a specific time set at the factory, this can be altered in the driver or at the printer. If you want to change the sleep time, choose Manual and then enter the time in the text box on the driver.
While the printer is in sleep mode, the LCD shows Sleep, but the printer can still receive data. Receiving a print file or document or pressing Go will automatically wake up the printer to start printing

Manual Duplex Printing

Select Paper Handling.
For Mac OS X 10.3.9 and 10.4.x
Choose Odd numbered pages. Turn the paper over and reload it in the tray, and then choose Even numbered pages and print.
Screen
For Mac OS X 10.5.x
Choose Odd only and print. Turn the paper over and reload it in the tray, and then choose Even only and print.
Screen

Status Monitor (For Mac OS X 10.3.9 or greater users)

This reports the printer status (any errors that may happen with the printer) when printing. If you would like to turn the status monitor on, follow these steps:
For Mac OS X 10.3.9 and 10.4.x
1
Run the Printer Setup Utility (from the Go menu, choose Applications, Utilities), then choose the printer.
2
Click the Utility, then the status monitor will start up.
For Mac OS X 10.5.x
1
Run the System Preferences, select Print & Fax, then choose the printer.
2
Click the Open Print Queue..., then click the Utility. The status monitor will start up.