| | |
| 1 | Open the back cover (back output tray).  | ||||||||
| 2 | Open the manual feed slot cover.  | ||||||||
| 3 | <For printing envelopes only> Pull down the two grey levers, one on the left-hand side and one on the right-hand side, toward you as shown in the illustration below. 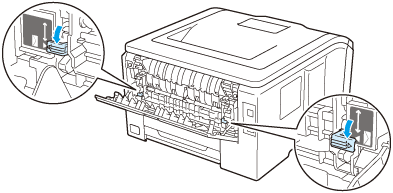 | ||||||||
| 4 | Using both hands, slide the manual feed slot paper guides to the width of the paper that you are going to use. 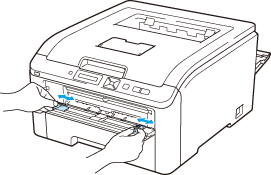 | ||||||||
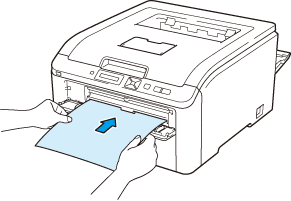
| 5 | Using both hands, put one piece of paper or one envelope in the manual feed slot until the front edge of it touches the paper feed roller. When you feel the machine automatically pull it in, let go. | ||||||||
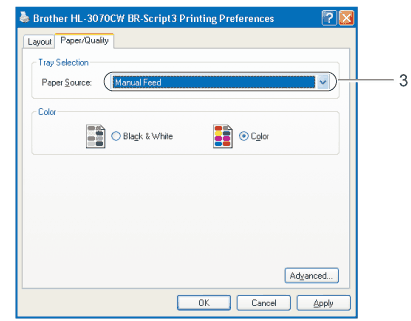
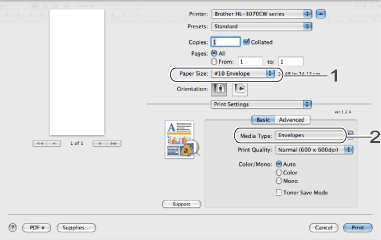
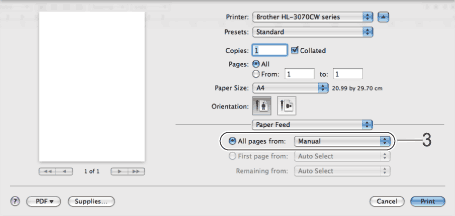
| 6 | Choose the following from the printer driver: Paper Size......(1) Media Type......(2) Paper Source......(3) and any other settings you may want to make. (See Driver and Software.). 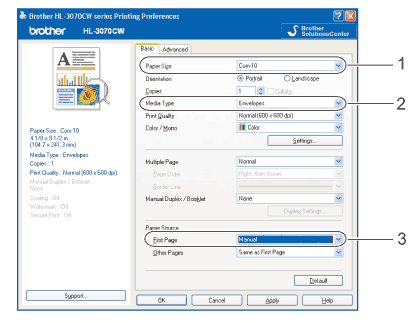
| ||||||||
| 7 | Send the print data to the printer. | ||||||||
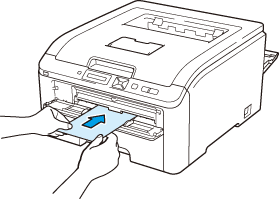
| 8 | After the LCD show Manual Feed, put in the next sheet of paper or envelope as shown in step 5. Repeat for each page that you want to print. | ||||||||
| 9 | <For printing envelopes only> When you have finished printing, reset the two grey levers which are pulled down at step 3 back to the original position. |
| • | |
| • | If the envelopes are creased after they are printed, see Improving the print quality. |
| • | (For Windows® users) If DL size double flap envelopes are creased after printing, choose DL Long Edge in Paper Size, from the Basic tab. Put a new DL size double-flap envelope in the manual feed slot with the longest edge of the envelope in first, then print again. 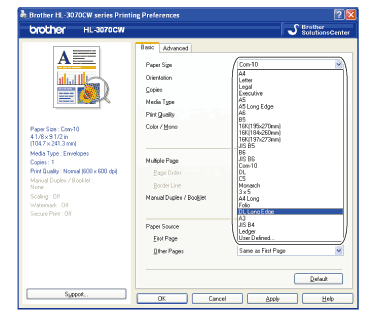 |
| • | Envelope joints that are sealed by the manufacturer should be secure. |
| • | All sides of the envelope should be properly folded without wrinkles or creases. |
| | |