| | |
| 1 | Turn on your computer. (You must be logged on with Administrator rights.) Close any applications running before configuration. |
| 2 | Put the supplied CD-ROM into your CD-ROM drive. The opening screen will appear automatically. Choose your printer model and the language. |
| 3 | Click Install Printer Driver on the menu screen. 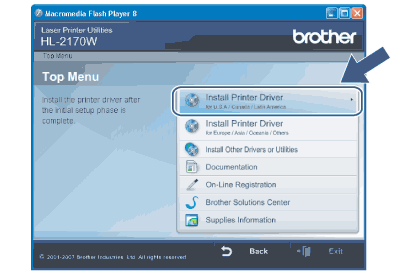 |
| 4 | Click Wireless Network users. 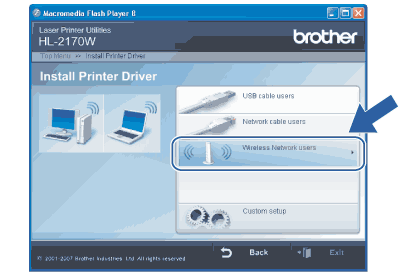 |
| 5 | Choose Wireless Setup and Driver Install (Recommended) or Wireless Setup Only, and then click Next. 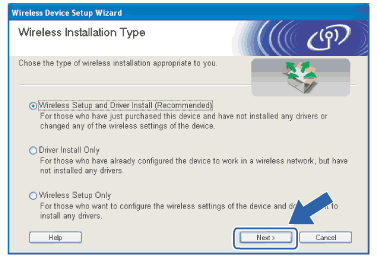 |
| 6 | Choose Step by Step install (Recommended) and then click Next. 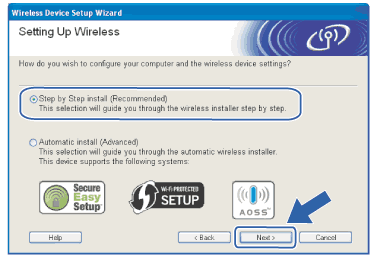 |
| 7 | Choose With cable (Recommended) and then click Next. 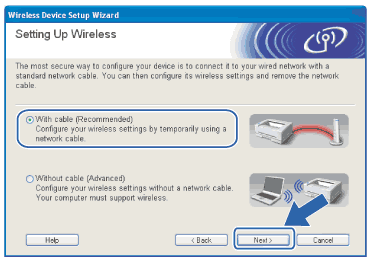 |
| 8 | Connect the Brother wireless device to your access point using a network cable and click Next. 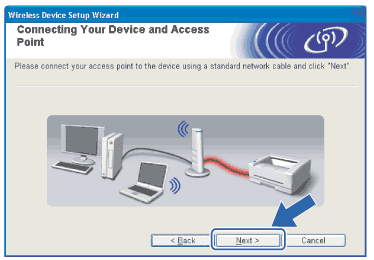 |
| 9 | Choose the printer you wish to configure, and click Next. If the list is blank, check if the access point and the printer are powered on, and then click Refresh. 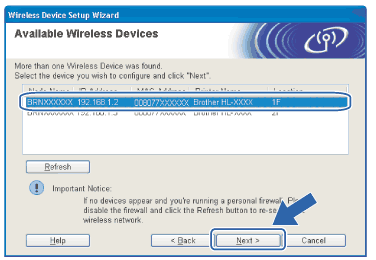 |
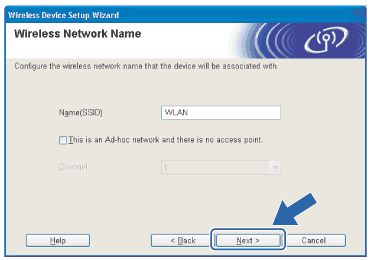
| 10 | The wizard will search for wireless networks available from your printer. Choose the access point you wish to associate the printer with, and then click Next. 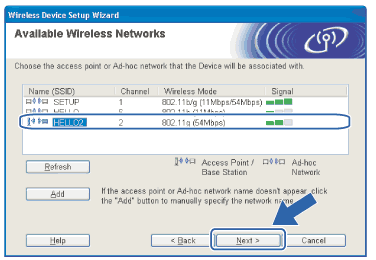 |
| 11 | If your network is not configured for Authentication and Encryption, the following screen will appear. To continue configuration, click OK and go to 13. 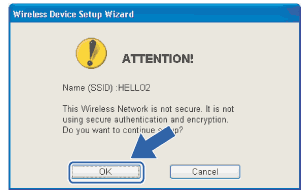 |
| 12 | If your network is configured for Authentication and Encryption, the following screen will appear. When configuring your Brother wireless printer, you must ensure that it is configured to match the Authentication and Encryption settings of your existing wireless network. Choose the Authentication Method and Encryption Mode from the pull-downs in each setting box. Then enter the Network key and Confirm Network Key, and then click Next. 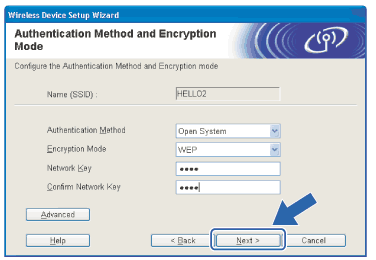 |
| 13 | Click Next. The settings will be sent to your printer. The settings will remain unchanged if you click Cancel. 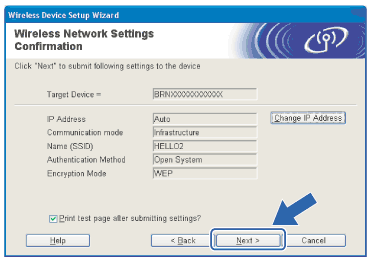 |
| 14 | Disconnect the network cable between your access point (hub or router) and the printer, and click Next. 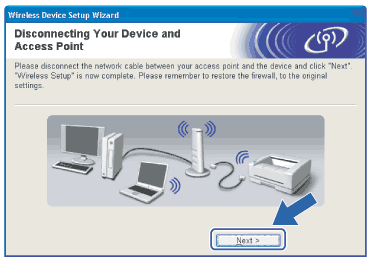 |
|
| | |