Home > Troubleshooting > Printer Jam or Paper Jam > Roll Paper is Jammed Inside and at the Back of the Machine (Roll Paper Jam 03)


Roll Paper is Jammed Inside and at the Back of the Machine (Roll Paper Jam 03)
If the LCD displays the following Roll paper jam messages, follow these steps:
- [Roll Paper Jam 03]
- Unplug the machine from the electrical socket.
- If the paper is loaded in the MP tray, remove the paper.
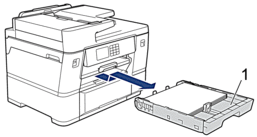
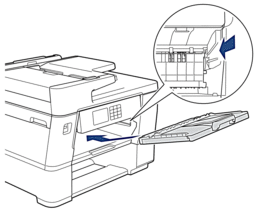
- Pull Tray #1 (1) completely out of the machine as shown by the arrow.
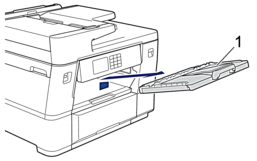
- Lift the paper support (1), and then pull it at an angle completely out of the machine as shown by the arrow.
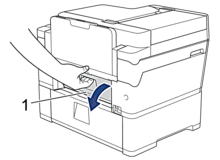
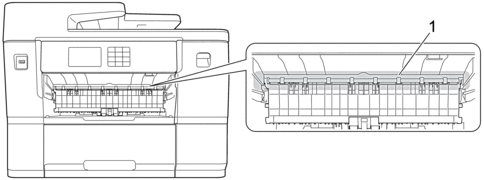
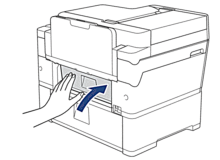
- Slowly open Jam Clear Cover A (1) at the back of the machine.
 This cover may feel heavier than usual, because the Roll paper runs through the inside of the cover.
 - Leave Jam Clear Cover A open, and then go to the front of the machine.
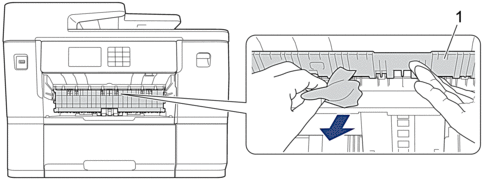
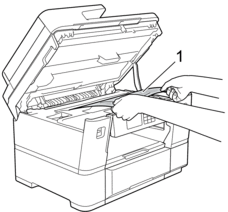
- Lift the internal flap (1), and slowly remove the jammed paper.
- Make sure you look carefully inside (1) for any scraps of paper.
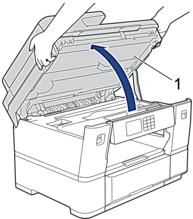
- Using both hands, use the finger holds on each side of the machine to lift the scanner cover (1) into the open position.
- Slowly pull the jammed paper (1) out of the machine.
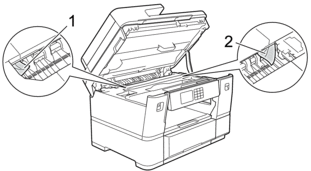
- Move the print head, and then remove any paper remaining in this area. Make sure pieces of paper are not left in the corners of the machine (1) and (2).
- IMPORTANT
-
- If the print head is in the right corner as shown in the illustration, you cannot move the print head. Close the scanner cover, and then reconnect the power cord. Open the scanner cover again, and then hold down
 until the print head moves to the centre. Then unplug the machine from the power source and remove the paper.
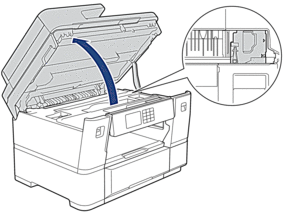
- If the paper is jammed under the print head, unplug the machine from the power source, and then move the print head and remove the paper.
- If ink gets on your skin or clothing, immediately wash it off with soap or detergent.
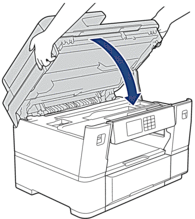
- Gently close the scanner cover using the finger holds on each side.
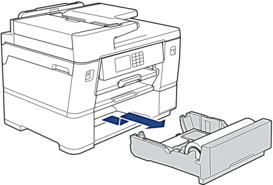
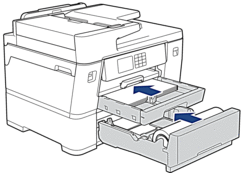
- Pull Tray #2 completely out of the machine as shown by the arrow.
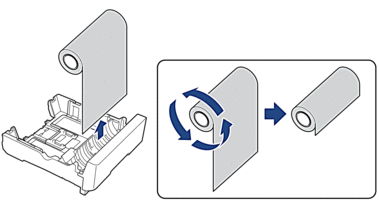
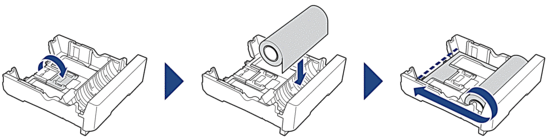
- Remove the Roll paper from Tray #2 and roll up the paper as shown in the illustration.
 If the feeding edge is folded, bent, or cut at an angle, cut it straight across.
- Reload the Roll paper in Tray #2. See Related Information:Load Roll Paper in Paper Tray #2.
- Close Jam Clear Cover A at the back of the machine. Make sure the cover is closed completely.
- Put the paper support firmly back in the machine. Make sure you fit the paper support into the channels.
- Slowly push the paper trays completely into the machine.
- Reconnect the power cord.
Did you find the information you needed?