Home > Paper Handling > Load Paper > Load Paper in Paper Tray #2 > Load Roll Paper in Paper Tray #2
Load Roll Paper in Paper Tray #2
- Use Tray #2 to print on Roll paper (Width: 297 mm / Outer diameter: 90 mm or less).
- Use Roll paper only when printing from your computer or when printing using AirPrint. Do not use Roll paper when copying or faxing.
- (Windows) You must install the Brother software if you want to print on Roll paper. To install the driver and software, go to your model’s Downloads page at support.brother.com.
- If the [Check Paper] setting is set to [On] and you pull the paper tray out of the machine, a message appears on the LCD, allowing you to change the paper size and paper type.
- When you load a different paper size in the tray, you must change the Paper Size setting in the machine or the paper size setting on your computer.
Doing this enables the machine to automatically feed paper from the appropriate tray if Auto Tray Select has been set in the printer driver (Windows) or on the machine.
- If the ink cartridges have reached the end of their lives when you are printing on Roll paper, you can replace them with new ink cartridges of the same colour and continue printing.
The colour tone may be different after the ink cartridge replacement.
You can watch a video for guidance on how to print using Roll paper at support.brother.com/g/d/crfu/.
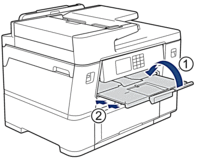
- If the paper support flap (1) is open, close it, and then close the paper support (2).
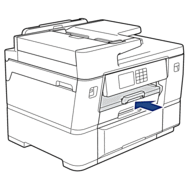
- Pull Tray #2 completely out of the machine as shown by the arrow.
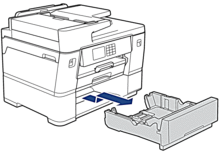

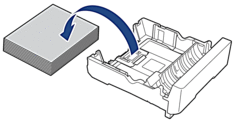
Remove any A4 or Letter size paper from Tray #2 when loading Roll paper. DO NOT load A4 or Letter size paper and Roll paper at the same time.
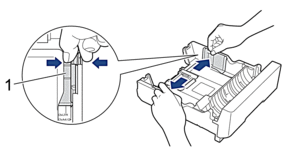
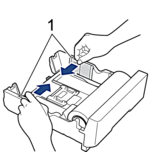
- Gently press and slide the paper width guides (1) to extend them to the maximum width.
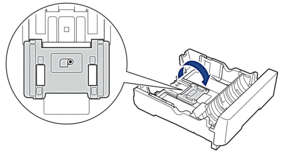
- Set the switch flap to Roll paper mode, as shown.
- Gently load the Roll paper with the feeding edge down and facing you, as shown.
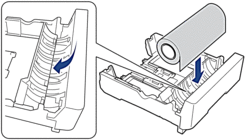
- Place your fingers on both sides of the Roll paper and rotate the roll in the direction of the arrow, as shown. Continue to rotate the roll until the paper feeds through the paper slot in the base of the tray and touches the far edge (1) of the tray.

- Gently adjust the paper width guides (1) to fit the paper. Make sure the paper guides touch the edges of the paper.
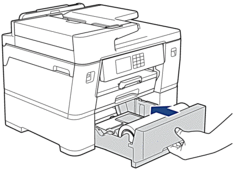
- Slowly push Tray #2 completely into the machine.
- IMPORTANT
-
DO NOT push the paper tray into the machine forcefully or quickly. Doing this may cause paper jams or paper feed problems.
- Make sure that the paper support is closed.
- IMPORTANT
- To avoid damaging the printed page, DO NOT extend the paper support when printing on Roll paper.
 When using Roll paper in Tray #2, the machine holds the printed page after printing and cutting so it does not fall. When printing is complete, remove the printed page and press [OK].
 - Change the paper size setting to [297 mm Roll] in the machine’s menu.
- IMPORTANT
- If you pull Tray #2 out of the machine after loading the Roll paper, the Roll paper may become loose or the feeding edge may shift away from the far edge of the tray. To avoid damaging the Roll paper and causing paper feed problems, reload the Roll paper.
Did you find the information you needed?


