A new belt unit can print approximately 50,000 A4 or Letter size single-sided pages.
Belt End Soon message
Belt End Soon
If the LCD shows Belt End Soon, it means the belt unit is near the end of its life. Buy a new belt unit and have it ready before you get a Replace Belt message.
When the following message appears on the LCD, you need to replace the belt unit:
Replace Belt
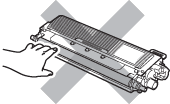
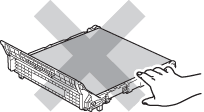
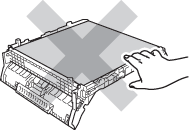
IMPORTANT
•
DO NOT touch the surface of the belt unit. If you touch it, it could degrade print quality.
•
Damage caused by incorrect handling of the belt unit may void your warranty.
1
Turn off the machine. Unplug the power cord from the electrical socket.
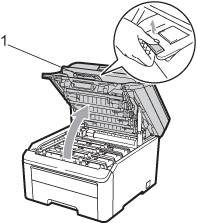
2
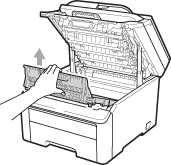
Fully open the top cover by lifting up on the handle (1).
IMPORTANT
When the scanner is open, you cannot open the top cover.
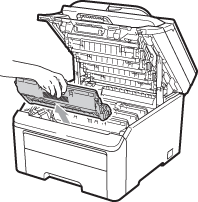
3
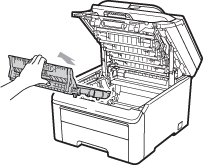
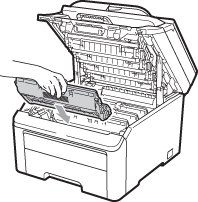
Take out all the drum unit and toner cartridge assemblies.
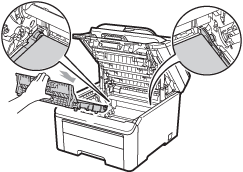
IMPORTANT
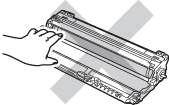
•
We recommend that you place the drum unit and toner cartridge assembly on a clean, flat surface with a sheet of disposable paper or cloth underneath it in case you accidentally spill or scatter toner.
•
To prevent damage to the machine from static electricity, DO NOT touch the electrodes shown in the illustration.
•
Handle the toner cartridge carefully. If toner scatters on your hands or clothes, wipe or wash it off with cold water at once.
•
To avoid print quality problems, DO NOT touch the shaded parts shown in the illustrations.
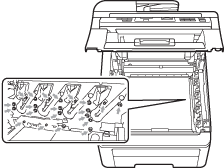
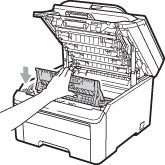
4
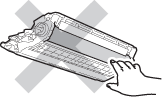
Hold the green handle of the belt unit and lift the belt unit up, then pull it out.
IMPORTANT
To avoid print quality problems, DO NOT touch the shaded parts shown in the illustration.
5
Unpack the new belt unit and put the new belt unit in the machine.
6
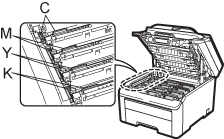
Slide each drum unit and toner cartridge assembly into the machine. Make sure that you match the toner cartridge colour to the same colour label on the machine. Repeat this for all the drum unit and toner cartridge assemblies.
C-Cyan M-Magenta Y-Yellow K-Black
7
Close the top cover of the machine.
When you replace a belt unit with a new one, you need to reset the belt unit counter by completing the following steps:
1
Plug the machine’s power cord back into the electrical socket first, and reconnect all cables. Turn on the machine.