Home > Scan > Scan Using the Scan Functions on Your Brother Machine > Save Scanned Documents to a USB Flash Drive


Save Scanned Documents to a USB Flash Drive
To avoid damaging the drive or the data stored on the USB flash drive, DO NOT remove it while the machine is scanning to it.
ADS-4300N
- Do one of the following:
- Windows
Launch
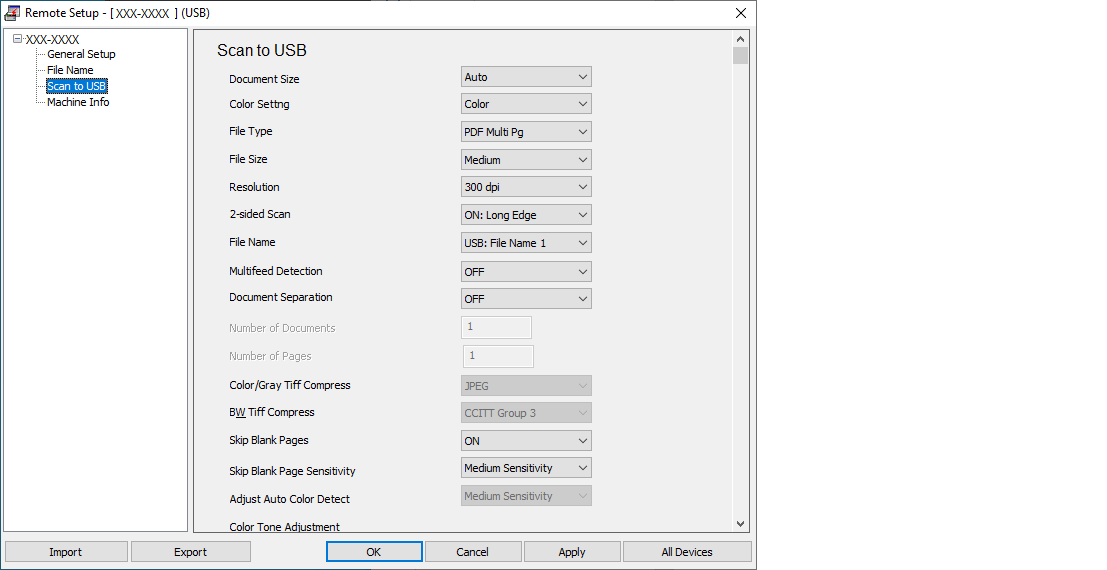
 (Brother Utilities), and then click the drop-down list and select your model name (if not already selected). Click Tools in the left navigation bar, and then click Remote Setup.
 - Mac
In the Finder menu bar, click , select your model name, and then double-click the Brother Remote Setup icon.
If the Discover Devices dialog box appears, select your model name and then click Connect.
 If your machine is connected via a network, we recommend using Web Based Management to configure your scan settings.
 - Select Scan to USB in the navigation pane, and then configure scan settings as needed.
Windows
Mac
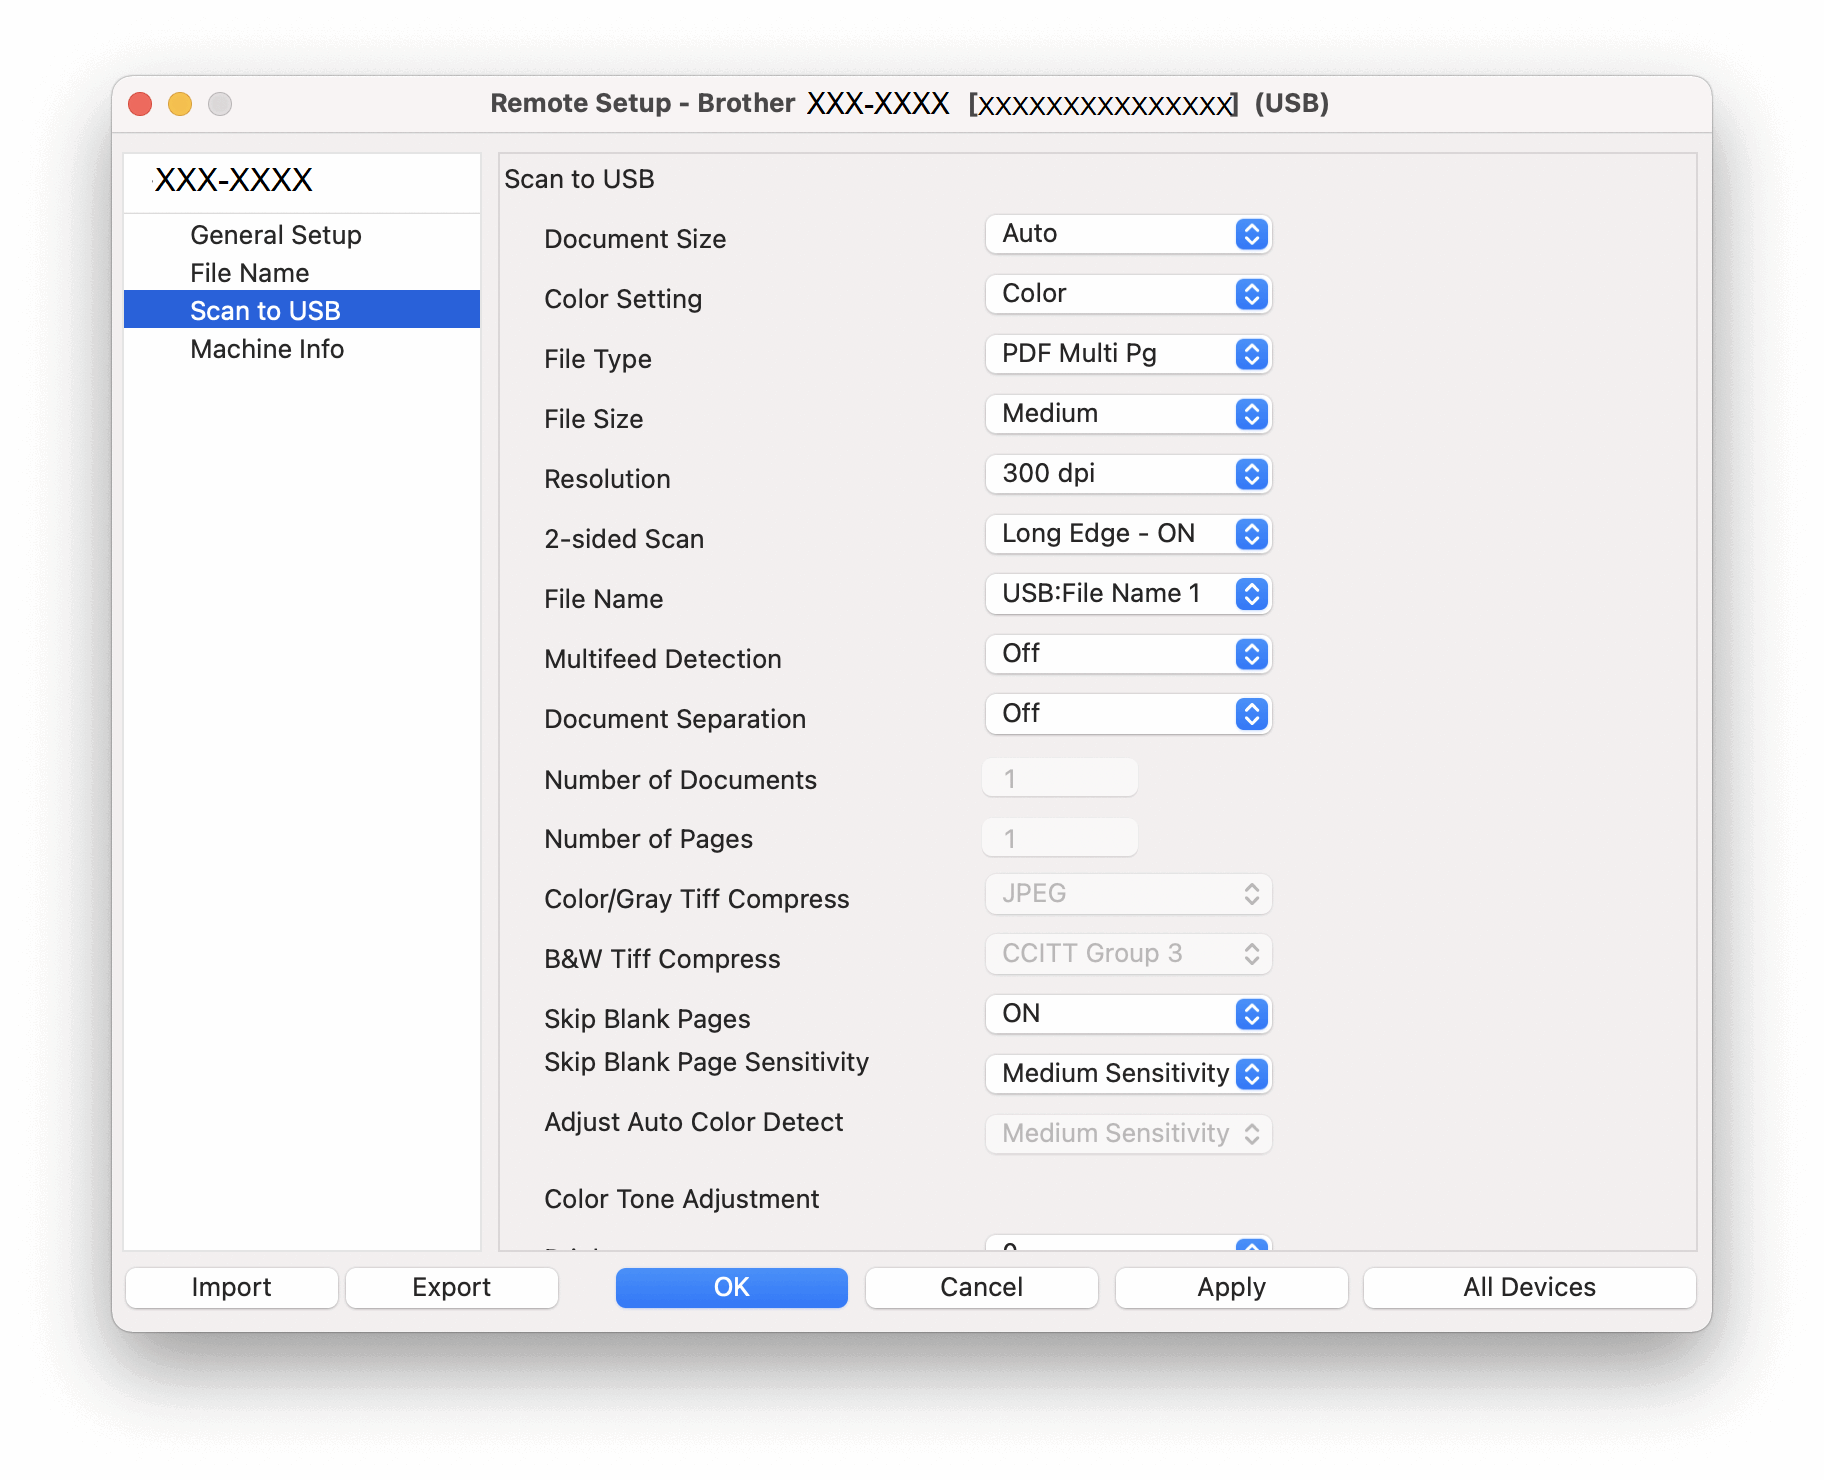
- Click OK to close the Remote Setup window.
- Insert a USB flash drive into the machine.
- Load your document.
- Press
 (Scan to USB) on the control panel. The machine starts scanning, and then the scanned data is saved on the USB flash drive.
ADS-4700W/ADS-4900W
- Load your document.
- Insert a USB flash drive into the machine.
The Scan to USB screen appears automatically. If the Scan to USB screen does not appear, press the [Basic 2] tab in the Home screen, and then press [to USB].
- To change the scan settings, press [Options]. Configure the following settings:
Option Description 2-sided Scan When using 2-sided scanning, select 2-sided Scan: Long Edge so the layout of the data file’s pages matches your original.
Color Setting Select the color format for your document.
Resolution Select the scan resolution for your document.
File Type Select the file format for your document.
Document Size Select your document size.
File Name Rename the file.
File Name Style Select the order in which the date, counter number, and other items appear in the file names.
File Size Select the file size for your document.
Skip Blank Page When On is selected, blank pages are skipped.
Multifeed Detection Detect a multifeed error.
Document Separation Split a scanned image.
When multiple documents have been scanned, you can split up and save documents separately by using this function. You can also set the number of pages to split a document by.
Color/Gray TIFF Compression Select the compression TIFF file type for a color/gray document.
B&W TIFF Compression Select the compression TIFF file type for a black and white document.
Advanced Settings Continuous Scan Scan more pages than the maximum capacity of the ADF and save them as one data file.
After scanning the first batch of documents, press Continue to scan additional pages. When finished scanning, press Complete.
Color Tone Adjustment Adjust the brightness and contrast.
Adjust Auto Color Detect When Color Setting is set to Auto, you can adjust the detection level of color.
Skip Blank Page Sensitivity Select the sensitivity level for detecting blank pages in the scanned data. The higher the sensitivity, the easier it is for the machine to detect blank pages.
Margin Settings Adjust your document's margins.
Set New Default Save your settings as the default settings.
Factory Reset Restore all settings back to the factory settings.
- To save the settings as a shortcut, press [Save as Shortcut].
- To select [Long Paper (Narrow)] or [Long Paper (Normal)] for [Document Size], use the following settings:
- [2-sided Scan]: [Off]
- [Color Setting]: Other than [Auto] ([Color], [Gray] or [Black and White])
- [Resolution]: Lower than 300 dpi
- [Skip Blank Page]: [Off]
- If signed PDF was selected from the [File Type] setting, you must configure the certificate settings using Web Based Management.
- Press [Start].The machine starts scanning, and then the scanned data is saved on the USB flash drive.