Home > Set Up Your Printer > Load Media Roll > Load a Roll in a Printer with a Peeler Unit


Load a Roll in a Printer with a Peeler Unit
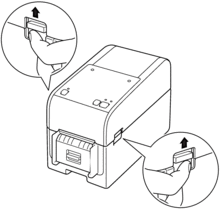
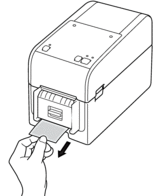
- Press and hold
 to turn the printer off.
 - Pull up the release levers on both sides of the printer to unlock the Roll Compartment Cover.
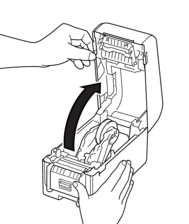
- Hold the front of the printer, and firmly lift the Roll Compartment Cover to open it.
- CAUTION
- Do not touch the Tear Bar with your hands. Doing so may result in injury.
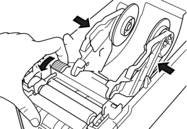
- Slide both Roll Guides outwards.
- Insert the roll so that the label's printing surface is facing up, as shown in the illustration.

- Rotate the Adjuster Dial to lock the Roll Guides in the appropriate position.
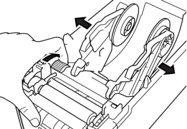
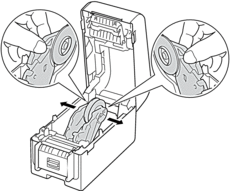
- Peel off the first label from front to back.
 A distance of 100 mm or more is recommended from the tip of the backing paper to the tip of the label.
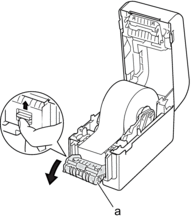
 - Feed the end of the backing paper under the Media Guide Tips (1).
- NOTE
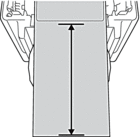
- When using media with a width of 22.9 mm or less, make sure the media exiting from the Label Exit Slot is not tilted to avoid labels being fed diagonally.
Top View

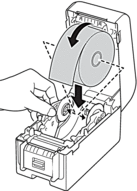
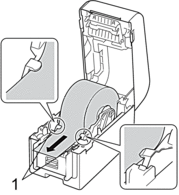
- Open the Peeler Door.
- Peeler Door
- Pass the edge of the backing paper through the Peeler Door slot.
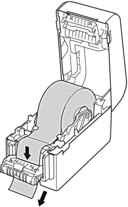
- Close the Peeler Door.

- Close the Roll Compartment Cover until it locks into place.
- CAUTION
- Be careful when closing the Roll Compartment Cover. There is a risk of injury if your finger gets pinched between the upper and lower parts of the cover.
- Gently pull the backing paper coming out of the Release Paper Outlet until it stops. This minimizes slack in the roll.
- Set the printer driver peeler option on your computer.
- Select the Use Peeler Function checkbox on the printer driver.
- Click OK.
- IMPORTANT
-
- Do not leave any printed labels in the printer. Doing so will cause label jams.
- When the printer is not in use, remove any rolls from it and close the Roll Compartment Cover.
Did you find the information you needed?