Home > Set Up Your Printer > Load Media Roll > Load a Roll in a Printer with a Cutter Unit
Load a Roll in a Printer with a Cutter Unit
For labels longer than 100 mm, install the Label Support.
- Press and hold
 to turn the printer off.
 - Pull up the release levers on both sides of the printer to unlock the Roll Compartment Cover.
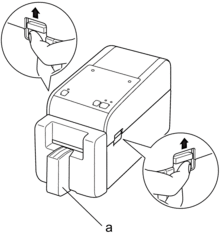
Label Support
- Hold the front of the printer, and firmly lift the Roll Compartment Cover to open it.
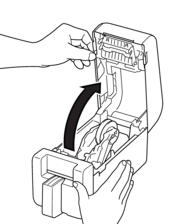
- CAUTION
- Do not touch the Tear Bar with your hands. Doing so may result in injury.
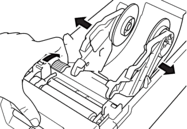
- Slide both Roll Guides outwards.
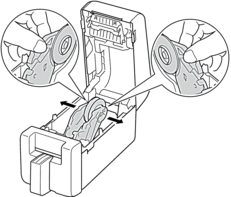
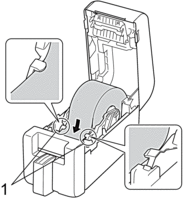
- Insert the roll so that the label's printing surface is facing up, as shown in the illustration.
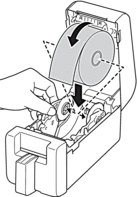

- Rotate the Adjuster Dial to lock the Roll Guides in the appropriate position.
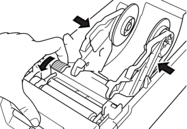
- When printing on continuous labels, wrinkles may occur, depending on the Roll being used and on the printing environment. If this happens, rotate the Adjuster Dial toward the rear of the printer to increase the space between the Roll Guides.
- Feed the end of the backing paper under the Media Guide Tips (1).
- NOTE
- When using media with a width of 22.9 mm or less, make sure the media exiting from the Label Exit Slot is not tilted to avoid labels being fed diagonally.
Top View

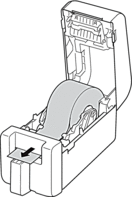
- Feed the end of the roll through the Cutter Slot.
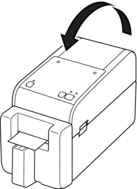
- Close the Roll Compartment Cover until it locks into place.
- CAUTION
- Be careful when closing the Roll Compartment Cover. There is a risk of injury if your finger gets pinched between the upper and lower parts of the cover.
- IMPORTANT
-
- Do not leave any printed labels in the printer. Doing so will cause label jams.
- When the printer is not in use, remove any rolls from it and close the Roll Compartment Cover.
Did you find the information you needed?


