Home > Printer Settings > Print and Confirm Dump Data
Print and Confirm Dump Data
Set your printer to Dump Mode, and then restart it. Dump Mode allows you to print and review the data received from the printer.
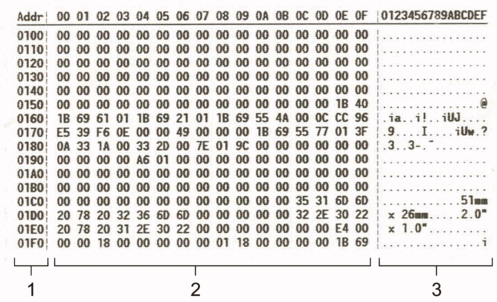
Example:

The layout is landscape orientation and shown in order of Address, Hexadecimal, and ASCII.
- Address
- Hexadecimal
- ASCII
TD-2310D/TD-2320D/TD-2320DF
- Load a 58 mm Media Roll into the printer.
- Press and hold
 to turn off the printer.
 - Press and hold
 ,
,  , and
, and  for five seconds.
 - Press
 two times, and then press OK.
 - Press
 . The printer starts printing after rebooting.
 To resume normal printing, turn the printer off and then on again.
TD-2350D/TD-2350DF/TD-2320DSA/TD-2350DSA
- Connect the printer to the computer using a USB cable.
- Turn the printer on.
 Make sure the printer is in Standby Mode.
 - Load a 58 mm Media Roll into the printer.
- Press Menu.
- Press
 or
or  to select the following:
 - Select [Administration]. Press OK.
- Select [Dump Mode]. Press OK.
- Follow the on-screen instructions.
- When the printer's LCD displays a processing message, the printer starts printing automatically. If it does not print, press
 to print the dump data.
  To resume normal printing, turn the printer off and then on again.
TD-2310D/TD-2320D/TD-2350D/TD-2320DF/TD-2350DF/TD-2320DSA/TD-2350DSA
To set the printer to Dump Mode using the Printer Setting Tool.
- Connect the printer to the computer using a USB cable.
- Press
 to turn the printer on.
 - Start the Printer Setting Tool.
Click .
- Click Device Settings.
- Click .
- When prompted, click OK to confirm.The printer switches to Dump Mode.
 To resume normal printing, turn the printer off and then on again.
Did you find the information you needed?


