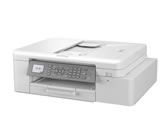
MFC-J4335DW(XL)
FAQ e Risoluzione dei problemi |

MFC-J4335DW(XL)
Data: 11/06/2021 ID: faq00100360_513
Check the Print Alignment from Your Brother Machine
If your printed text becomes blurred or images become faded after transporting the machine, adjust the print alignment.
MFC-J4340DW
Before adjusting the print alignment, complete a print quality check first by pressing  (Ink),
  or
or  to select again, and then OK.
 (Ink),
  or
or  to select again, and then OK.
 - Press
 (Ink).
 - Press
 or
or  to make your selections:
 - Select [Impr. PrintQuality]. Press OK.
- Select [Alignment]. Press OK.
- Press
 after a confirmation message if a print quality check has been completed appears on the LCD.
 - Select [Auto] or [Manual].
- If you select the [Auto] mode, the print alignment is automatically adjusted by scanning the check sheet.
- If you select the [Manual] mode, you need to input information printed on the check sheet manually.
- If you selected the [Auto] mode, select the paper size to print the check sheet on.
- Load specified size paper in the tray, and then press
 . The machine prints the check sheet.
 - Follow the instructions on the LCD.

When the print alignment is not adjusted correctly, text looks blurry or crooked, like this:

After the print alignment is adjusted correctly, text looks like this:

MFC-J4440DW/MFC-J4540DW
Before adjusting the print alignment, complete a print quality check first by pressing  .
.
- Press
 .
. - Press [Next].
- Press [Yes] after a confirmation message if a print quality check has been completed appears on the LCD.
- Press [Auto] or [Manual].
- If you select the [Auto] mode, the print alignment is automatically adjusted by scanning the check sheet.
- If you select the [Manual] mode, you need to input information printed on the check sheet manually.
- If you selected the [Auto] mode, select the paper size to print the check sheet on.
- Load specified size paper in the tray, and then press [Start].The machine prints the check sheet.
- Follow the instructions on the LCD.

When the print alignment is not adjusted correctly, text looks blurry or crooked, like this:

After the print alignment is adjusted correctly, text looks like this:

MFC-J4335DW(XL), MFC-J4340DW(E), MFC-J4535DWXL, MFC-J4540DW(XL)
Per richiedere ulteriore assistenza, contattare il servizio assistenza clienti Brother:
Feedback sui contenuti
Di seguito è possibile fornire il proprio feedback che ci consentirà di migliorare il servizio assistenza.
Passo 1: le informazioni contenute in questa pagina sono risultate utili?
Passo 2: si desidera aggiungere un commento?
Questo modulo viene utilizzato esclusivamente con finalità di feedback.