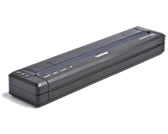
PJ-762
 |
FAQ & Fehlerbehebung |
How to install the rechargeable Li-ion battery (optional)
Installing the rechargeable Li-ion battery
-
Move the Battery Latch 1 to the unlock position.
-
While holding the Battery Latch 2 in the unlock position, remove the Battery Cavity Mounting Block.
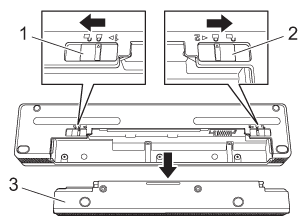 |
1. Battery Latch 1
2. Battery Latch 2
3. Battery Cavity Mounting Block |
-
Release the Battery Latch 2.
The Battery latch 2 moves back to the lock position.
-
Insert the battery into the battery cavity until it locks into place.
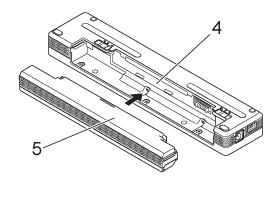 |
4. Battery cavity
5. Rechargeable Li-ion battery |
-
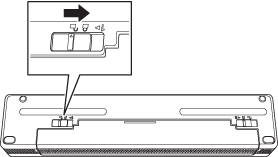
Move the Battery Latch 1 to the lock position.
-
The voltage supplied by the rechargeable Li-ion battery may vary. The printing speed may also vary depending on the voltage.
-
When the battery is being used, the battery cavity mounting block is not needed. Keep it in a safe place to avoid losing it.
Removing the rechargeable Li-ion battery
-
Move the Battery Latches to the unlock position, and then remove the battery.
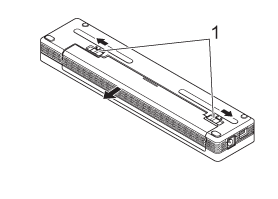 |
1. Battery latches |
-
Insert the Battery Cavity Mounting Block into the battery cavity until it locks into place.
-
Move the Battery Latch 1 to the lock position.
Wenn Ihre Frage nicht beantwortet werden konnte, haben Sie andere FAQ geprüft?
Haben Sie in den Handbüchern nachgesehen?
Wenn Sie weitere Unterstützung benötigen, wenden Sie sich an den Brother-Kundendienst:
Relevante Modelle
PJ-722, PJ-723, PJ-762, PJ-763, PJ-763MFi, PJ-773
Rückmeldung zum Inhalt
Helfen Sie uns dabei, unseren Support zu verbessern und geben Sie uns unten Ihre Rückmeldung.


