- Brother support website
- Brother Support for IT Administrators
- I want to create password-protected scanned files.
I want to create password-protected scanned files.
- Use Brother's Scan to Secure PDF feature to create scanned documents protected by a password. Set the password on the software before scanning each sensitive document, and then use the same password to open the document.
- Users can scan confidential documents and save them as password-protected PDF files directly to a pre-selected folder. In addition, users can scan confidential documents and send password-protected PDF files as email attachments.
The screens and available settings may differ depending on the software version.
To check if your device supports the Scan to Secure PDF feature, see your model's Online User's Guide.
Create password-protected scanned PDF files and save them to a folder (Windows) >
Create password-protected scanned PDF files and save them to a folder (Mac) >
Create password-protected scanned PDF files and attach them to an email (Windows) >
Create password-protected scanned PDF files and attach them to an email (Mac) >
Create password-protected scanned PDF files and save them to a folder (Windows)
-
Load your document.
-
Click the
 (ControlCenter4) icon in the task tray, and then click Open.
Make sure you are in Advanced Mode. -
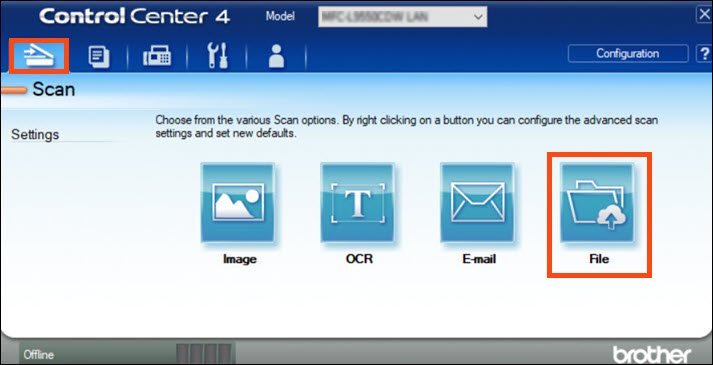
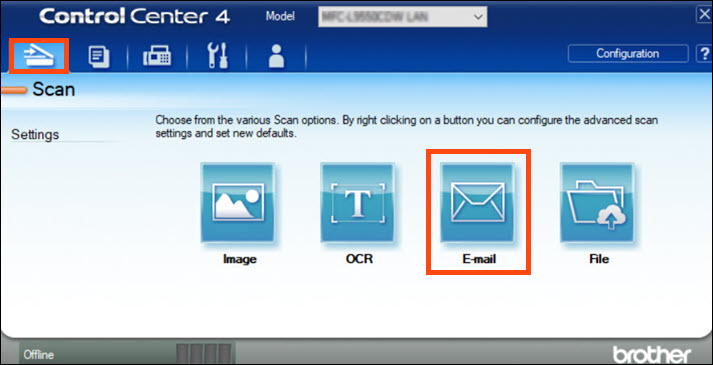
Click the Scan tab, and then click File.
-
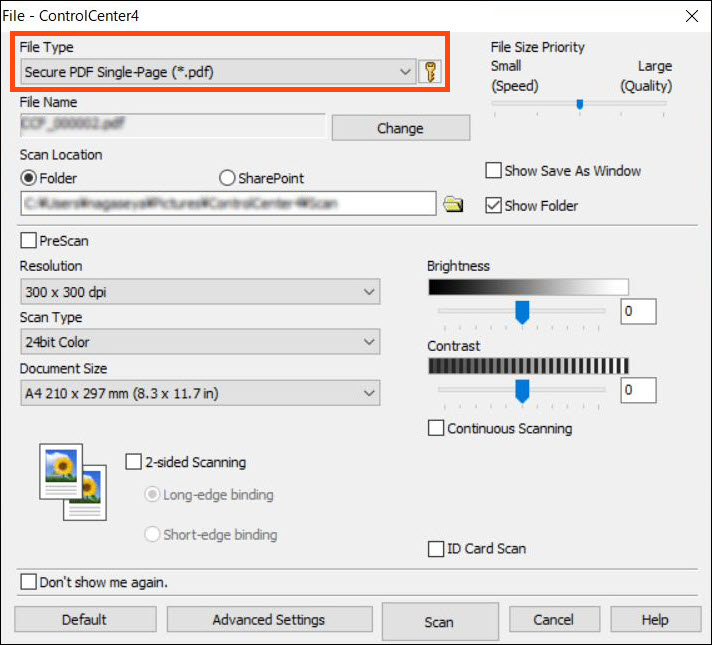
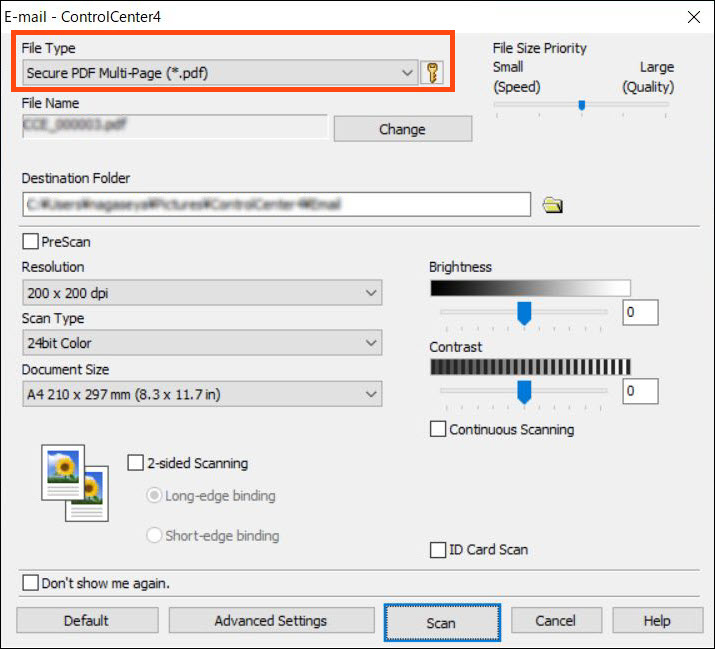
Click the File Type drop-down list, and then select Secure PDF Single-Page (*.pdf) or Secure PDF Multi-Page (*.pdf).
-
Click
 , type the password, confirm it, and then click OK.
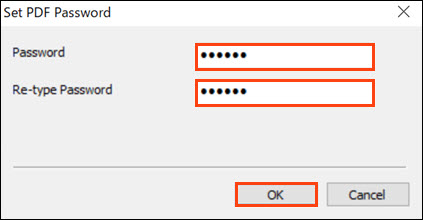
-
Click the folder icon to browse to and select the folder where you want to save your scanned documents.
-
Change the scan settings, such as File Name, Resolution, Scan Type, and Document Size, if needed.
NOTE:
To preview and configure the scanned image, select the PreScan check box.
-
Click Scan.
The device starts scanning.
The file is saved in the folder you selected.
Create password-protected scanned PDF files and save them to a folder (Mac)
-
Load your document.
-
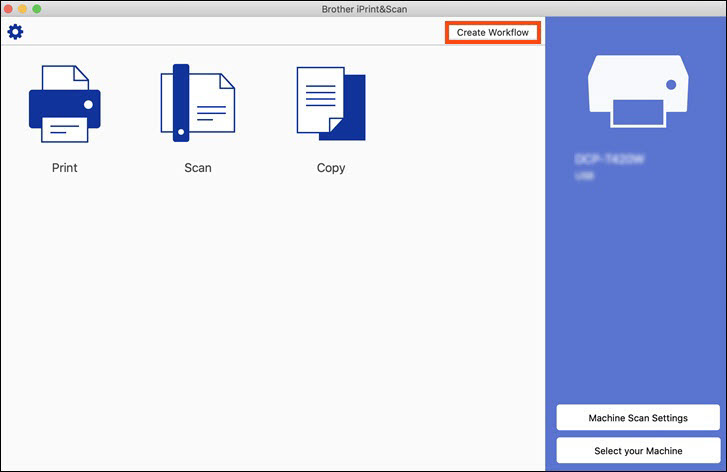
In the Finder menu, click Go, click Applications, and then double-click the Brother iPrint&Scan icon.
-
Click Create Workflow.
-
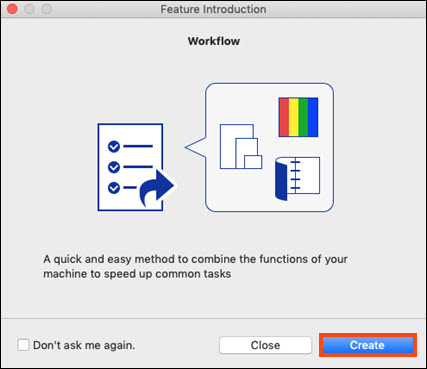
Click Create.
-
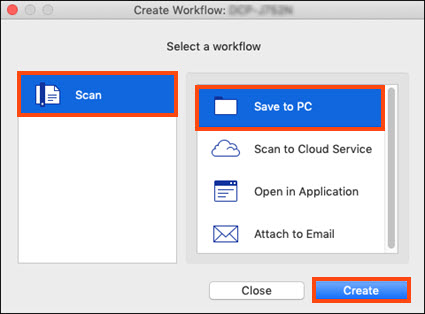
Click Scan, click Save to PC, and then click Create.
-
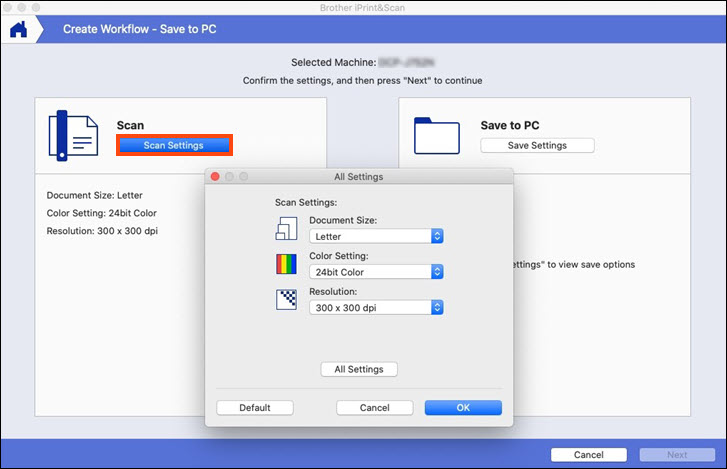
Click Scan Settings, and change the settings if needed.
-
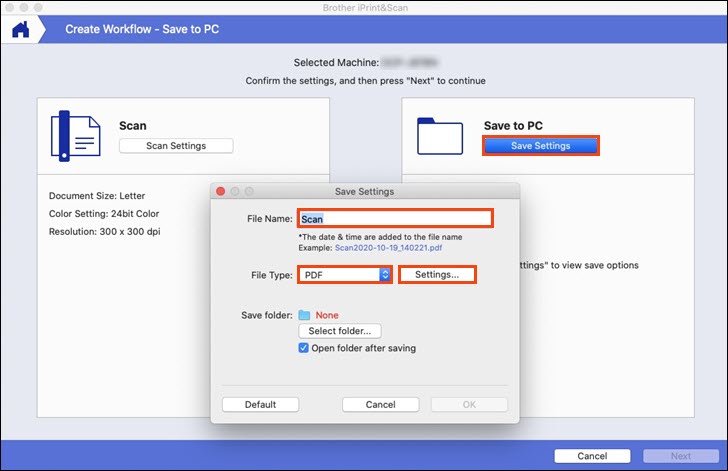
Click Save Settings.
-
Type a name into the File Name field, click in the File Type field and select PDF, and then click Settings....
-
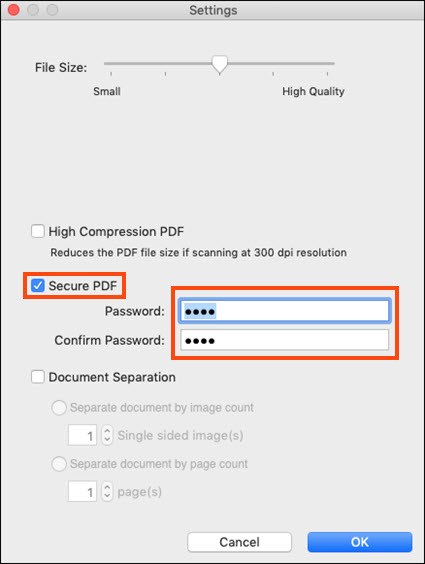
Select the Secure PDF check box and type the password in the Password and Confirm Password fields.
-
Change any other settings if needed, and then click OK.
-
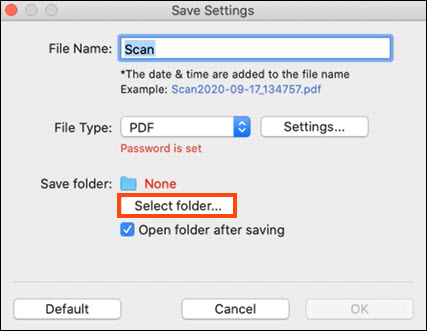
Click Select folder... to browse to and select the folder where you want to save your scanned document, and then click Open.
-
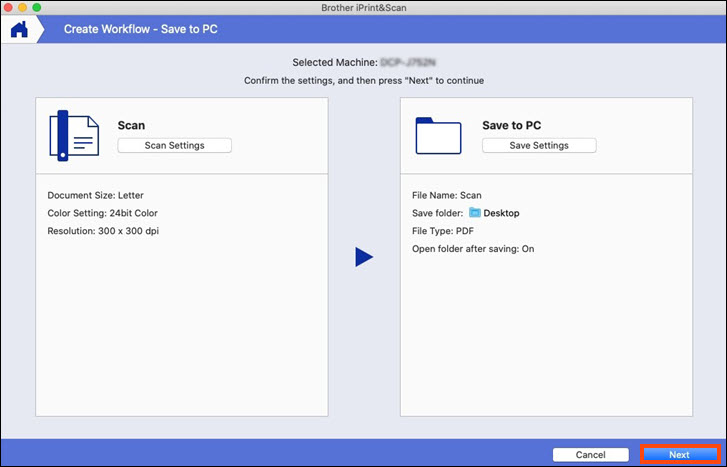
Click OK.
-
Click Next .
-
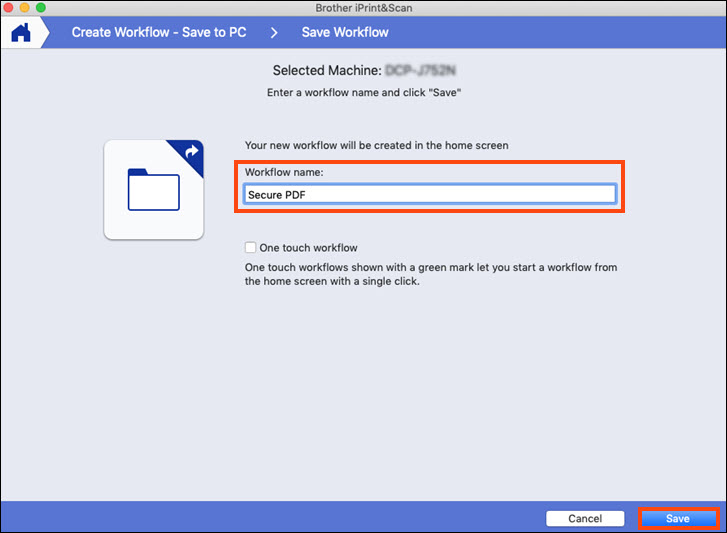
Type the workflow name you want, and then click Save.
-
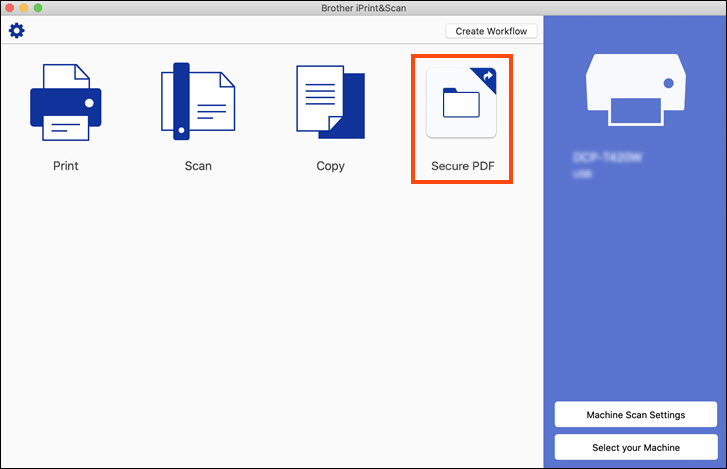
When you return to the home screen, click the workflow you just created, and then click Start.
The device starts scanning.
The file is saved in the folder you selected.
Create password-protected scanned PDF files and attach them to an email (Windows)
-
Load your document.
-
Click the
(ControlCenter4) icon in the task tray, and then click Open.
Make sure you are in Advanced Mode. -
Click the Scan tab, and then click E-mail.
-
Click the File Type drop-down list, and then select Secure PDF Single-Page (*.pdf) or Secure PDF Multi-Page (*.pdf).
-
Click
, type the password, confirm it, and then click OK.
-
Change the scan settings, such as File Name, Destination Folder, Resolution, Scan Type, and Document Size, if needed.
NOTE:
To preview and configure the scanned image, select the PreScan check box.
-
Click Scan.
The device starts scanning.
Your default email application opens and the PDF file is attached to a new email message.
Create password-protected scanned PDF files and attach them to an email (Mac)
-
Load your document.
-
In the Finder menu, click Go, click Applications, and then double-click the Brother iPrint&Scan icon.
-
Click Create Workflow.
-
Click Create.
-
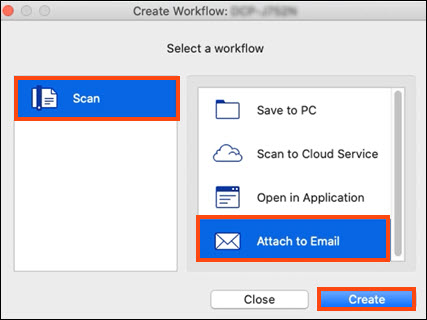
Click Scan, click Attach to Email, and then click Create.
-
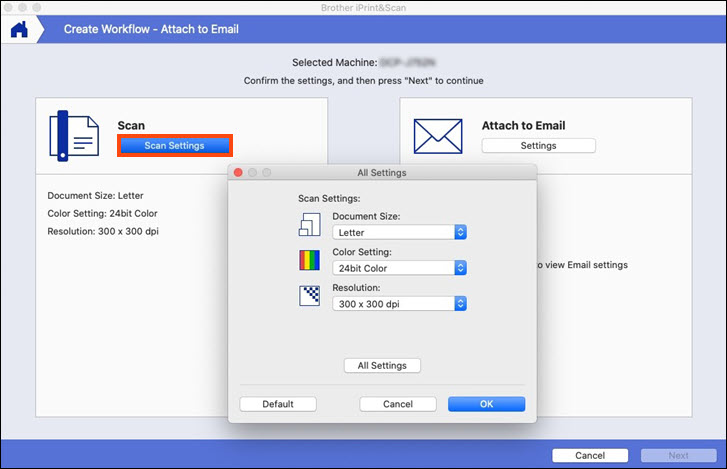
Click Scan Settings, and change the settings if needed.
-
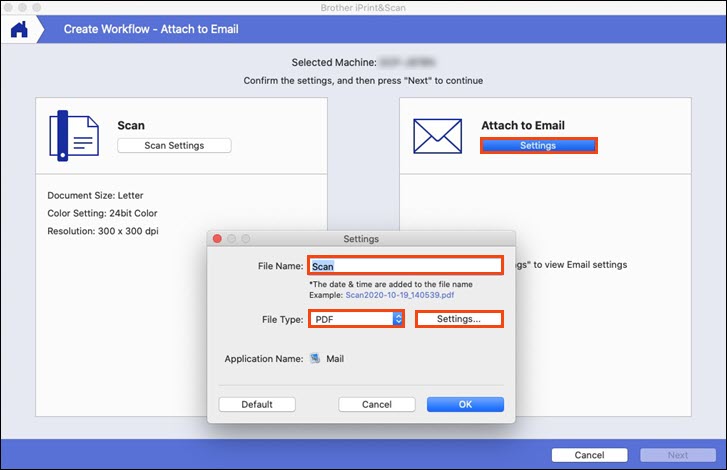
Click Settings.
-
Type a name into the File Name field, click in the File Type field and select PDF, and then click Settings....
-
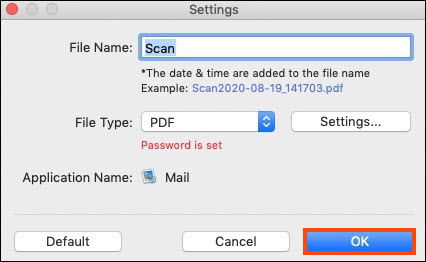
Select the Secure PDF check box and type the password in the Password and Confirm Password fields.
-
Change any other settings if needed, and then click OK.
-
Click OK.
-
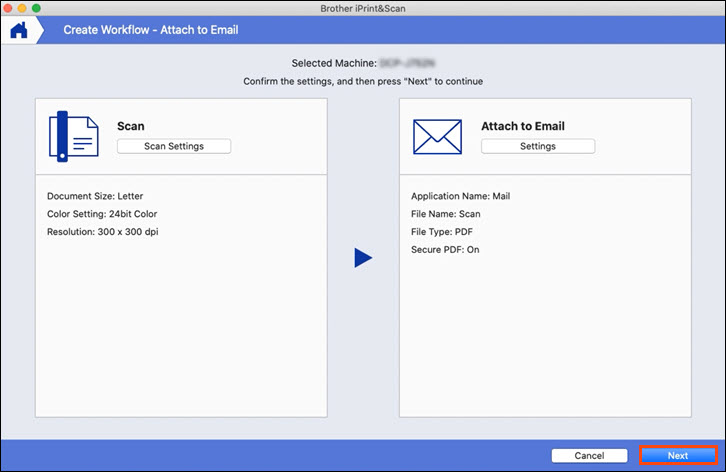
Click Next .
-
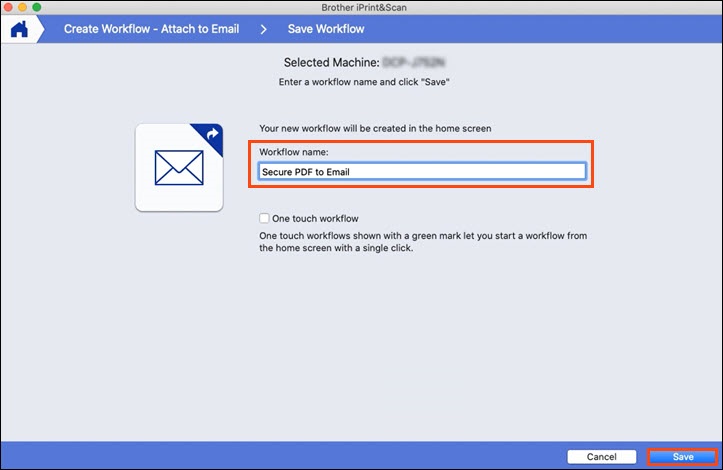
Type the workflow name you want, and then click Save.
-
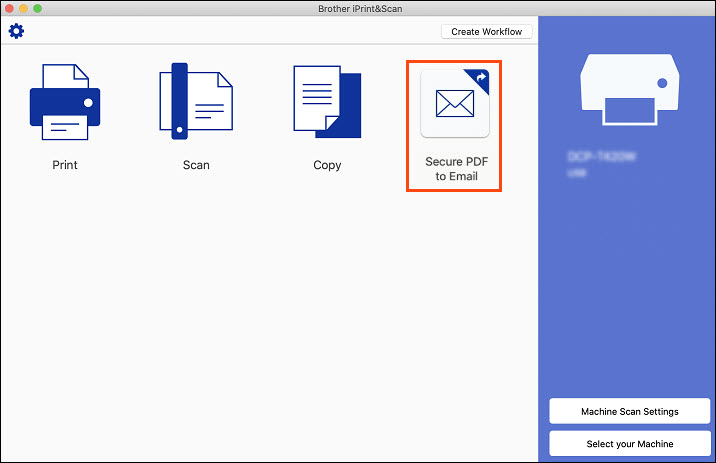
When you return to the home screen, click the workflow you just created, and then click Start.
The device starts scanning.
Your default email application opens and the PDF file is attached to a new email message.