- Brother support website
- Brother Support for IT Administrators
- I want to use BRAdmin Professional 4 to apply a common configuration across my entire printer fleet, but retain unique settings for each device using the Mapply function (Windows only).
I want to use BRAdmin Professional 4 to apply a common configuration across my entire printer fleet, but retain unique settings for each device using the Mapply function (Windows only).
- Use BRAdmin Professional 4 to create a CSV deployment file and set up all of your devices at the same time.
- Use the dynamic keywords (the multiple apply "Mapply" function) to apply a specific settings file to an individual device, using a CSV deployment file.
- You can individualize as many devices as needed.
NOTE:
If you have already installed BRAdmin Professional 4, make sure you use the latest version.
Create a settings file for your entire fleet from one device
-
Go to the Downloads page on the Brother support website to download the latest version of BRAdmin Professional 4 (Windows only).
-
Follow the on-screen installation instructions.
-
When finished, launch BRAdmin Professional 4.
-
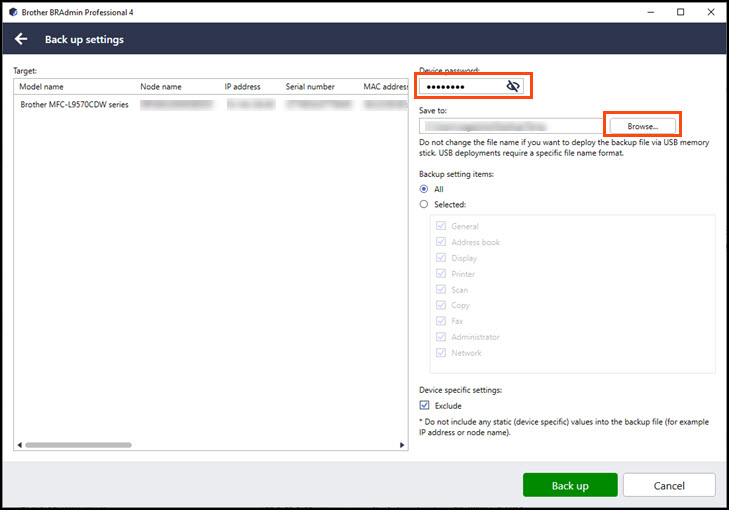
In the Devices list, select the device with the settings you want to copy, and then click Back up settings.

-
Type the device's password, and then click Browse... to browse to the folder where you want to save that device's settings file.
-
Select the Backup setting items you want to copy, select the Exclude checkbox, and then click Back up.

-
Confirm the summary results that appear when the backup is finished.
Create a CSV deployment file from the settings file using Brother Setting File Editor
-
Click
 (Application settings).
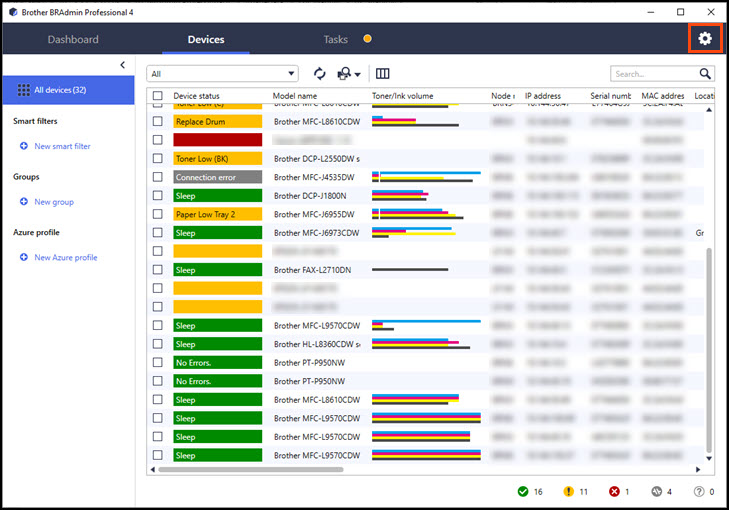
-
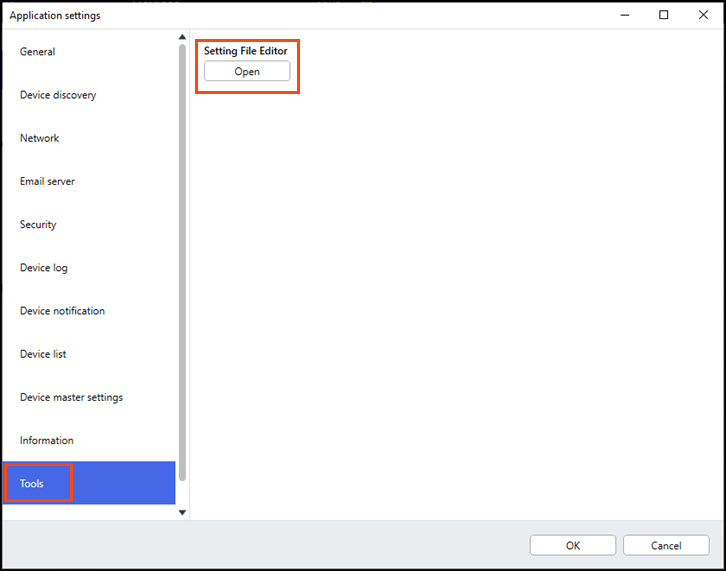
In the Application settings window, click Tools, and then click Open.
-
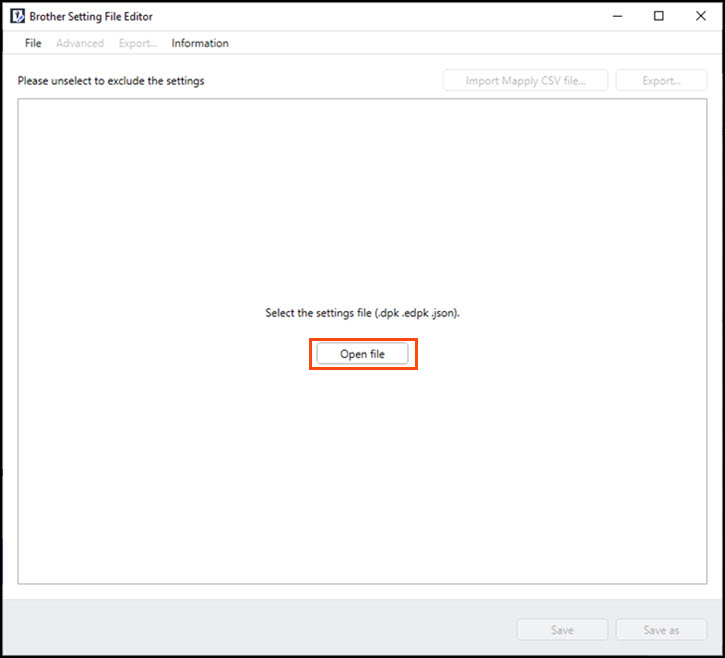
When the Brother Setting File Editor opens, click Open file.
-
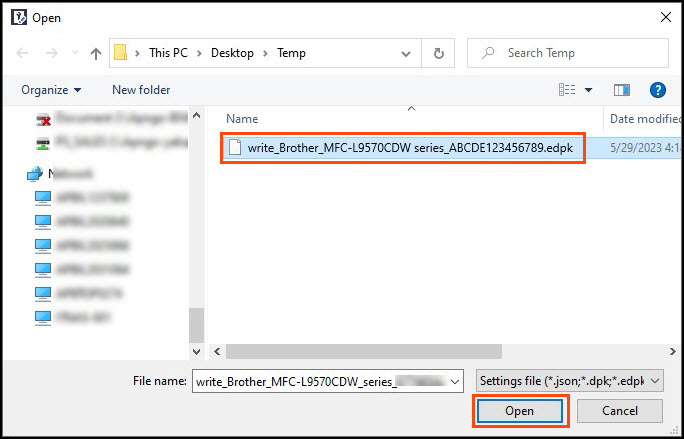
Select the device settings file that you created in step 6, and then click Open.
-
If you set a password for the settings file, the file extension is EDPK.
-
If you did not set a password for the settings file, the file extension is DPK.
NOTE:
-
Type the device password, if needed, and click OK.
-
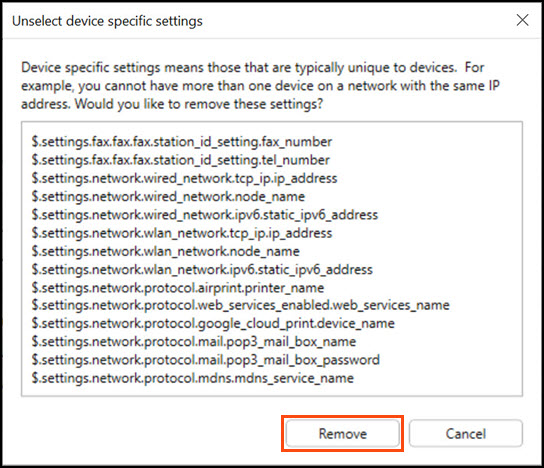
If the pop-up screen below appears, click Remove.
-
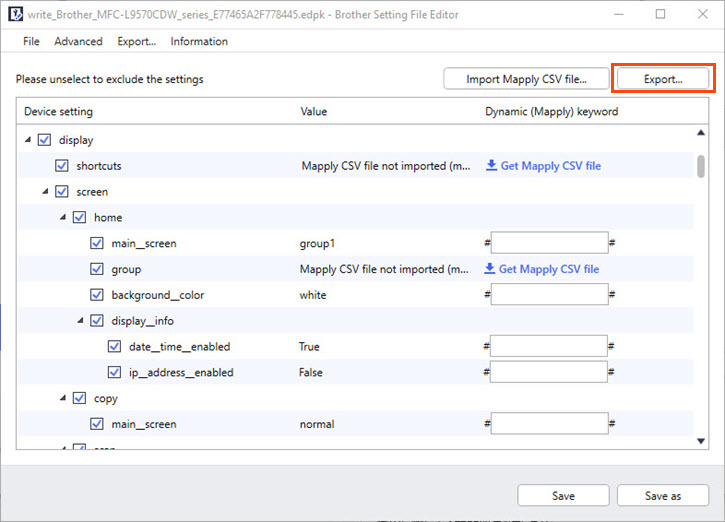
When the Brother Setting File Editor appears, clear the checkboxes associated with any settings that you do not want.
-
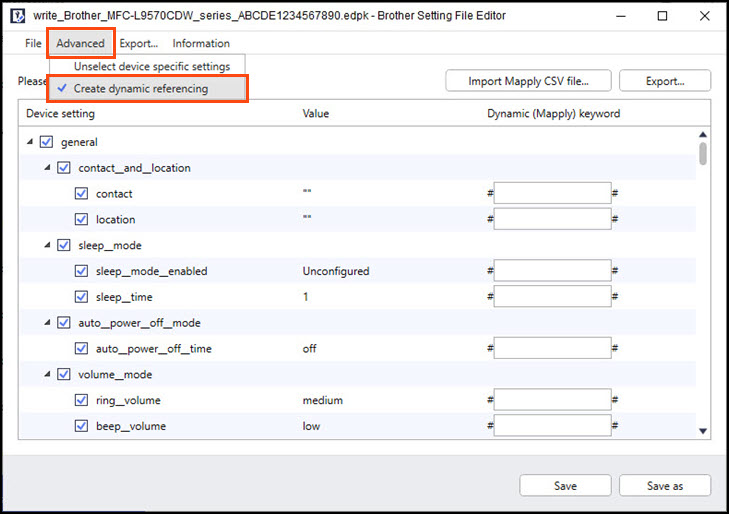
To use dynamic (Mapply) keywords, click the Advanced menu and select Create dynamic referencing.
-
If the pop-up screen appears, click OK.
-
Specify the Mapply keywords you want in the Dynamic (Mapply) keyword field.
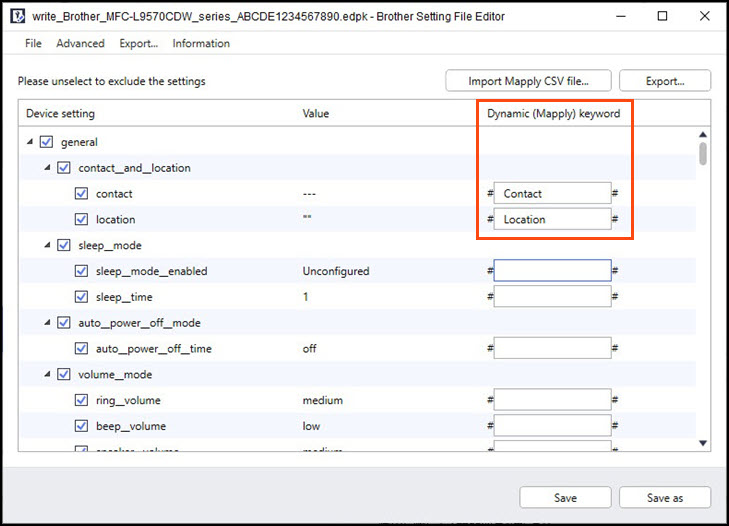
-
Type a Dynamic (Mapply) keyword for any setting that is different across your printer fleet, for example: contact, location, sleep mode, and the other settings that appear in the Device setting list.
-
In the Dynamic (Mapply) keyword column, you can enter English characters, numbers, "-" (hyphen) and "_" (underscore).
NOTE:
-
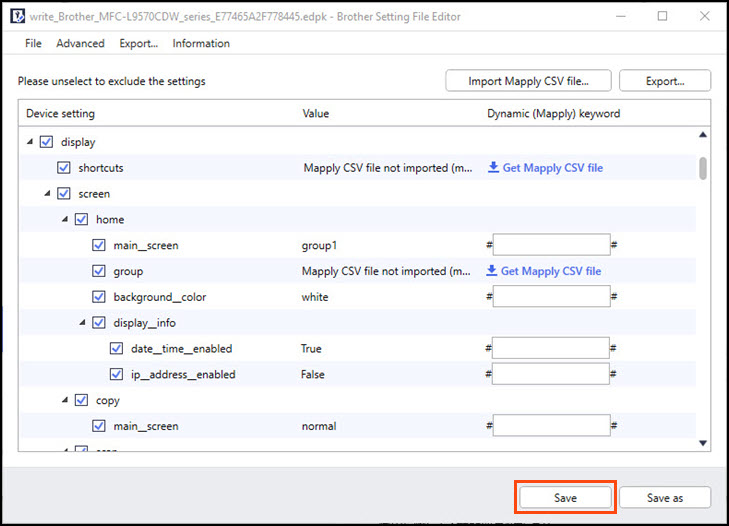
Scroll down the page and click Get Mapply CSV file to download the Mapply CSV template. You need to do this for all the Device settings you want to save.

-
Go to the folder where you want to save the Mapply CSV files, and save the files.
-
Open the Mapply CSV file you saved in Step 18, and then edit it. Save the editted CSV file.
-
Click Import Mapply CSV file..., and go to the folder where you have saved the Mapply CSV file.
-
Select the Mapply CSV file, and then click Open.
-
Click Save.
-
If the pop-up screen appears, click OK.
-
Click the Export... button in the upper right corner of the screen.
-
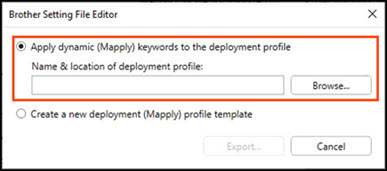
Do one of the following:
-
To create a new CSV deployment profile, select Create a new deployment (Mapply) profile template, and then click Export.... Go to the folder where you want to save the file, specify the file name, and then click Save.
-
To add the dynamic keywords to an existing deployment CSV or ZIP file, select Apply dynamic (Mapply) keywords to the deployment profile. Click Browse..., go to the folder where you have saved the existing deployment CSV or ZIP file, select the file, and then click Open. Click Export.... Go to the folder where you want to save the file, specify the file name, and then click Save.

-
-
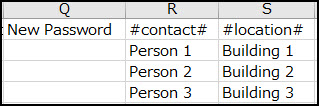
Open the CSV file you exported in step 26, and type the target devices' information. Only the Node Name or IP Address needs to be filled as they are mandatory. Type the device password in the Password column.

-
Type the file path for the settings file in the File Path column, and in the Package Password column, type the settings file password.

-
In the dynamic (Mapply) keywords column (#contact# and #location# for this example), type the values, and then save the file.
Apply settings using a CSV deployment file
-
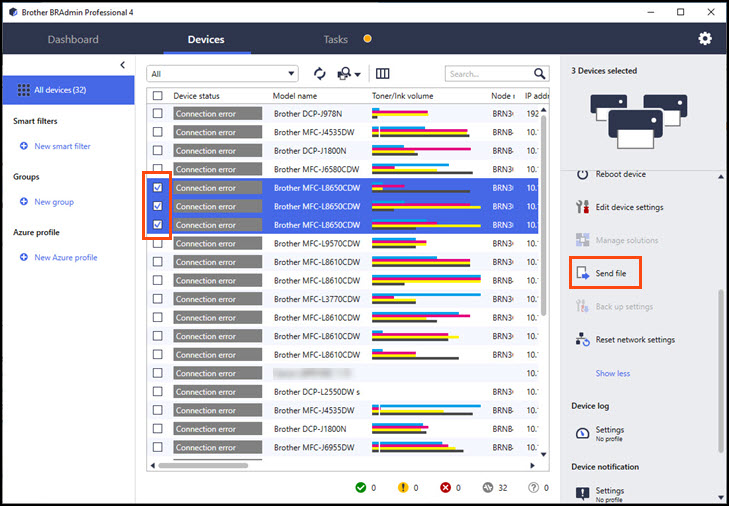
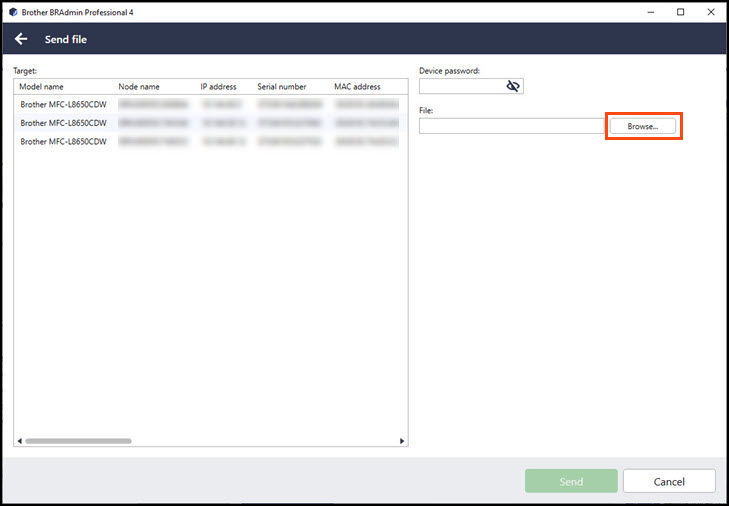
In the Devices list, select the checkboxes for the target devices, and then click Send File in the right navigation bar.
-
Click Browse... to go to the folder where you created the CSV deployment file.
NOTE:
There is no need to type a password, because each device's password is set in the CSV deployment file.
-
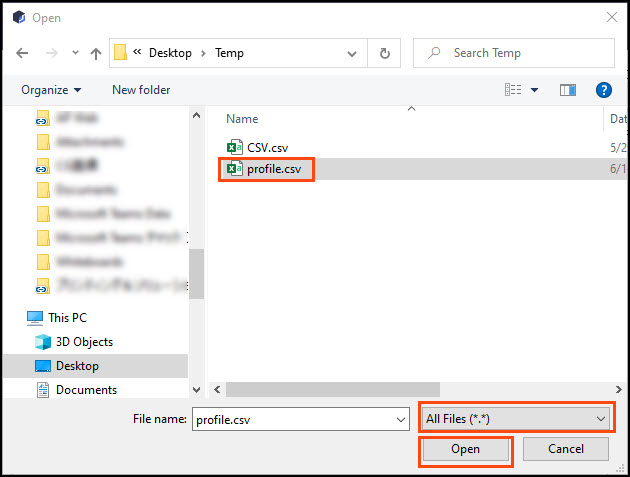
Confirm All Files (*.*) is selected from the file format options, and then select the CSV deployment file that you edited in steps 27 to 29.
Click open.
-
Click Send.
-
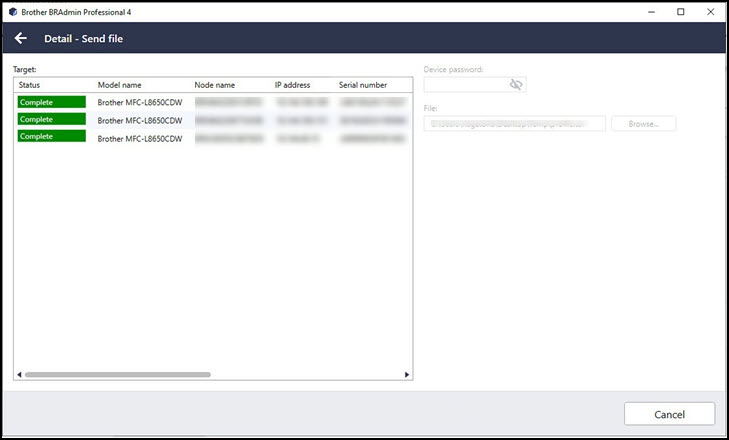
Click the Tasks tab, click the task you need in the Tasks log list, and then click Details.
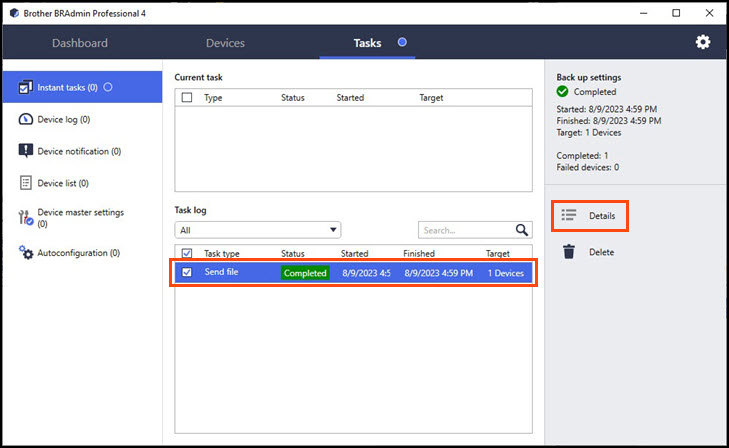
-
Check the results in the Target list.