Home > Routine Maintenance > Replace Supplies > Replace the Toner Cartridge
Replace the Toner Cartridge
- Make sure the machine is turned on.
- Open the front cover.
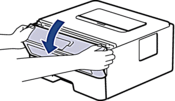
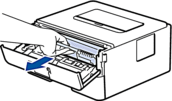
- Remove the toner cartridge and drum unit assembly from the machine.
- Push down the green lock lever, and then take the toner cartridge out of the drum unit as shown in the illustration.
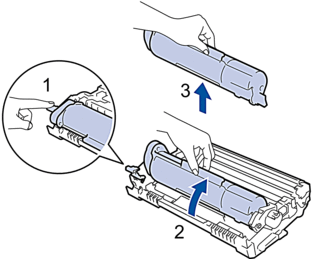
 To avoid staining toner on your hands or clothes, DO NOT touch the shaded parts shown in the illustrations.
- Unpack the new toner cartridge.
- Push the new toner cartridge firmly into the drum unit until you hear it lock into place.
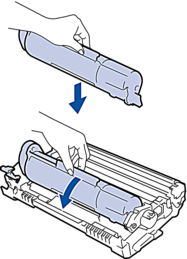
 Make sure you put the toner cartridge in correctly or it may separate from the drum unit.
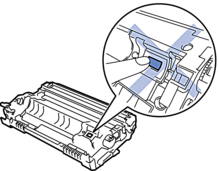
 - Clean the corona wire inside the drum unit by gently sliding the green tab from left to right and right to left several times.
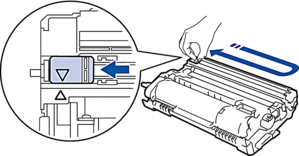
 Be sure to return the tab to the Home position (
 ). The arrow on the tab must be aligned with the arrow on the drum unit. If it is not, printed pages may have a vertical stripe.
 - Reinsert the toner cartridge and drum unit assembly back into the machine.
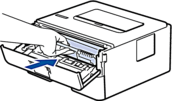
- Close the front cover of the machine.

Do not turn off the machine or open the front cover until the machine returns to Ready Mode.
- The toner cartridge that comes with your Brother machine is an Inbox toner cartridge.
- It is a good idea to keep a new toner cartridge ready for use when you see the Toner Low warning.
- DO NOT unpack the new toner cartridge until you are ready to install it.
- If a toner cartridge is left unpacked for a long time, the toner life will be shortened.
- We recommend using genuine Brother supplies to ensure stable print quality and performance. Although not all non-genuine supplies may cause quality issues, it is possible that some may adversely affect print quality or cause machine malfunction. Brother may charge for repairing your machine if it is proven that non-genuine supplies caused the damage, even if the machine is still covered by the warranty.
Did you find the information you needed?


