


| |
|
| 1 |
Turn off the printer power switch, and then unplug the printer. Disconnect the interface cable from the printer.
|
||
| 2 |
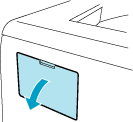
Remove the DIMM cover.
|
||
| 3 |
Unpack the DIMM and hold it by its edges.

 |
||
| 4 |
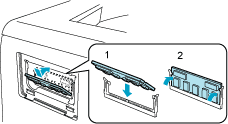
Hold the DIMM by the edges and align the notches in the DIMM with the protrusions in the slot.
Insert the DIMM diagonally (1), then tilt it toward the interface board until it click into place (2).
|
||
| 5 |
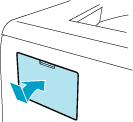
Put the DIMM cover back on.
|
||
| 6 |
Reconnect the interface cable to your printer. Plug the printer back in, and then turn on the power switch.
|
| |
|