


| |
|
| 4 |
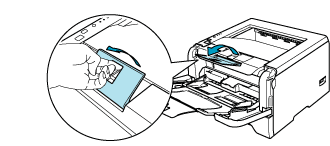
Lift up the support flap to prevent paper from sliding off the face-down output tray, or remove each page as soon as it comes out of the printer.
|
||||||
| 5 |
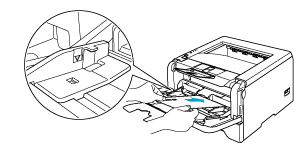
Put paper in the MP tray. Make sure that the paper stays under the maximum paper mark (
|
||||||
| 6 |
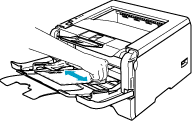
While pressing the paper-guide release lever, slide the paper guide to fit the paper size.
|
||||||
| 7 |
Send the print data to the printer.
|
| • |
Remove each sheet or envelope at once after printing. Stacking the sheets or envelopes may cause the paper to jam or curl.
|
| • |
If envelopes get smudged during printing set the Media Type to Thick Paper or Thicker Paper to increase the fixing temperature. To adjust the print density setting, see Printing on thick paper, labels and envelopes
.
|
| • |
If the envelopes is creased after they are printed, see
Improving the print quality.
|
| • |
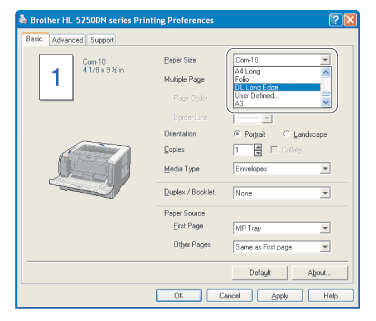
If the DL size double flap envelope is creased after printing, choose DL Long Edge in Paper Size, from the Basic tab. Put a new DL size double-flap envelope in the MP tray with the longest edge of the envelope in first, then print again.
|
||||
| • |
When you put paper in the MP tray, remember the following:
|
||||
|
| |
|