Using the BR-Script3 printer driver (PostScript® 3™ language emulation for Windows®) (HL-4050CDN/HL-4070CDW only)

(For more information, see the Help text in the printer driver.)
Note Note
• 
To use the BR-Script3 printer driver you must install the driver using the Custom Install from the CD-ROM.
• 
The screens in this section are from Windows® XP. The screens on your computer may vary depending on your operating system.

Device Settings tab

Choose the options you have installed.
Screen

Printing Preferences

Note Note
 
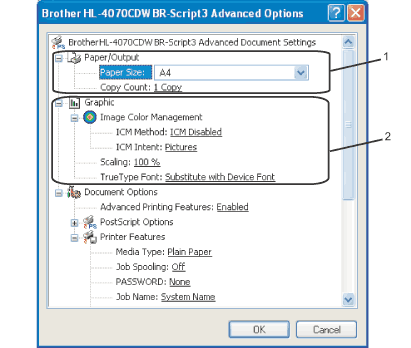
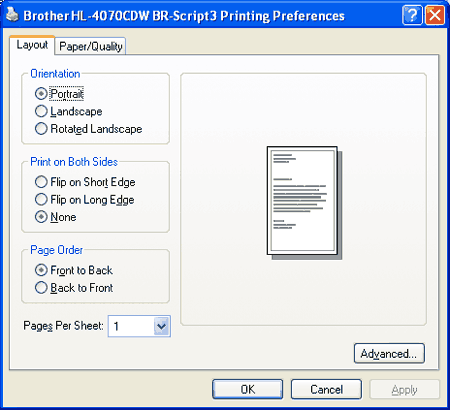
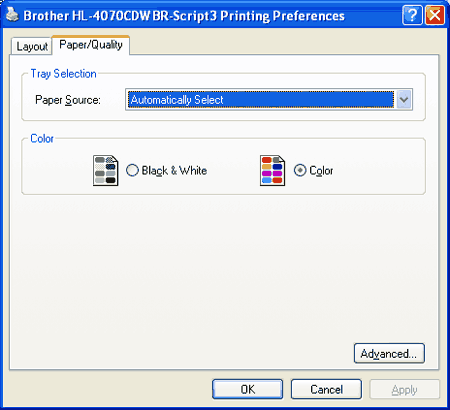
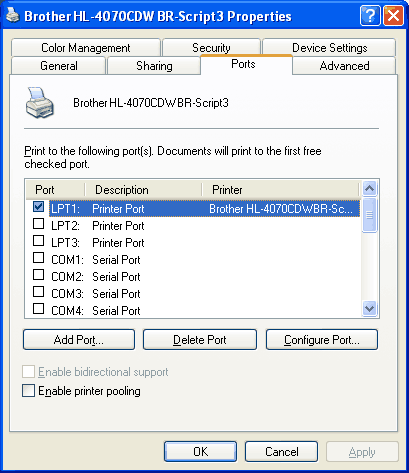
If you are using Windows® 2000, XP, Windows Vista™ or Windows Server® 2003, you can access the Printing Preferences dialog box by clicking Printing Preferences... in the General tab of the Brother HL-4050CDN(HL-4070CDW) BR-Script3 Properties dialog box.
• 
Layout tab
You can change the layout setting by choosing the settings for Orientation, Print on Both Sides (Duplex), Page Order and Page Per Sheet.
Screen
• 
Orientation
Orientation selects the position of how your document will be printed. (Portrait, Landscape or Rotated Landscape)
• 
Print on Both Sides
If you want to do duplex printing. choose Flip on short or Flip on Long Edge.
• 
Page Order
Specifies the order in which the pages of your document will be printed. Front to Back prints the document so that page 1 is on top of the stack. Back to Front prints the document so that page 1 is on the bottom of the stack.
• 
Paper/Quality tab
Choose the Paper Source and Color.
Screen
• 
Paper Source
You can choose Auto Select, Tray1, MP tray or Manual Feed.
• 
Color
Choose how to print colour graphics either Black and White or Color.

Advanced options

Screen
1
Choose the Paper Size and Copy Count (1).
• 
Paper Size
From the drop-down box choose the Paper Size you are using.
• 
Copy Count
The copy selection sets the number of copies that will be printed.
2
Set the Image Color Management, Scaling and TrueType Font settings (2).
• 
Image Color Management
Specifies how to print your colour graphics.
• 
If you don’t want to enable Image Color Management, click ICM Disabled.
• 
If you want the calculations for colour matching to be performed on the host computer before it sends the document to the printer, click ICM Handled by Host System.
• 
If you want the calculations for colour matching to be performed on your printer, click ICM Handled by Printer using printer calibration.
• 
Scaling
Specifies whether to reduce or enlarge documents, and by what percentage.
• 
TrueType Font
Specifies the TrueType font options. Click Substitute with Device Font (the default) to use equivalent printer fonts for printing documents that contain TrueType fonts. This will permit faster printing; however, you might lose special characters not supported by the printer font. Click Download as Softfont to download TrueType fonts for printing instead of using printer fonts.
3
You can change settings by choosing a setting in the Printer Features list (3):
Screen
• 
Media Type
You can use the following types of media in your printer. For the best print quality, select the type of media that you wish to use.
Plain Paper
Thin Paper
Thick Paper
Thicker Paper
Bond Paper
Envelopes
Env. Thick
Env. Thin
Recycled Paper
Postcard
Label
 
• 
Job Spooling
Secure Print allows you to secure documents that are password protected when they are sent to the printer. Only the people who know the password will be able to print them. Since the documents are secured at the printer, you must enter the password using the control panel of the printer. The secured document must have a Password and Job Name.
(For more information about the Reprint function, see Reprinting documents.)
• 
Password
Choose the password for your secured document that you send to the machine from the drop-down box.
• 
Job Name
Choose the Job name from the drop-down list for your secured document.
• 
Print Quality
You can choose the following print quality settings.
• 
Normal
600 dpi class. Recommended for ordinary printing. Good print quality with good print speeds.
• 
Fine
2400 dpi class. The finest print mode. Use this mode to print precise images such as photographs. Since the print data is much larger than in normal mode, processing time, data transfer time and printing time will be longer.
• 
Toner Save
You can conserve toner using this feature. When you set Toner Save Mode to On, print appears lighter. The default setting is Off.
Note Note
 
We do not recommend Toner Save for printing Photo or Gray Scale images.
• 
Colour/Mono
You can choose the following colour mode:
• 
Colour
The device will print all pages in full colour mode.
• 
Mono
Selecting Mono mode prints your documents in grayscale.
Note Note
 
If the Cyan, Magenta or Yellow toner runs out, choosing Mono will allow you to keep printing as long as the Black toner does not run out.
• 
Gamma Correction
You can adjust the brightness of your printed document compared to the image on the screen.
• 
Colour Mode
The following options are available in Colour Matching mode:
• 
Normal
This is the Default colour mode.
• 
Vivid
The colour of all elements are adjusted to become a more vivid colour.
• 
Improve Gray Colour
You can improve the image of a shaded area.
• 
Enhance Black Printing
If a black graphic cannot print correctly, choose this setting.
• 
Halftone Screen Lock
Stops other applications from modifying the Halftone settings. The default setting is On.
• 
High Quality Image Printing
You can get high quality image printing. If you set High Quality Image Printing to On, the printing speed will be slower.
• 
BR-Script Level
You can change the BR-script emulation language level. Choose a level from the drop-down list.

Ports tab

Choose the port where your printer is connected or the path to the network printer you are using.
Screen