


| | |
| • | Using self-signed certificate This print server issues its own certificate. Using this certificate, you can easily use the SSL/TLS communication without having a certificate from a CA. See Creating and installing self-signed certificate. | ||||
| • | Using a certificate from a CA There are two methods for installing a certificate from a CA. If you already have a CA or if you want to use a certificate from an outside trusted CA:
|
| • | If you are going to use SSL/TLS communication, we recommend that you contact your system administrator before using. |
| • | This print server stores only one pair of a certificate and a private key that you installed or previously imported. This printer overwrites the certificate and the private key if you install a new one. |
| • | When you reset the print server back to its default factory settings, the certificate and the private key that are installed will be deleted. If you want to keep the same certificate and the private key after resetting the print server, export them before resetting and re-install them. See How to export the certificate and private key. |

| 1 | Click Create Self-Signed Certificate on the Configure Certificate page. | ||||
| 2 | Enter a Common Name and a Valid Date, then click Submit.
| ||||
| 3 | Now the self-signed certificate is created successfully. Check the box on the left of each function you want to disable, and then click OK. 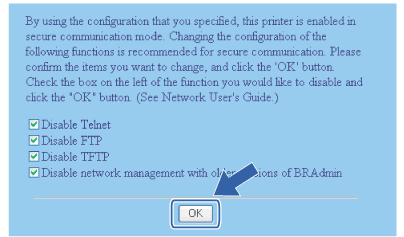
| ||||
| 4 | Restart the printer to activate the configuration. | ||||
| 5 | Now the self-signed certificate is saved in your printer memory. To use SSL/TLS communication, the self-signed certificate also needs to be installed on your computer. Proceed to the next section. |
| 1 | Click Start and All Programs. |
| 2 | Right click Internet Explorer, and then click Run as administrator. 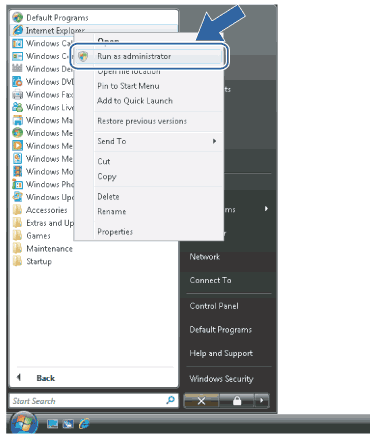 |
| 3 | Click Allow. 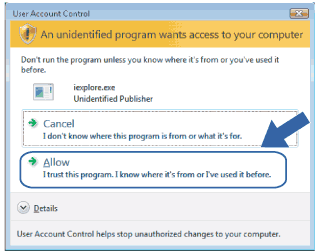 |
| 4 | Type https://printer_ip_address/ into your browser to access your printer. (Where printer_ip_address is the IP address or the print server name) Then, click Continue to this website (not recommended). 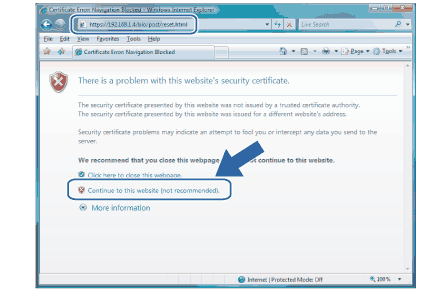 |
| 5 | Click Certificate Error, and then click View certificates. For the rest of the instructions, follow the steps from 4 on .  |
| 1 | Click Start and All Programs. |
| 2 | Right click Internet Explorer, and then click Run as administrator. |
| 3 | Choose the Administrator that you want to install with and enter the administrator password, and then click OK. 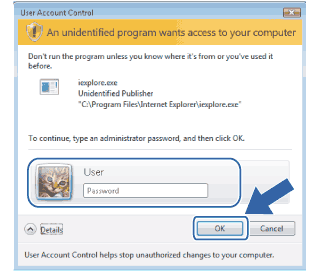 |
| 4 | Type https://printer_ip_address/ into your browser to access your printer. (Where printer_ip_address is the IP address or the print server name) Then, click Continue to this website (not recommended). |
| 5 | Click Certificate Error, and then click View certificates. |
| 6 | Choose the Details tab, and then click Copy to File.... 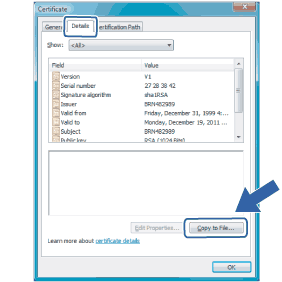 |
| 7 | Click Next.  |
| 8 | Make sure that DER encoded binary X.509 (.CER) is chosen, and then click Next. 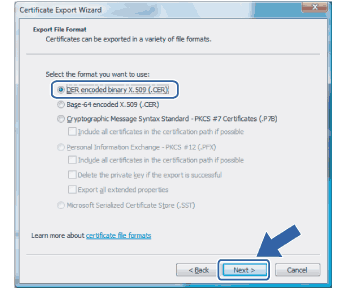 |
| 9 | Click Browse....  |
| 10 | Click Browse Folders. 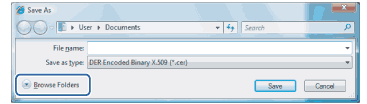 |
| 11 | Choose a folder you want to save the certificate file in and enter a file name, and then click Save. 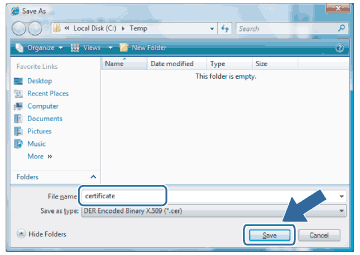 |
| 12 | Click Next. 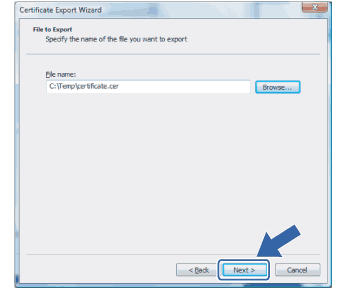 |
| 13 | Click Finish. 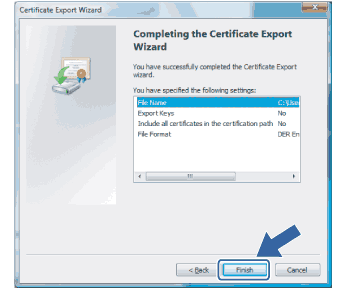 |
| 14 | Click OK. 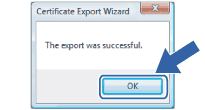 |
| 15 | Click OK. 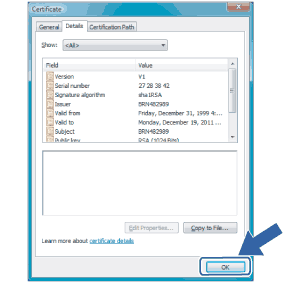 |
| 16 | Open the folder that you saved the certificate file in 11 and double-click the certificate file. For the rest of the instructions, follow the steps from 4 on . 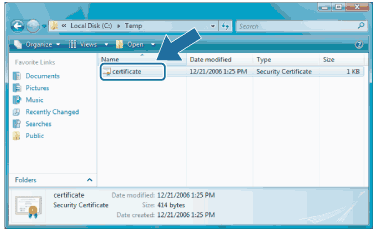 |
| 1 | Start your web browser. | ||
| 2 | Type https://printer_ip_address/ into your browser to access your printer. (Where printer_ip_address is the IP address or the print server name) | ||
| 3 | When the following dialog appears, click View Certificate. 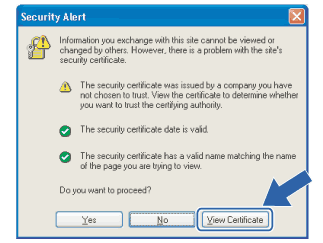 | ||
| 4 | Click Install Certificate… from the General tab. 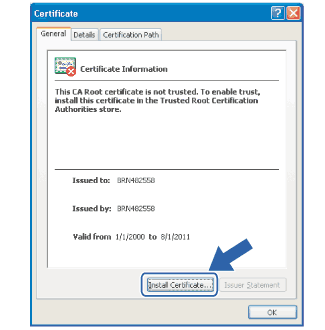 | ||
| 5 | When the Certificate Import Wizard appears, click Next. 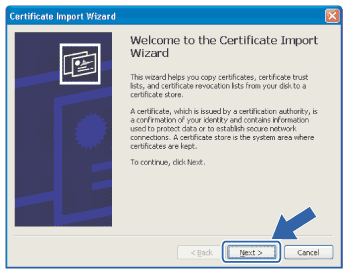 | ||
| 6 | Choose Place all certificates in the following store and then, click Browse.... 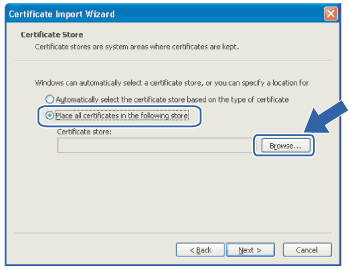 | ||
| 7 | Choose Trusted Root Certification Authorities and then, click OK. 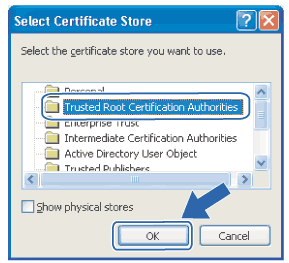 | ||
| 8 | Click Next. 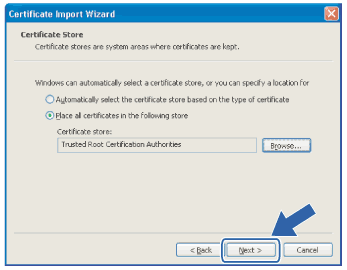 | ||
| 9 | Click Finish. 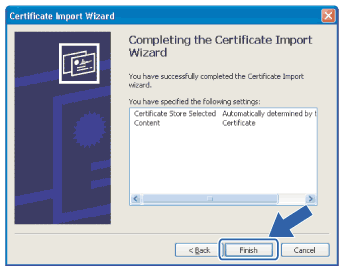 | ||
| 10 | Click Yes, if the fingerprint (thumbprint) is correct. 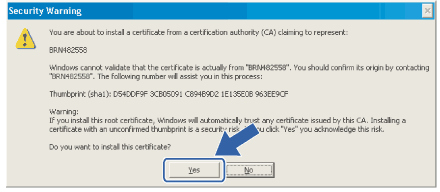
| ||
| 11 | Click OK. 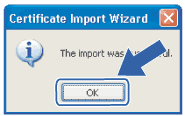 | ||
| 12 | Now the self-signed certificate is installed on your computer, and SSL/TLS communication is available. |
| | |