| 1 | Turn on the machine by plugging in the power cord. | ||||
| 2 | Press Menu, 7, 2, 6. Using
| ||||
| 3 | Turn on your computer. | ||||
| 4 | Put the supplied CD-ROM into your CD-ROM drive. If the model name screen appears, choose your machine. If the language screen appears, choose your language. | ||||
| 5 | The CD-ROM main menu will appear. Click Install Other Drivers or Utilities. 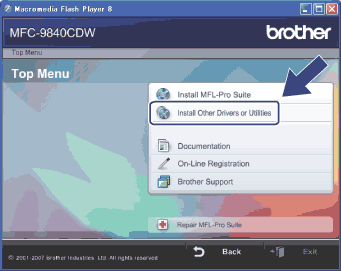 | ||||
| 6 | Click Wireless LAN Setup Wizard. 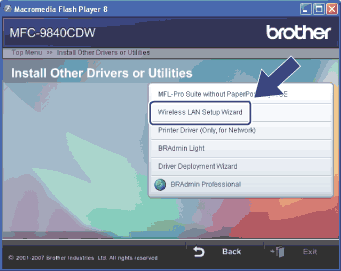 | ||||
| 7 | Read the Important Notice and click Next. 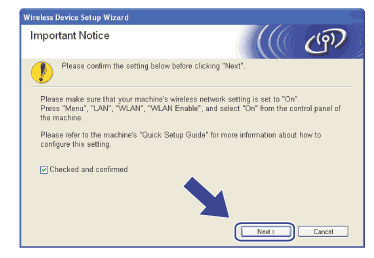 | ||||
| 8 | Choose Manual and then click Next. 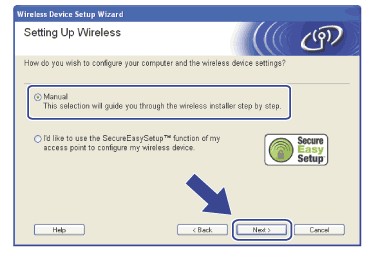 | ||||
| 9 |
Choose I’m not able to connect my device to my access point with a network cable. Click Next.
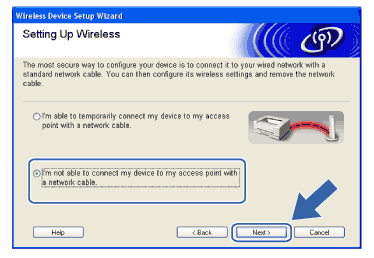 | ||||
| 10 | Choose This computer has wireless capability, and make sure I am using an access point in infrastructure mode is not checked. Click Next. 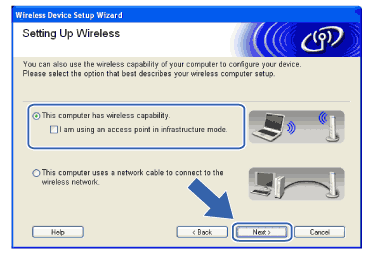 | ||||
| 11 | You need to temporarily change your computer’s wireless settings. Please follow the on-screen instructions. Please make sure you take notes on all the settings such as SSID or channel of your computer. You will need them to return your computer back to its original wireless settings. 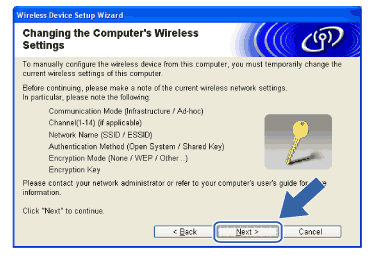 | ||||
| 12 | To communicate with the un-configured wireless machine, temporarily change the wireless settings on your computer to match machine’s default settings shown on this screen. Click Next. 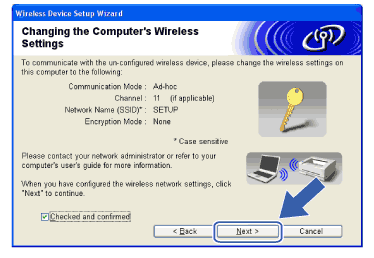 | ||||
| 13 | The following list appears. If the list is blank, check if the machine is powered on, and then click Refresh. Choose the machine you wish to configure, and click Next. 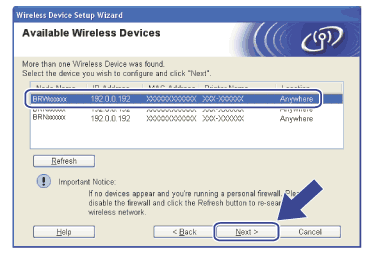 | ||||
| 14 | The wizard will search for wireless networks available from your machine. Choose the Ad-hoc network you wish to associate the machine with, and then click Next. If no Ad-hoc wireless networks are available, you need to create a new wireless network. Go to 17. 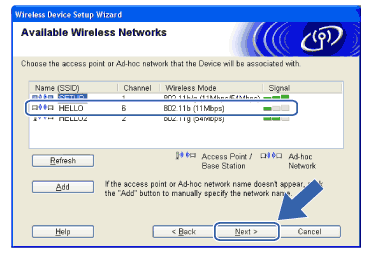
| ||||
| 15 | If your network is not configured for Authentication and Encryption, the following screen will appear. To continue configuration, click OK and go to 18. 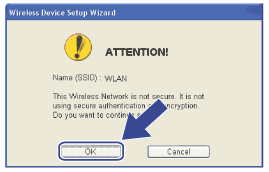 | ||||
| 16 | If your network is configured for Authentication and Encryption, the following screen will appear. When configuring your Brother wireless machine, you must ensure that it is configured to match the Authentication and Encryption settings of your existing wireless network. Choose the Authentication Method and Encryption Mode from the pull-downs in each setting box. Then enter the Network key and click Next. Go to 18. 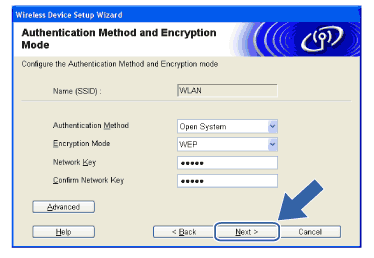 | ||||
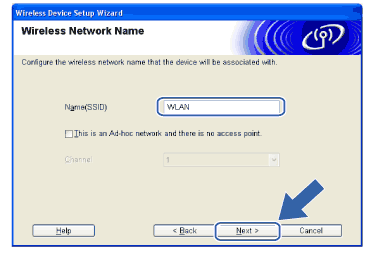
| 17 | Enter a new SSID name and choose the Authentication Method and Encryption Mode from the pull-downs in each setting box. Then enter the Network key and click Next. 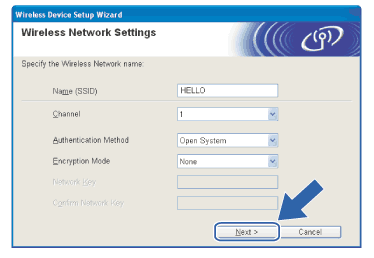 | ||||
| 18 | Click Next. The settings will be sent to your machine. The settings will remain unchanged if you click Cancel. 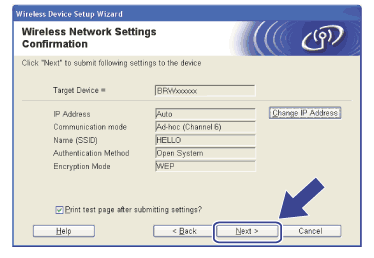 | ||||
| 19 | To communicate with the configured wireless device, you must configure your computer to use same wireless settings. Manually change the wireless settings on your computer to match the machine’s wireless settings shown on this screen. Click Next. (The settings shown on this screen are for example only. Your settings will not be the same.)  | ||||
| 20 | You have completed the wireless setup. Click Finish. If you would like to continue installing drivers and software necessary for operating your device, please choose Install MFL-Pro Suite from CD-ROM menu. 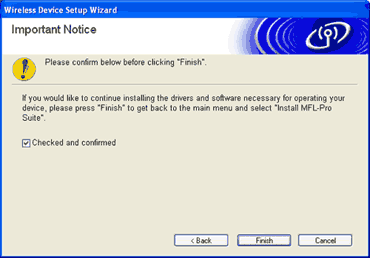 |