Home > Routine Maintenance > Replace Supplies > Replace the Belt Unit


Replace the Belt Unit
Before starting the replacement procedure, see Related Information: Replace Supplies.
Replace the Belt Unit
- Make sure the machine is turned on.
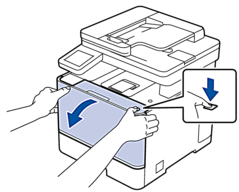
- Press the front cover release button and open the front cover.
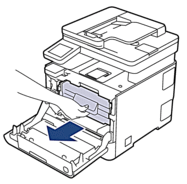
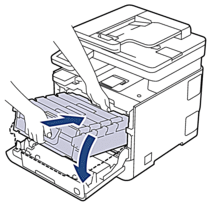
- Hold the drum unit's green labeled handle. Pull the drum unit out of the machine until it stops.
- IMPORTANT
- We recommend placing the toner cartridge and drum unit assembly on a clean, flat surface with disposable paper underneath it in case you accidentally spill or scatter toner.
- Holding the green labeled handles of the drum unit, lift the front of the drum unit and remove it from the machine.
- IMPORTANT
-
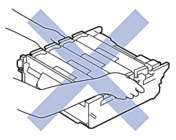
Hold the handles of the drum unit when you carry it. DO NOT hold the sides of the drum unit.
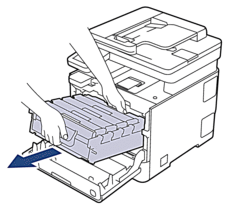
- Hold the handle of the belt unit with both hands and lift the belt unit up, then pull it out.
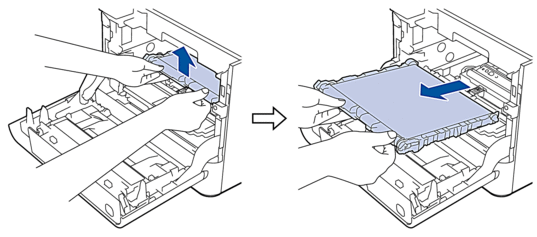
- Unpack the new belt unit and install it in the machine. Make sure the belt unit is level and fits firmly into place.

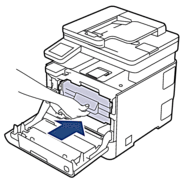
- Gently slide the drum unit into the machine until it stops.
- Using the green labeled handle, push the drum unit back into the machine until it locks in place.
- Close the machine's front cover.
Reset the Belt Unit Counter
- Make sure the machine is turned on.
- Press and hold
 (Toner) for about five seconds.
 - Press [Belt].
- Press [Yes].
Did you find the information you needed?