Home > Troubleshooting > Error and Maintenance Messages


Error and Maintenance Messages
As with any sophisticated office product, errors may occur and supply items may have to be replaced. If this happens, your machine identifies the error or required routine maintenance and shows the appropriate message. The most common error and maintenance messages are shown in the table.
You can correct most errors and perform routine maintenance by yourself. If you need more tips: Visit us at support.brother.com, and click FAQs & Troubleshooting.
HL-L2390DW/DCP-L2550DW/MFC-L2690DW/MFC-L2690DWXL/MFC-L2710DW/MFC-L2717DW
| Error Message | Cause | Action |
|---|
| 2-sided Disabled | The back cover of the machine is not closed completely. | Close the back cover of the machine until it locks in the closed position. |
| The 2-sided tray is not installed completely. | Install the 2-sided tray firmly in the machine. |
| Cartridge Error Put the Black (BK) Toner Cartridge back in. Put the Toner Cartridge back in. | The toner cartridge is not installed correctly. | Pull out the drum unit and toner cartridge assembly, take out the toner cartridge, and put it back in the drum unit again. Put the drum unit and toner cartridge assembly back in the machine. If the problem continues, contact Brother Customer Service or your local Brother dealer. |
| Comm.Error | Poor telephone line quality caused a communication error. | Send the fax again or connect the machine to another telephone line. If the problem continues, contact the telephone company and ask them to check your telephone line. |
| Cover is Open. | The front cover is not completely closed. | Open and then firmly close the front cover of the machine. |
| The fuser cover is not completely closed or paper was jammed in the back of the machine when you turned on the power. | Close the fuser cover located inside the back cover of the machine. |
| The ADF cover is not completely closed. | Close the ADF cover. If the error message remains, press Stop/Exit. |
| Disconnected | The other person or other person's fax machine stopped the call. | Try to send or receive again. If calls are stopped repeatedly and you are using a VoIP (Voice over IP) system, try changing the Compatibility to Basic (for VoIP). |
| Document Jam | The document was not inserted or fed correctly, or the document scanned from the ADF was too long. | Remove the jammed paper from the ADF unit. Clear any debris or scraps of paper from the ADF unit paper path. Press Stop/Exit. |
| DR Mode in Use | The machine is set to Distinctive Ring mode. You cannot change the Receive Mode from Manual to another mode. | Set Distinctive Ring to Off. |
| Drum ! | The corona wire on the drum unit must be cleaned. | Clean the corona wire on the drum unit. 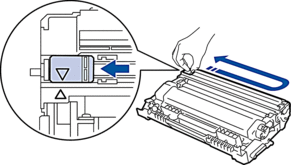 |
| The drum unit or the toner cartridge and drum unit assembly is not installed correctly. | Put the toner cartridge in the drum unit. Then reinstall the toner cartridge and drum unit assembly in the machine. |
| Drum End Soon | The drum unit is near the end of its life. | Order a new drum unit before you get the Replace Drum message. |
| Jam 2-sided | The paper is jammed in the 2-sided paper tray. | Pull the paper tray and the 2-sided tray out completely, open the back cover and then remove all jammed paper. Close the back cover, and put the paper tray and the 2-sided tray firmly back in the machine. |
| Jam Inside | The paper is jammed inside the machine. | Open the front cover and remove the toner cartridge and drum unit assembly. Pull out all jammed paper. Close the front cover. If the error message remains, press Start. |
| Jam Rear | The paper is jammed in the back of the machine. | Open the fuser cover and remove all jammed paper. Close the fuser cover. If the error message remains, press Start. |
| Jam Tray | The paper is jammed in the indicated paper tray. | Pull the paper tray out completely and remove all jammed paper. Put the paper tray firmly back in the machine. |
| Manual Feed | Manual was selected as the paper source in the printer driver, but there is no paper in the manual feed slot. | Place paper in the manual feed slot. |
| No Caller ID | There is no incoming call history. You did not receive calls or you have not subscribed to the Caller ID service from your telephone company. | If you want to use the Caller ID feature, call your telephone company. |
| No Paper | The machine is out of paper, or paper is not loaded correctly in the paper tray. |
|
| No Response/Busy | The number you dialed does not answer or is busy. | Verify the number and try again. |
| No Toner | The toner cartridge or the toner cartridge and drum unit assembly is not installed correctly. | Remove the toner cartridge and drum unit assembly. Remove the toner cartridge from the drum unit, and reinstall the toner cartridge back in the drum unit. Reinstall the toner cartridge and drum unit assembly back in the machine. If the problem continues, replace the toner cartridge with a new one. |
| Out of Memory | The machine's memory is full. | If a fax-sending or copy operation is in process Do one of the following:
Do one of the following:
|
| Print Unable XX | The machine has a mechanical problem. |
|
| Replace Drum | It is time to replace the drum unit. The drum unit counter was not reset when a new drum was installed. | Replace the drum unit. Reset the drum unit counter. |
| Replace Toner | The toner cartridge is at the end of its life. The machine stops all print operations. While memory is available, faxes are stored in the memory. | Replace the toner cartridge with a new one. |
| Scan Unable XX | The machine has a mechanical problem. |
|
| Self-Diagnostic | The temperature of the fuser unit does not rise to a specified temperature within the specified time. |
|
| The fuser unit is too hot. |
| Size Error DX | The paper size specified in the printer driver and the machine's paper size setting are not available for automatic 2-sided printing. | Press Stop/Exit. Choose a paper size supported by 2-sided printing. Paper sizes available for automatic 2-sided printing are Letter, Legal and Folio. |
| The paper in the tray is not the correct size and is not available for automatic 2-sided printing. | Load the correct size of paper in the tray and set the tray for that paper size. Paper sizes available for automatic 2-sided printing are Letter, Legal and Folio. |
| Size Mismatch | The paper in the tray is not the correct size. | Load the correct size of paper in the tray and set the size of paper to the tray. |
| Toner Ended | The toner cartridge is at the end of its life. The machine stops all print operations. | Replace the toner cartridge with a new one. |
| Toner Low | If the LCD displays this message, you can still print. The toner cartridge is near the end of its life. | Order a new toner cartridge now so a replacement toner cartridge is available when the LCD displays Replace Toner. |
| Wait for a while | The temperature of the inside of the machine is too hot. The machine will pause its current print job and go into cooling down mode. During the cooling down mode, you will hear the cooling fan running while the LCD displays Wait for a while. | Wait until the machine has finished cooling down. Make sure all vents on the machine are clear of obstructions. When the machine has cooled down, the machine will resume printing. If the fan is not spinning, disconnect the machine from the power for several minutes, then reconnect it. |

HL-L2395DW/MFC-L2730DW/MFC-L2750DW/MFC-L2750DWXL
| Error Message | Cause | Action |
|---|
| 2-sided Disable | The back cover of the machine is not closed completely. | Close the back cover of the machine until it locks in the closed position. |
| The 2-sided tray is not installed completely. | Install the 2-sided tray firmly in the machine. |
| Access Denied | The function you want to use is restricted by Secure Function Lock 3.0. | Call your administrator to check your Secure Function Lock Settings. |
| Cartridge Error Put the Toner Cartridge back in. | The toner cartridge is not installed correctly. | Pull out the drum unit and toner cartridge assembly, take out the toner cartridge, and put it back in the drum unit again. Put the drum unit and toner cartridge assembly back in the machine. If the problem continues, contact Brother Customer Service or your local Brother dealer. |
| Comm.Error | Poor telephone line quality caused a communication error. | Send the fax again or connect the machine to another telephone line. If the problem continues, contact the telephone company and ask them to check your telephone line. |
| Cooling Down | The temperature of the inside of the machine is too hot. The machine will pause its current print job and go into cooling down mode. During the cooling down mode, you will hear the cooling fan running while the LCD displays Cooling Down. | Wait until the machine has finished cooling down. Make sure all vents on the machine are clear of obstructions. When the machine has cooled down, the machine will resume printing. If the fan is not spinning, disconnect the machine from the power for several minutes, then reconnect it. |
| Cover is Open | The front cover is not completely closed. | Open and then firmly close the front cover of the machine. |
| The fuser cover is not completely closed or paper was jammed in the back of the machine when you turned on the power. | Close the fuser cover located inside the back cover of the machine. |
| The ADF cover is not completely closed. | Close the ADF cover. If the error message remains, press |
| Disconnected | The other person or other person's fax machine stopped the call. | Try to send or receive again. If calls are stopped repeatedly and you are using a VoIP (Voice over IP) system, try changing the Compatibility to Basic (for VoIP). |
| Document Jam | The document was not inserted or fed correctly, or the document scanned from the ADF was too long. | Remove the jammed paper from the ADF unit. Clear any debris or scraps of paper from the ADF unit paper path. Press |
| DR Mode in Use | The machine is set to Distinctive Ring mode. You cannot change the Receive Mode from Manual to another mode. | Set Distinctive Ring to Off. |
| Drum ! | The corona wire on the drum unit must be cleaned. | Clean the corona wire on the drum unit. |
| The drum unit or the toner cartridge and drum unit assembly is not installed correctly. | Put the toner cartridge in the drum unit. Then reinstall the toner cartridge and drum unit assembly in the machine. |
| Drum End Soon | The drum unit is near the end of its life. | Order a new drum unit before you get the Replace Drum message. |
| Jam 2-sided | The paper is jammed in the 2-sided paper tray. | Pull the paper tray and the 2-sided tray out completely, open the back cover and then remove all jammed paper. Close the back cover, and put the paper tray and the 2-sided tray firmly back in the machine. |
| Jam Inside | The paper is jammed inside the machine. | Open the front cover and remove the toner cartridge and drum unit assembly. Pull out the jammed paper. Close the front cover. |
| Jam Rear | The paper is jammed in the back of the machine. | Open the fuser cover and remove all jammed paper. Close the fuser cover. If the error message remains, press Retry. |
| Jam Tray | The paper is jammed in the indicated paper tray. | Pull the paper tray out completely and remove all jammed paper. Put the paper tray firmly back in the machine. |
| Limit Exceeded | The print limit set in Secure Function Lock 3.0 was reached. | Call your administrator to check your Secure Function Lock Settings. |
| Manual Feed | Manual was selected as the paper source in the printer driver, but there is no paper in the manual feed slot. | Place paper in the manual feed slot. |
| No Caller ID | There is no incoming call history. You did not receive calls or you have not subscribed to the Caller ID service from your telephone company. | If you want to use the Caller ID feature, call your telephone company. |
| No Paper | The machine is out of paper, or paper is not loaded correctly in the paper tray. |
|
| No Response/Busy | The number you dialed does not answer or is busy. | Verify the number and try again. |
| No Toner | The toner cartridge or the toner cartridge and drum unit assembly is not installed correctly. | Remove the toner cartridge and drum unit assembly. Remove the toner cartridge from the drum unit, and reinstall the toner cartridge back in the drum unit. Reinstall the toner cartridge and drum unit assembly back in the machine. If the problem continues, replace the toner cartridge with a new one. |
| Out of Memory | The machine's memory is full. | If a fax-sending or copy operation is in process Do one of the following:
Do one of the following:
|
| Print Data Full | The machine’s memory is full. | Press |
| Print Unable XX | The machine has a mechanical problem. |
|
| Replace Drum | It is time to replace the drum unit. | Replace the drum unit. |
| The drum unit counter was not reset when a new drum was installed. | Reset the drum unit counter. |
| Replace Toner | The toner cartridge is at the end of its life. The machine stops all print operations. While memory is available, faxes are stored in the memory. | Replace the toner cartridge with a new one. |
| Scan Unable XX | The machine has a mechanical problem. |
|
| Scan Unable | The document is too long for 2‑sided scanning. | Press |
| Self-Diagnostic | The temperature of the fuser unit does not rise to a specified temperature within the specified time. | Press and hold |
| The fuser unit is too hot. |
| Size Error 2-sided | The paper size specified in the printer driver and the machine's paper size setting are not available for automatic 2-sided printing. | Press Paper sizes available for automatic 2-sided printing are Letter, Legal and Folio. |
| The paper in the tray is not the correct size and is not available for automatic 2-sided printing. | Load the correct size of paper in the tray and set the tray for that paper size. Paper sizes available for automatic 2-sided printing are Letter, Legal and Folio. |
| Size mismatch | The paper in the tray is not the correct size. | Load the correct size of paper in the tray and set the size of paper to the tray. |
| Toner Ended | The toner cartridge is at the end of its life. | Replace the toner cartridge with a new one. |
| Toner Low | If the LCD displays this message, you can still print. The toner cartridge is near the end of its life. | Order a new toner cartridge now so a replacement toner cartridge is available when the LCD displays Replace Toner. |
| Touchscreen Initialisation Failed | The touchscreen was pressed before the power on initialization was completed. | Make sure nothing is touching or resting on the touchscreen. |
| Debris may be stuck between the lower part of the touchscreen and its frame. | Insert a piece of stiff paper between the lower part of the touchscreen and its frame and slide it back and forth to push out the debris. |
