| 1 | Turn on the machine by plugging in the power cord. |
| 2 | Press Menu. Press  or  to choose Network, press OK. Press or to choose Network I/F, press OK. Choose WLAN. |
| 3 | Turn on your computer. Close any applications running before configuration. |
| 4 | Put the supplied CD-ROM into your CD-ROM drive. The opening screen will appear automatically. If the model name screen appears, choose your machine. If the language screen appears, choose your language. |
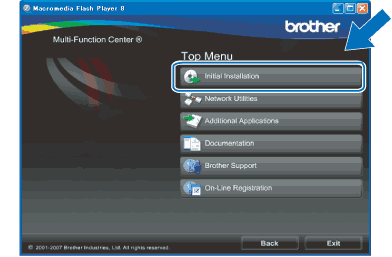
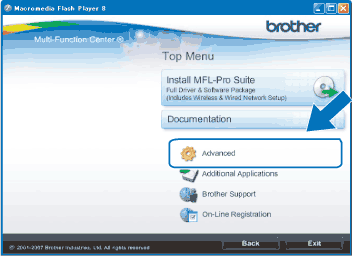
| 5 | The CD-ROM main menu will appear. Click Initial Installation or Advanced.  Note | • | If this window does not appear, use Windows® Explorer to run the start.exe program from the root folder of the Brother CD-ROM. | | • | The screen on your machine may vary depending on your region. |
|
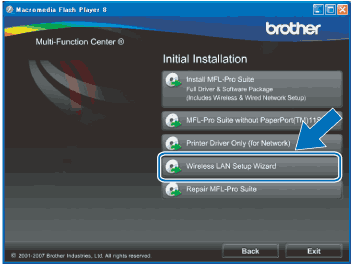
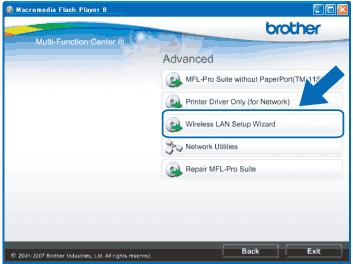
| 6 | Click Wireless LAN Setup Wizard. |
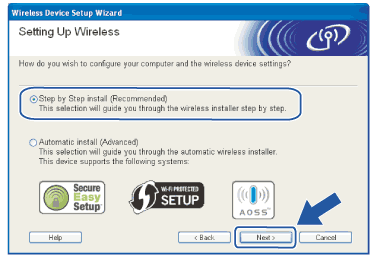
| 7 | Choose Step by Step install (Recommended) and then click Next. |
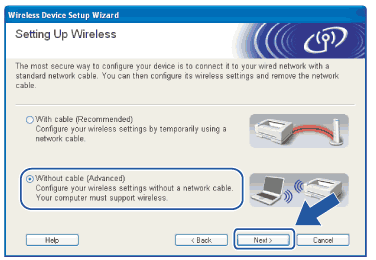
| 8 | Choose Without cable (Advanced) and then click Next. |
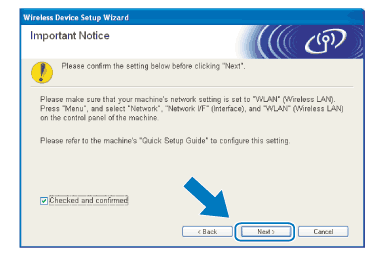
| 9 | Read the Important Notice. Check the box after you confirm the wireless setting is enabled, and then click Next. |
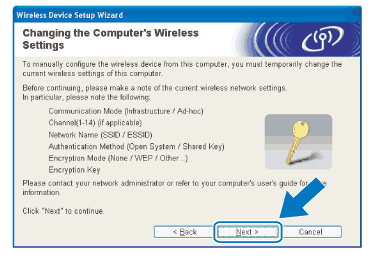
| 10 | You need to temporarily change your PC’s wireless settings. Please follow the on-screen instructions. Please make sure you take notes on all the settings such as SSID or channel of your PC. You will need them to return your PC back to its original wireless settings. |
| 11 | To communicate with the un-configured wireless machine, temporarily change the wireless settings on your PC to match machine’s default settings shown on this screen. Click Next. Note | • | If a message to restart your PC appears after the wireless settings have been changed, restart your PC and then go back to step 4 and continue with the install skipping steps 9, 10 and 11. | | • | For Windows Vista® users: You can temporarily change the wireless settings on your computer, following the steps below: | (1) | Click  and then Control Panel. | | (2) | Click Network and Internet and then Network and Sharing Center icon. | | (3) | Click Connect to a network. | | (4) | You can see the SSID of the wireless Brother machine in the list. Choose SETUP and click Connect. | | (5) | Click Connect Anyway and then Close. | | (6) | Click View status of Wireless Network Connection (SETUP). | | (7) | Click Details... and check the Network Connection Details. It may take a few minutes to change from 0.0.0.0 to 169.254.x.x IP address to be shown on screen (where x.x. are numbers between 1 and 254). |
| | • | For Windows® XP SP2 users you can temporarily change the wireless settings on your PC, following the steps below: | (1) | Click Start and then Control Panel. | | (2) | Click Network Connections icon. | | (3) | Choose and right click Wireless Network Connection. Click View Available Wireless Networks. | | (4) | You can see the Brother wireless machine in the list. Choose SETUP and click Connect. | | (5) | Check the Wireless Network Connection status. It may take a few minutes to change from 0.0.0.0. to 169.254.x.x IP address to be shown on screen (where x.x. are numbers between 1 and 254). |
|
|
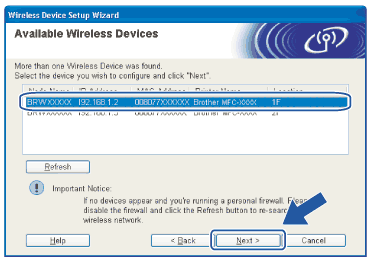
| 12 | Choose the machine you wish to configure, and click Next. If the list is blank, check if the machine is powered on, and then click Refresh. Note | | The default Node name is “BRWxxxxxxxxxxxx” (where “xxxxxxxxxxxx” is your Ethernet address). |
|
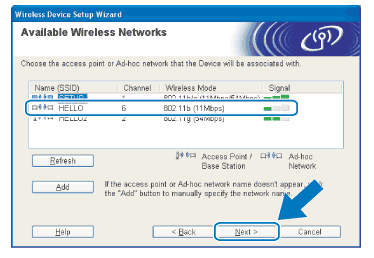
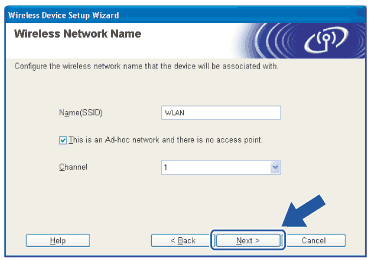
| 13 | The wizard will search for wireless networks available from your machine. Choose the Ad-hoc network you wish to associate the machine with, and then click Next. Note | • | If the list is blank, check if the machine is within range for wireless communication. Then, click Refresh. | | • | If your target Ad-hoc network does not appear on the list, you can manually add it by clicking the Add button. Check This is an Ad-hoc network and there is no access point., and then enter the Name (SSID) and the Channel number, and then click Next. |
|
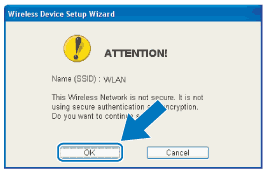
| 14 | If your network is not configured for Authentication and Encryption, the following screen will appear. To continue configuration, click OK and go to 16. |
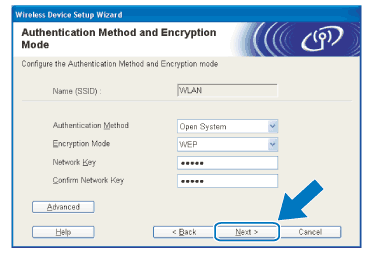
| 15 | If your network is configured for Authentication and Encryption, the following screen will appear. When configuring your Brother wireless machine, you must ensure that it is configured to match the Authentication and Encryption settings of your existing wireless network. Choose the Authentication Method and Encryption Mode from the pull-downs in each setting box. Then enter the Network Key and click Next. Note | • | If you want to setup or configure additional WEP key indexes other than WEP key1, click Advanced. | | • | If you do not know the Authentication or Encryption settings for your network, contact your network administrator. | | • | If your wireless settings fail, an error message will appear during the installation of MFL-Pro Suite and the installation will be terminated. If you encounter this failure, go to step 1 and setup the wireless connection again. | | • | If you are using WEP and the LCD displayed ‘Connected’ but your machine is not found, make sure you entered the WEP key correctly. The WEP key is case sensitive. |
|
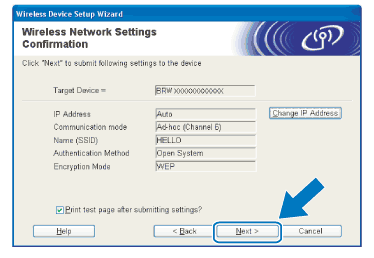
| 16 | Click Next. The settings will be sent to your machine. The settings will remain unchanged if you click Cancel. Note | | If you want to manually enter the IP address settings of your machine, click Change IP Address and enter the necessary IP address settings for your network. |
|
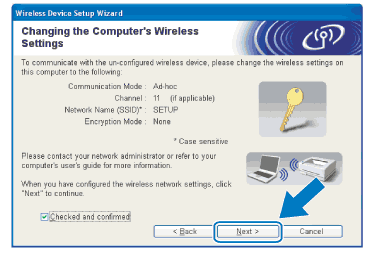
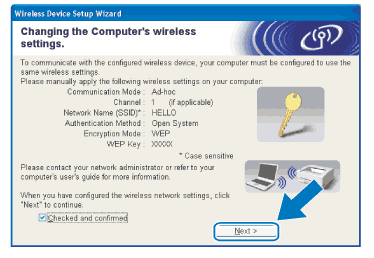
| 17 | To communicate with the configured wireless device, you must configure your computer to use the same wireless settings. Manually change the wireless settings on your computer to match the machine’s wireless settings shown on this screen. Check the box after you confirm these settings, and then click Next. (The settings shown on this screen are for example only. Your settings will not be the same.) |
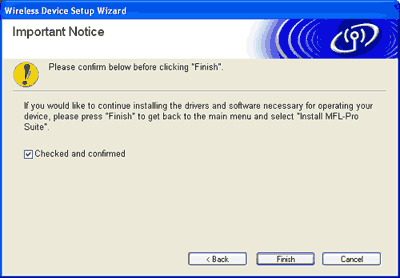
| 18 | Click Finish. |