Home > Troubleshooting > Printer Jam or Paper Jam > Paper is Jammed in the Back of the Machine (Jam Rear)


Paper is Jammed in the Back of the Machine (Jam Rear)
If the LCD displays [Jam Rear], follow these steps:
MFC-T780DW

The illustrations in this User's Guide may not match your model exactly, but the steps are the same for each model.
- Unplug the machine from the AC power outlet.
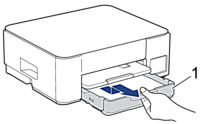
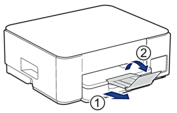
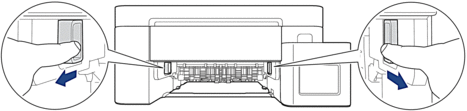
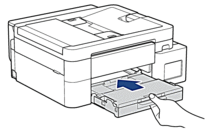
- Pull the paper tray (1) completely out of the machine as shown by the arrow.
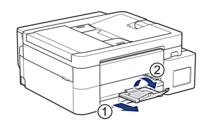
- Lift the paper support (1), and then pull it at an angle completely out of the machine as shown by the arrow.

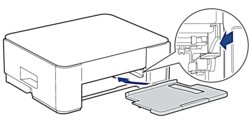
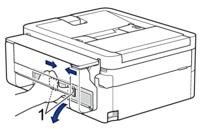
- Push down on the Jam Clear Cover (1) on the back of the machine, and then open it (2).
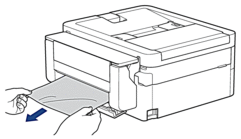
- Slowly pull the jammed paper out of the machine.
- Close the Jam Clear Cover. Make sure the cover is closed completely.
- Put the paper support firmly back in the machine. Make sure you fit the paper support into the channels.
- Push the paper tray firmly back in the machine.
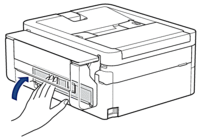
- Pull out the paper support (1) until it locks into place, and then unfold the paper support flap (2).
- Reconnect the power cord.
MFC-T930DW/MFC-T935DW/MFC-T980DW
- Unplug the machine from the AC power outlet.
- IMPORTANT
-
Before you unplug the machine from the power source, you can transfer your faxes that are stored in the machine's memory to your computer or another fax machine so you will not lose any important messages.
- Pull the paper tray (1) completely out of the machine as shown by the arrow.
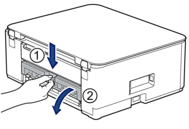
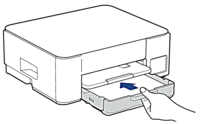
- Pull the two green levers inside the machine to release the jammed paper.
 Depending on the paper size, it is easier to remove the jammed paper from the front of the machine rather than from the back of the machine.
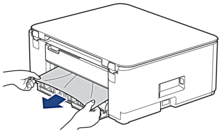
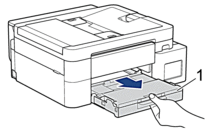
 - Squeeze both levers (1), and then open the Jam Clear Cover at the back of the machine.
- Slowly pull the jammed paper out of the machine.
- Close the Jam Clear Cover. Make sure the cover is closed completely.
- Slowly push the paper tray completely into the machine.
- Pull out the paper support (1) until it locks into place, and then unfold the paper support flap (2).
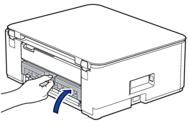
- Reconnect the power cord.
Did you find the information you needed?