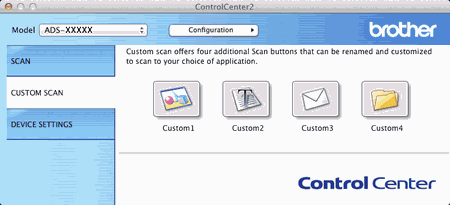
Register the Favorite Scan Settings Using ControlCenter2 (CUSTOM SCAN) (Macintosh)

There are four buttons which you can configure to fit your scanning needs.
To customize a button, click the button while holding down the Control key, and the configuration window appears. There are four scan functions: Scan to Image, Scan to OCR, Scan to E-mail and Scan to File.
Scan to Image
Lets you scan a page directly into any image viewer/editor software. You can choose any image editor application on your computer as a destination.
Scan to OCR
Converts scanned documents into editable text files. You can choose the destination application for the editable text. You must install Presto! PageManager on your computer. For installation information see Scan Using Presto! PageManager or TWAIN Applications (Macintosh).
Scan to E-mail
Attaches the scanned images to an E-mail message. You can also choose the file attachment type and create a quick send list of E-mail addresses chosen from your E-mail address book.
Scan to File
Lets you save a scanned image to any folder on a local or network hard disk. You can also choose the file type to be used.
Screen

User-defined button

To customize a button, click the button while holding down the Control key, and the configuration window appears. Follow these guidelines for button configuration.

Scan to Image/OCR/E-mail/File

General tab
Enter a name in Name for Custom (up to 30 characters) to create the button name.
Choose the type of scan from the Scan Action selections.
Screen
Settings tab (Scan to Image/OCR/ E-mail)
Choose the Target Application, File Type, Resolution, Scan Type, Document Size, 2-sided Scanning, Brightness and Contrast settings.
Note Note
The Scan to E-mail feature does not support Webmail services. Use the Scan to Image or Scan to File feature to scan a document or picture, and then attach the file of the scanned data to an E-mail message.
Screen
If you choose Secure PDF (*.pdf) from the File Type list, the Set PDF Password dialog box appears. Enter your password in the Password and Re-type Password box and then click OK.
Note Note
Secure PDF (*.pdf) is available for Scan to Image, Scan to E-mail and Scan to File.
Settings tab (Scan to FIle)
Choose the file format from the File Type pop-up menu. Save the file to the default folder or choose your preferred folder by clicking the Browse button.
Choose the Resolution, Scan Type, Document Size, 2-sided Scanning, Brightness and Contrast settings.
If you want to specify the destination of the scanned image, check the Show Save As window check box.
Screen