Scan Plastic Cards

1
Load a plastic card (see Loading Business Cards and Plastic Cards).
Note Note
Load only one plastic card at a time.
2
Click the Graphic (ControlCenter2) icon in the menu bar and then select Open.
The ControlCenter2 window will appear.
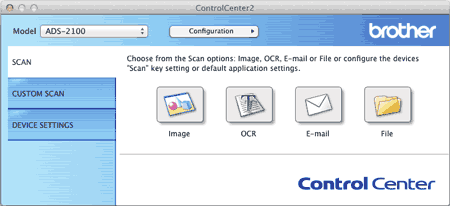
Screen
Note Note
If the Graphic (ControlCenter2) icon is not displayed in the menu bar, double-click the ControlCenter icon.
The ControlCenter icon is in Macintosh HD/Applications/Brother.
The Graphic (ControlCenter2) icon will appear in the menu bar.
3
Click the button in the SCAN tab while holding down the Control key for the Scan-to action you want to change (Image, OCR, E-mail, or File). The settings dialog box will appear (the example below uses Image).
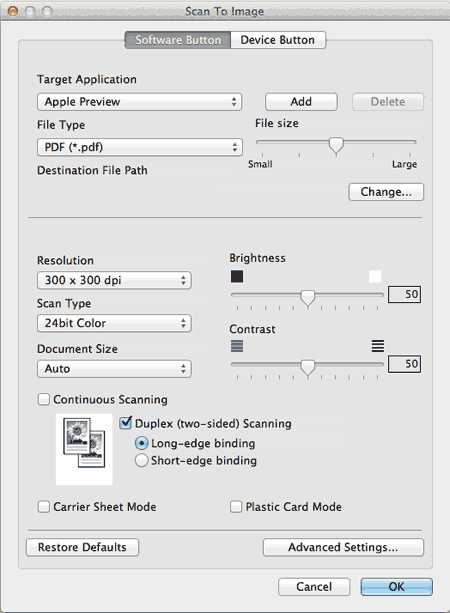
Screen
4
Check the Plastic Card Mode check box.
5
Change other settings if needed (see Change Scan Settings).
6
Click the button you selected in step 3.
The message dialog appears. Click the Start Scanning button.
The machine starts scanning.
Important Important
If a feed error should occur while scanning, open the front cover and carefully remove the plastic card in order to prevent damage to the card.
Note Note
Check the Don’t show me again. check box to not show the message dialog again.
Plastic Card Mode automatically uses these settings:
Resolution: 600 x 600 dpi
Document Size: 2 in 1 (Business Card)
Duplex(two-sided) Scanning: On (Short-edge binding)
Auto Deskew: Off
Multifeed Detection: Off
Automatic Image Rotation: Off
Original Layout
Scan Result
Graphic
Graphic