Scan Two Documents and Combine Them as a Single Page (2 in 1)
1
Load your document.
2
Click the (ControlCenter4) icon in the task tray and then select Open from the menu.
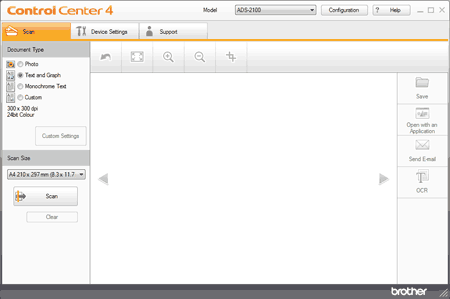
The ControlCenter4 window will appear.
Note
You can also start ControlCenter4 by doing one of the following:
•
(Windows® XP, Windows Vista®)
Double-click the (ControlCenter4) icon in the task tray.
•
Click ControlCenter4 located in Start/All Programs/Brother/ADS-XXXX (where XXXX is your model name).
3
Select the Scan tab.
4
Do one of the following:
•
Select Photo, Text and Graph, or Monochrome Text in the Document Type option for the type of document you want to scan.
•
Photo: 600 × 600 dpi, 24bit Colour
•
Text and Graph: 300 × 300 dpi, 24bit Colour
•
Monochrome Text: 200 × 200 dpi, Black and White
•
Select Custom in the Document Type option and then configure the scan settings in detail. See Custom Scan Settings.
Note
To do 2 in 1 scanning, uncheck the Automatic Image Rotation check box in the Advanced Settings dialog box.
5
Select 2 in 1 from the Scan Size drop-down list.
6
Click the (Scan) button. The machine starts scanning, and then the Scanning Completed dialog box will appear and display the number of scanned pages. The scanned image appears in the image viewer.
Note
If the Scanning Completed dialog box does not appear and you want to display the number of scanned pages, check the Display Scanning Results check box.
7
Do one of the following:
•
Click the (Save) button to save the scanned data. See Save Scanned Data.
•
Click the (Open with an Application) button to open the scanned data in another application. See Open with an Application.
•
Click the (Send E-mail) button to attach the scanned data to an E-mail. See Send E-mail.