| 1 | Load your document. |
| 2 | Click the The ControlCenter2 window will appear. 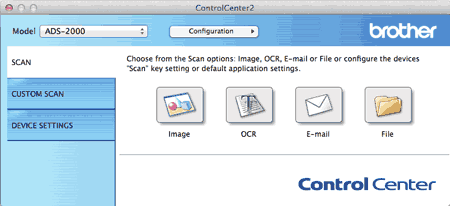 |
| 3 | While holding down the Control key click the button in the SCAN tab for the Scan-to action you want to change (Image, OCR, E-mail, or File). The settings dialog box will appear (the example below uses Image).  |
| 4 | Select Long Paper (Normal Width) or Long Paper (Narrow Width) from the Document Size drop-down list. |
| 5 | Change other settings if needed (see Change Scan Settings). |
| 6 | Click the button you selected in step 3. The message dialog appears. Click the Start Scanning button. The machine starts scanning. |