2. Meeting with OmniJoin
General
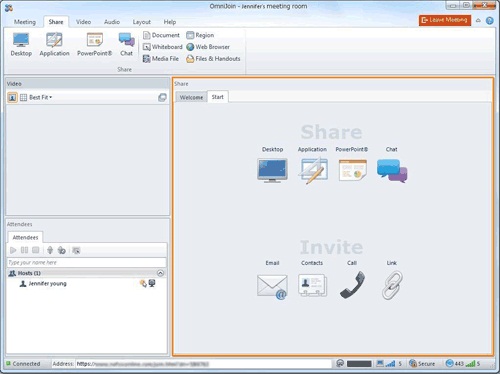
This section will help you get familiar with the OmniJoin meeting interface.
The Start Page
Overview...
Upon entering an OmniJoin meeting as a
[Host] or
[Presenter], you are shown a "Start" page. This can be really useful to help you invite other people, and to start sharing applications and documents.
Step-by-Step...
Invite Attendees to a Meeting
Overview...
As a Host in an OmniJoin meeting, you can invite other people to the meeting via email or by using the OmniJoin Contacts. You can even choose an email message from your customized message templates and make changes to the invite prior to sending it. (Depending on the type of the license used, you may not be able to customize Meeting invitation email.)
Step-by-Step...
Invite by email
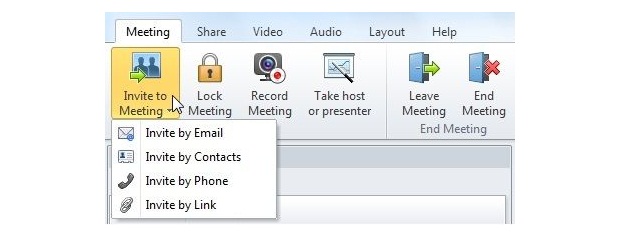
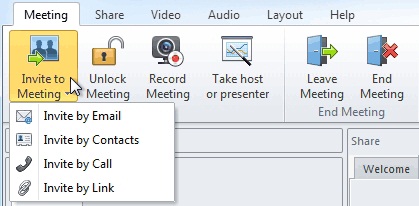
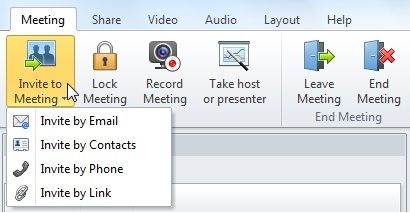
2. Select the Meeting tab
3. Select Invite to Meeting
4. Select Invite by Email
5. Email application will start, and a new email window will open that contains a meeting invitation
6. Enter the Email addresses of attendees invited to the meeting
7. Send the invitation email
 Did you know? You can customize and create your own invitations via the OmniJoin My Account - instead of using the standard "Meeting invitation" email template. (Depending on the type of the license used, you may not be able to customize Meeting invitation email.) Did you know? You can customize and create your own invitations via the OmniJoin My Account - instead of using the standard "Meeting invitation" email template. (Depending on the type of the license used, you may not be able to customize Meeting invitation email.) |
Invite by contacts
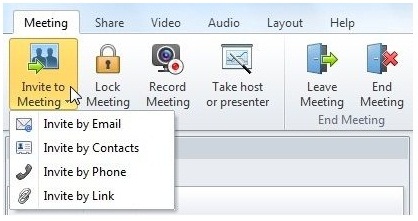
2. Select the Meeting tab
3. Select Invite to Meeting
4. Select Invite by Contacts
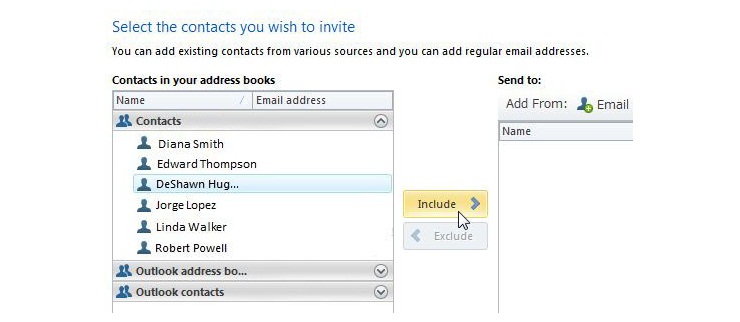
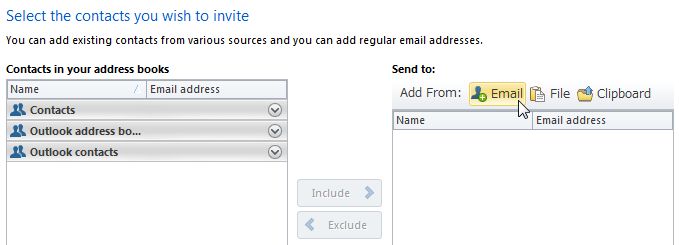
5. The invitation window will open, providing you with a list of your OmniJoin Contacts (if any) and email contacts (if you have any listed in your email program, such as Microsoft® Outlook®)
6. Click on a header (e.g. "Contacts") to display a list of contacts from your address book
7. Select a contact and click Include
8. Repeat step 7 to invite additional contacts to the meeting. You will gradually form a list of contacts you want to invite in the right-hand pane.
Did you know? You can send invitations to anyone who isn't an Outlook® or OmniJoin contacts by clicking on the "Email" button. |
9. Click Send Now
Did you know? You can edit the invitation email that will be sent, by clicking "Edit and Send" instead. |
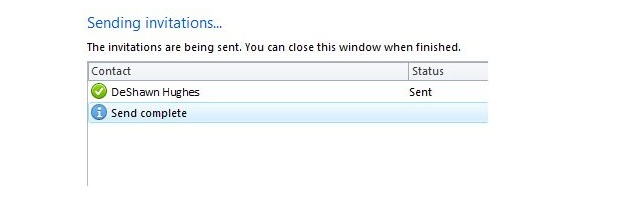
10. A new window will open, informing you that the invitations are being sent...
11. Click Close when the invitations have been sent
Invite by Call
This menu is displayed when joining a meeting that uses OmniJoin Integrated Audio with Add dial-out feature for attendees option selected.
2. Select the Meeting tab
3. Select Invite to Meeting
4. Select Invite by Call
5. The following window will open Select the country (or the closest location) and enter the phone number of the attendee to invite
6. Click Dial to call the attendee
Invite by link
2. Select the Meeting tab
3. Select Invite to Meeting
4. Select Invite by Link
5. Information window will open, and that informs you the URL including meeting ID
6. Click Copy link
7. Invite other people using the URL (e.g. copy and paste the URL into the message body of email)
8. Click Close when the invitations have been done
Alternatively…You can invite other people to the meeting by clicking each icon on the [Start page] as well. |
Did you know?You can also copy the link displayed in the address bar at the bottom of the screen. |
Join a Meeting
Overview...
If you have been invited to join an OmniJoin meeting, there are two easy ways you can join.
Step-by-Step...
Received an invitation balloon...
If you received an invitation balloon (example below) towards the bottom-right corner of your screen (near the notification area), you can choose to either accept or decline the invitation - easy!
1. Cick Accept to join the meeting
1 An optional license is required in order to use this feature.
Received an email...
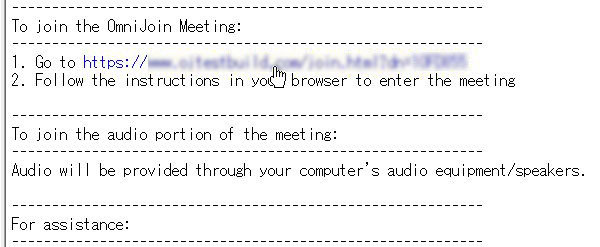
If you have received an email invitation, you can click on the hyperlink (web address) to join the meeting.
1. Click on the hyperlink (web address) in the email
2. This will open your web browser and will attempt to connect to the meeting
1 An optional license is required in order to use this feature.
Join a Meeting That Uses OmniJoin Integrated Audio
Overview...
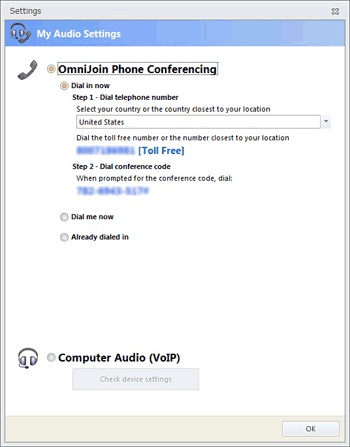
If OmniJoin Integrated Audio 1 is enabled, you can join a meeting that uses OmniJoin Phone Conferencing, in addition to VoIP, and change the audio mode to suit the conditions. If the network environment is not ideal, you can improve the audio quality by using OmniJoin Phone Conferencing.
When entering a meeting room, you are required to choose whether to use the computer's audio system (microphone and speakers) or OmniJoin Phone Conferencing.
Follow the screen instructions below, depending on which audio type you want to use. You can change this at any point during the meeting.
1 You may need an optional license to use this feature.
NOTE: In a meeting that uses only OmniJoin Phone Conferencing, a host is called the "Leader". To join the meeting as a Leader you need to enter a PIN code. For more information, see Method 1: Dial in now. |
Step-by-Step...
Join using a telephone
1. Join an OmniJoin meeting
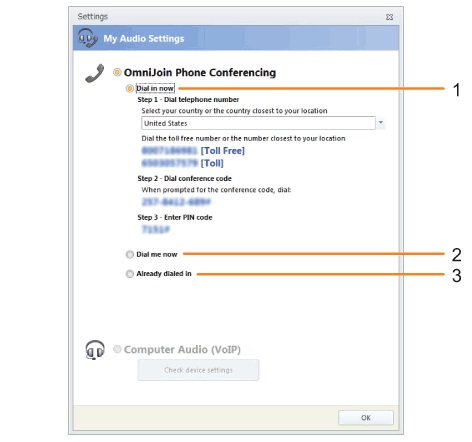
2. Select OmniJoin Phone Conferencing and the option you want to use
(1)Dial in now(See
Method 1.)
The phone number to join the meeting is displayed.
(2)Dial me now(See
Method 2.)
When the Dial-Out function is enabled, you will be called from the meeting.
(3)Already dialed in(See
Method 3.)
Select this option if you are already dialed in. (For example, when you have already dialed the number indicated in the invitation E-mail
1.)
1 Only for meeting that uses OmjniJoin Integrated Audio.
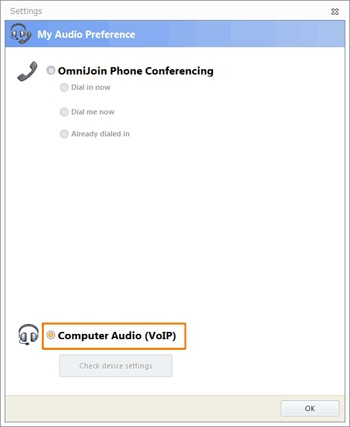
Join using your computer's audio system
1. Join an OmniJoin meeting
2. Select Computer Audio (VoIP)
Join using a telephone (Attendee makes a call to join a meeting)
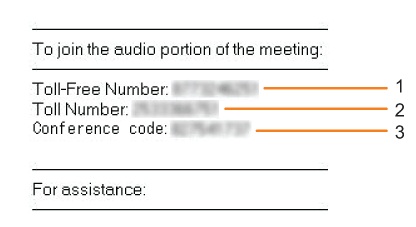
1. The invitation E-mail contains the following information
(1)Phone number for Toll-Free calls
(2)Phone number for Toll calls
(3)Conference code
2. Call the phone number and set the conference code
Use OmniJoin Phone Conferencing
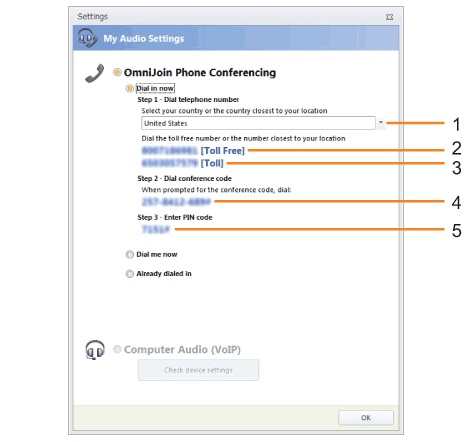
When using OmniJoin Phone Conferencing (when 1, 2 or 3 is selected in the preceding window), there are 2 methods to join a meeting as below. Carry out the settings following the displayed window.
Make a call to join the meeting.
NOTE: Depending on the fee type and settings, the displayed information is different. |
1. Select your country or the closest country and call the toll-free number or the phone number that is the closest to your location
2. Dial the Conference code displayed here
3. Enter the PIN code (when you join OmniJoin Phone Conferencing)
(1)Country or the closest location
(2)Phone number for Toll calls
(3)Phone number for Toll-Free calls
(4)Conference code
(5)PIN code (Displayed only to the Host, when only OmniJoin Phone Conference is selected in the audio settings)
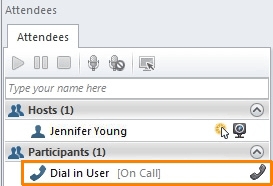
NOTE: When "Dial in now" call is set up, your name stays in the list and "Dial in User" appears in the list. |
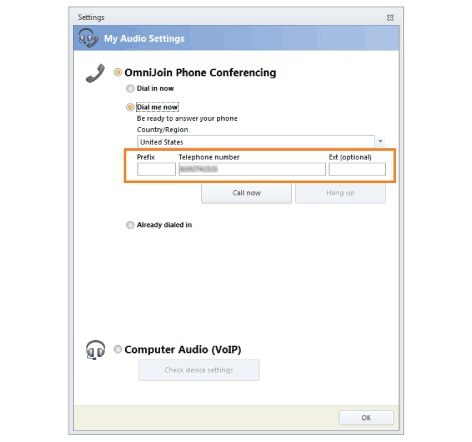
A call is made to attendees from the meeting.
1. Select your country or region
2. Enter your phone number
3. Click Call now to call your phone
NOTE: Click Hang Up when you want to leave the meeting by phone. |
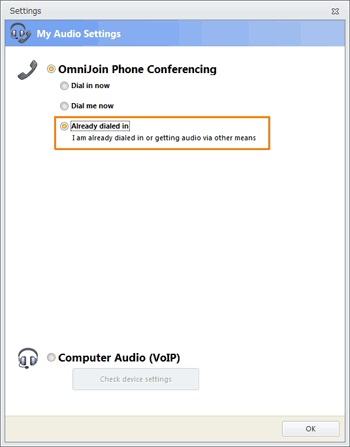
■ Method 3: Already dialed in
When you have already dialed in, click OK.
Control the audio using a phone...
Use the telephone functions to control the audio.
■ To mute/unmute your microphone: *6
■ To unmute your microphone: #6 (the microphone will not mute even if #6 is entered again)
■ To connect to customer support: #0
■ (Leader only) To All mute/All unmute attendees' microphones: *5
■ (Leader only) To All unmute attendees' microphones: #5 (the microphone will not mute even if #5 is entered again)
Did you know? Mute/unmute operations can be performed from the [Audio tab] of OmniJoin meeting. |
End the OmniJoin Phone Conferencing...
To end a meeting, select
[End Meeting] in the
Meeting tab even if you joined the meeting using OmniJoin Phone Conferencing.
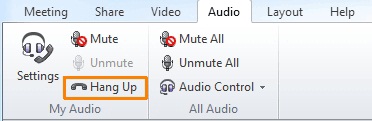
To end a call, hang up your phone or click Hang Up in the ribbon tab.
Leave a Meeting
Overview...
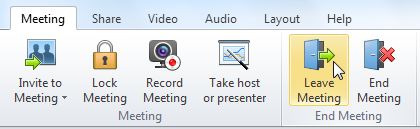
Use the "Leave Meeting" button if you want to leave your meeting room running. Even after you leave, other attendees can continue the meeting. You can easily leave a meeting with just a few clicks...
Step-by-Step...
1. While in an OmniJoin meeting...
2. Select the Meeting tab
3. Select Leave Meeting
Alternatively...You can also leave the meeting by simply clicking Leave Meeting on the top-right corner, and then clicking Leave Meeting. |
Leave the meeting that uses OmniJoin Integrated Audio when you joined using a phone
Click Hang Up to end your call when you have joined the meeting with OmniJoin Phone Conferencing option.
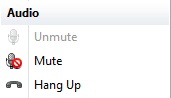
To end the call for any of the other attendees individually, right-click on an attendee's displayed name and click Hang Up (Hosts only).
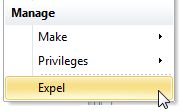
End a Meeting
Overview...
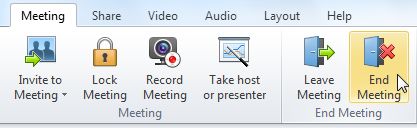
If you would like to delete or end a meeting, you can do so by clicking "End Meeting" in the Meeting tab. This will permanently delete the meeting and will expel any attendees who are currently in it. This is a very safe and secure way to ensure the meeting ends when you leave.
Step-by-Step...
1. While in an OmniJoin meeting (as a [Host])...
2. Select the Meeting tab
3. Select End Meeting
4. Click End Meeting to confirm deletion
Alternatively...You can also end the meeting by clicking Leave Meeting on the top-right corner, and then clicking End Meeting. |
Lock & Unlock a Meeting
Overview...
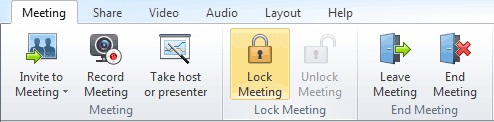
If you would like to lock or unlock a meeting, you can do so by using the Meeting tab and clicking the "Lock Meeting " or "Unlock Meeting" icons. Clicking the "Lock Meeting" icon will stop any attendees from being able to join you in the meeting and will be held in a "waiting room" if they try to join. Clicking the "Unlock Meeting" will let any waiting attendees join the meeting.
Step-by-Step...
Lock the meeting...
Locking a meeting will stop from attendees being able to join your meeting. This is useful if you want to prepare the meeting in advance of the scheduled start time (such as sharing documents or PowerPoint® files before-hand) or if you want to stop "late-comers" from entering once the meeting is under-way.
1. While in an OmniJoin meeting (as a [Host])...
2. Select the Meeting tab
3. Select Lock Meeting
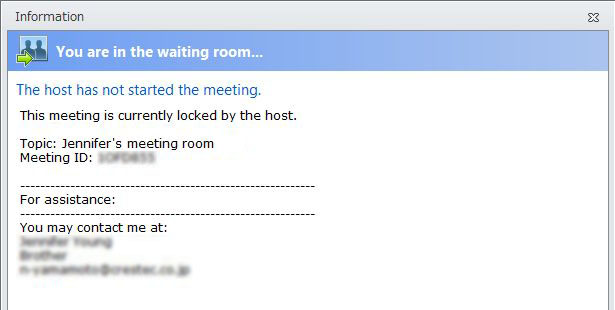
NOTE: Once you lock the meeting, anyone trying to join will be presented with a message (example below) and will not be able to join until you unlock the meeting. |
Unlock the meeting...
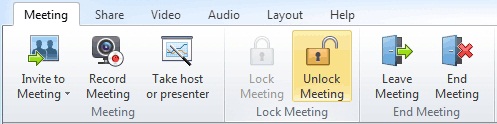
As standard,
[scheduled meetings] will be locked before the specified start time. Any locked meetings can be easily opened again (allowing attendees to join) by clicking Unlock Meeting in the Meeting tab.
1. While in an OmniJoin meeting (as a [Host])...
2. Select the Meeting tab
3. Select Unlock Meeting
Settings
Within a OmniJoin Meeting, you can access local settings to configure and customize your OmniJoin
experience. You can adjust your audio and video settings, language used, even the color scheme.
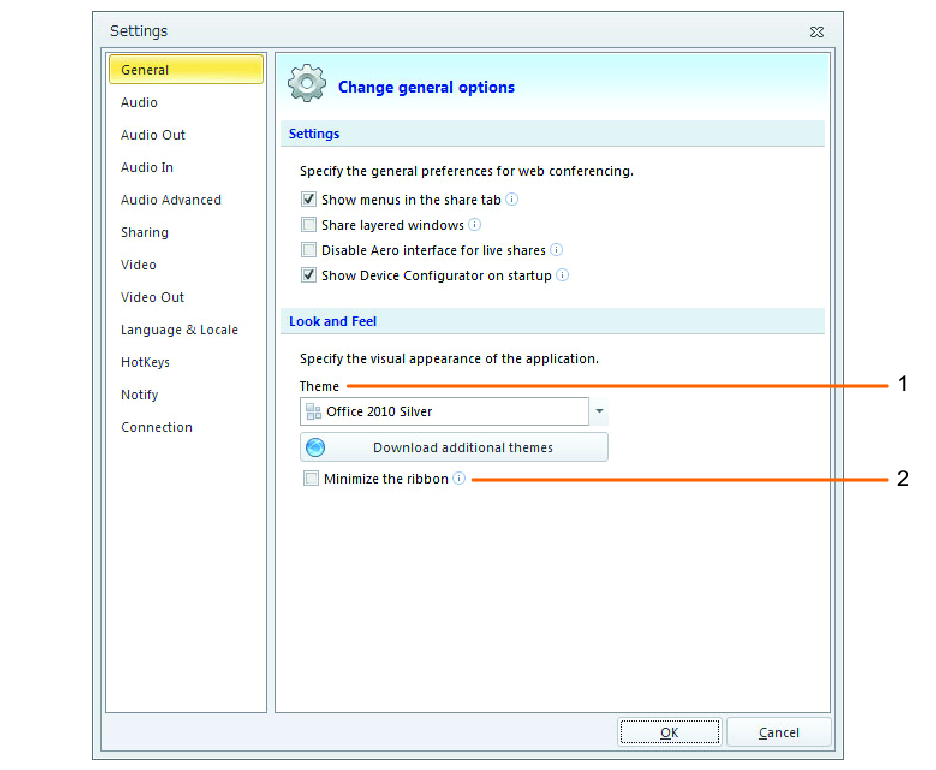
General Settings
Lets you to customize the look and feel of OmniJoin and provides you with some additional configuration options.
The following article will guide you through how to access and change the general settings of a meeting.
1. While in an OmniJoin meeting...
2. Select the Help tab
3. Select Settings
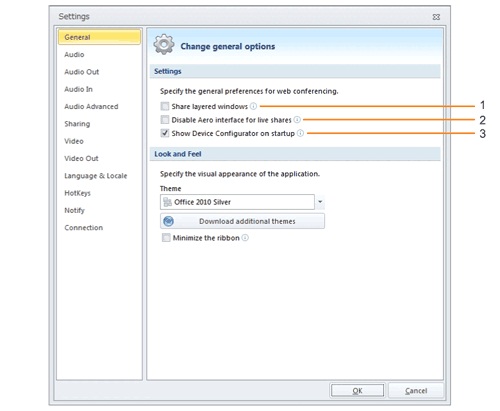
4. Select General
General...
(1)Share layered windows
Ticking this box determines whether "layered windows" (such as shape and special effect windows) are also shared along with the primary application window.
(2)Disable Aero interface for live shares
When selected, this will disable the Aero interface used in Windows. This can often help improve performance on older computers when sharing the desktop, live applications or web browsers.
(3)Show Device Configurator on startup
Whether or not you want to show the device configurator on startup. This configurator helps you setup your audio and video devices.
Look and Feel...
(1)Theme
You can customize the appearance of OmniJoin by selecting a color theme.
(2)Minimize the ribbon
This setting reduces the size of the ribbon area that runs along the top of the meeting. You can continue to access all the buttons and icons by clicking on the tabs at the top.
Audio
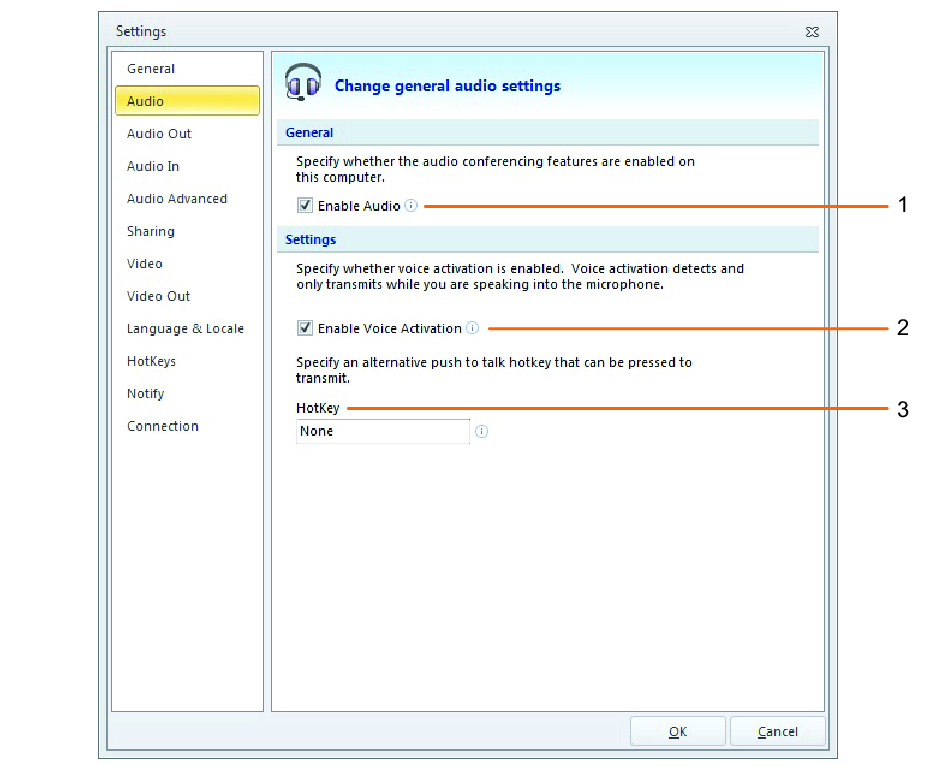
Enable or disable audio for your own OmniJoin Meeting and choose between an open microphone (voice activation) or Push-To-Talk (PTT) for transmitting your voice.
The following article will guide you through how to access and change the Audio settings.
1. While in an OmniJoin meeting...
2. Select the Help tab
3. Select Settings
4. Select Audio
(1)Enable Audio
Un-ticking this box will disable the use of all audio features in OmniJoin.
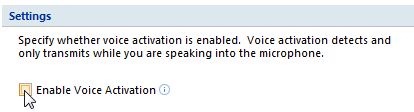
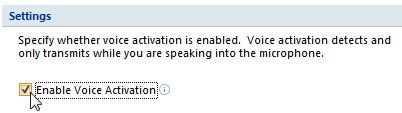
(2)Enable Voice Activation
Un-ticking this setting will mean that you will need to assign a "HotKey" that will become your "Push- To-Talk" button. This works like a walkie talkie or CB radio, in that your voice will only be sent to the conference participants while the key is held down.
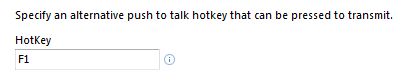
(3)HotKey
lf "Enable Voice Activation" is un-ticked, you can assign a HotKey to use in order to speak to other attendees in the meeting.
Click into the hotkey box and press a suitable key to assign.
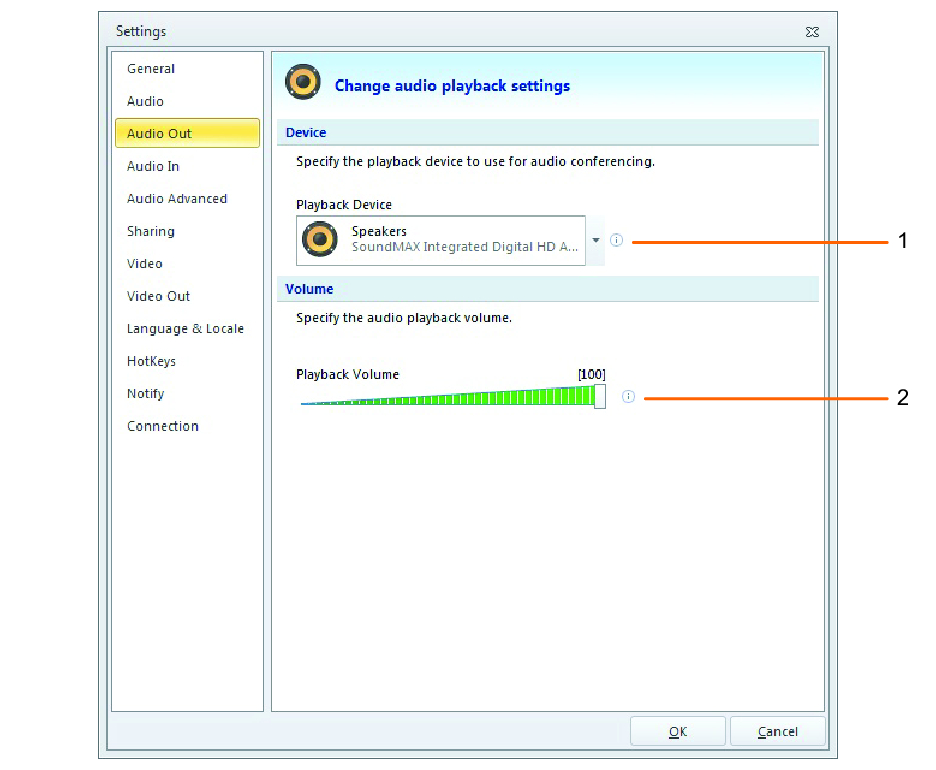
Audio Out Settings
Specify your audio playback device (USB headset or speaker phone) and volume level to suit your needs.
1. While in an OmniJoin meeting...
2. Select the Help tab
3. Select Settings
4. Select Audio Out
(1)Playback Device
Select your preferred playback device for your OmniJoin meetings.
(2)Playback Volume
Use the slider to adjust the volume of your OmniJoin meetings.
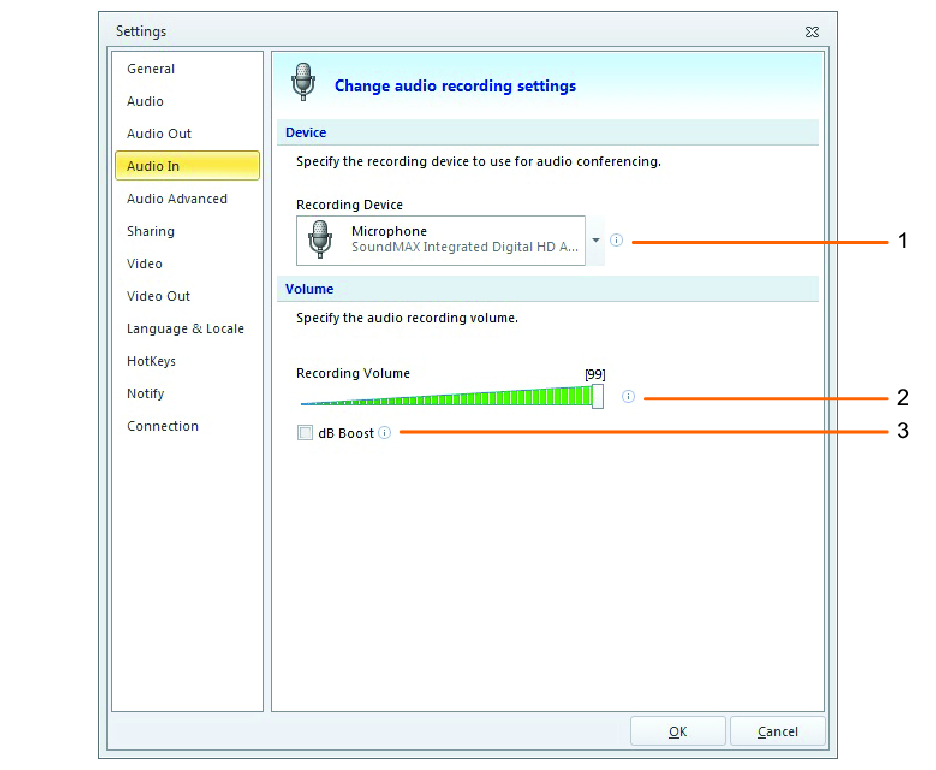
Audio In Settings
Choose your recording audio device (USB headset or speaker phone) and adjust the volume level (sensitivity) to suit your needs.
1. While in an OmniJoin meeting...
2. Select the Help tab
3. Select Settings
4. Select Audio In
(1)Recording Device
Select your preferred recording device for your OmniJoin meetings. This is normally your speaker phone or USB headset.
(2)Recording Volume
Use the slider to adjust the microphone volume of your OmniJoin meetings.
(3)dB Boost
Depending on the type of speaker phone, you may also have the option to tick "dB Boost". This can help amplify your microphone volume, making your voice louder.
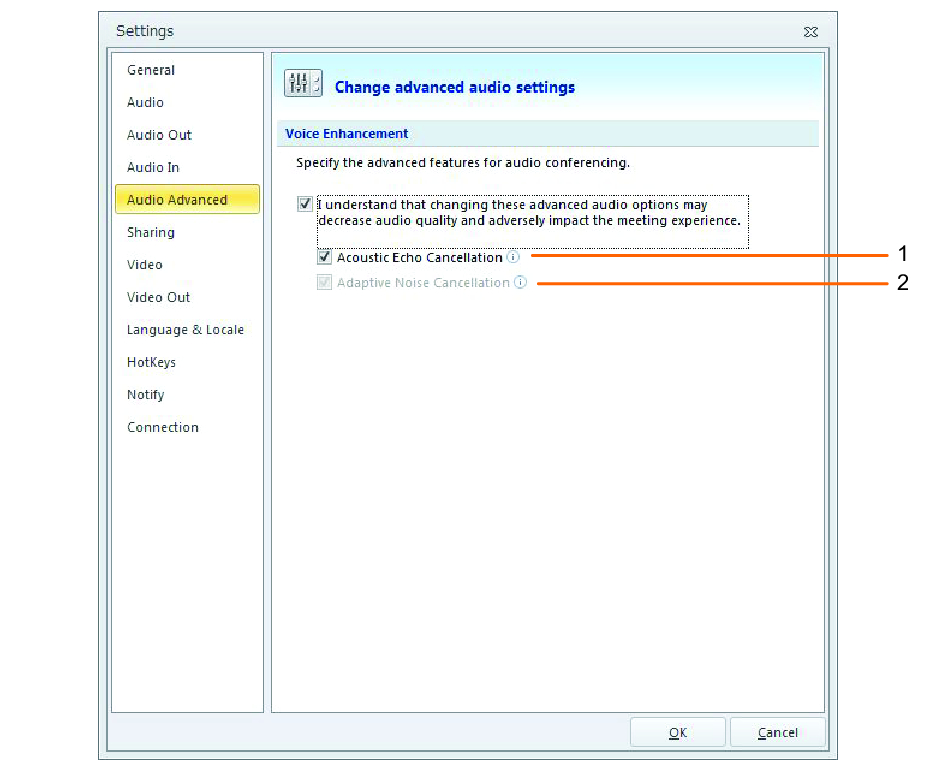
Audio Advanced Settings
Enable or disable audio enhancements, such as Acoustic Echo Cancellation and Adaptive Noise Cancellation. These (when enabled) can help reduce echo (looping sound) and distortion when using external speakers and a separate microphone.
1. While in an OmniJoin meeting...
2. Select the Help tab
3. Select Settings
4. Select Audio Advanced
(1)Acoustic Echo Cancellation
With this option selected, it will attempt to help minimize any echo or "looping sound" caused by using separate microphones and speakers.
(2)Adaptive Noise Cancellation
This option is automatically used with echo cancellation, but can be individually enabled or disabled by un-ticking Acoustic Echo Cancellation first. Adaptive Noise Cancellation will try and reduce any ambient background noise.
Did You Know? If you are using a headset or dedicated speakerphone that features AEC or ANC - you may find the audio quality improves if you un-tick these options. |
Sharing Settings
Fine-tune the quality of application, PowerPoint® files or document sharing from your computer by adjusting these settings. For most people, the standard settings will be adequate.
The following article will guide you through how to access and change your sharing settings.
1. While in an OmniJoin meeting...
2. Select the Help tab
3. Select Settings
4. Select Sharing
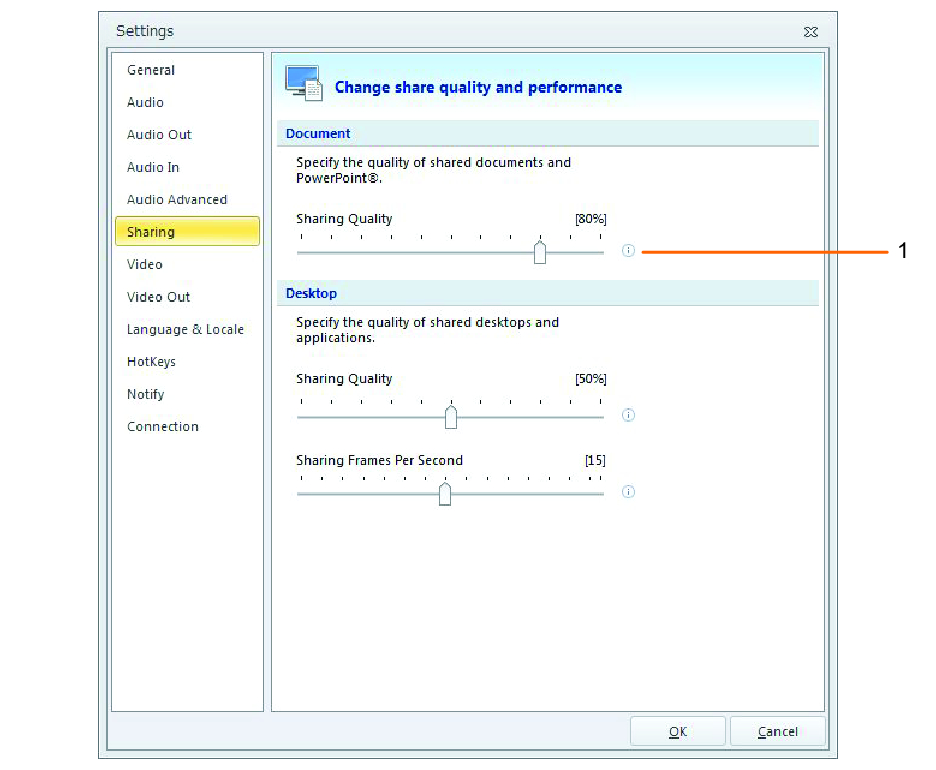
Document...
The quality setting (out of 100%) applies to both
[Document] and
[PowerPoint® file] sharing.
(1)Sharing Quality
This slider controls the quality of images in a static share (such as PowerPoint® files or Document) when displayed to attendees in the meeting.
NOTE: Increasing the quality will increase the bandwidth required to share documents and PowerPoint® files. |
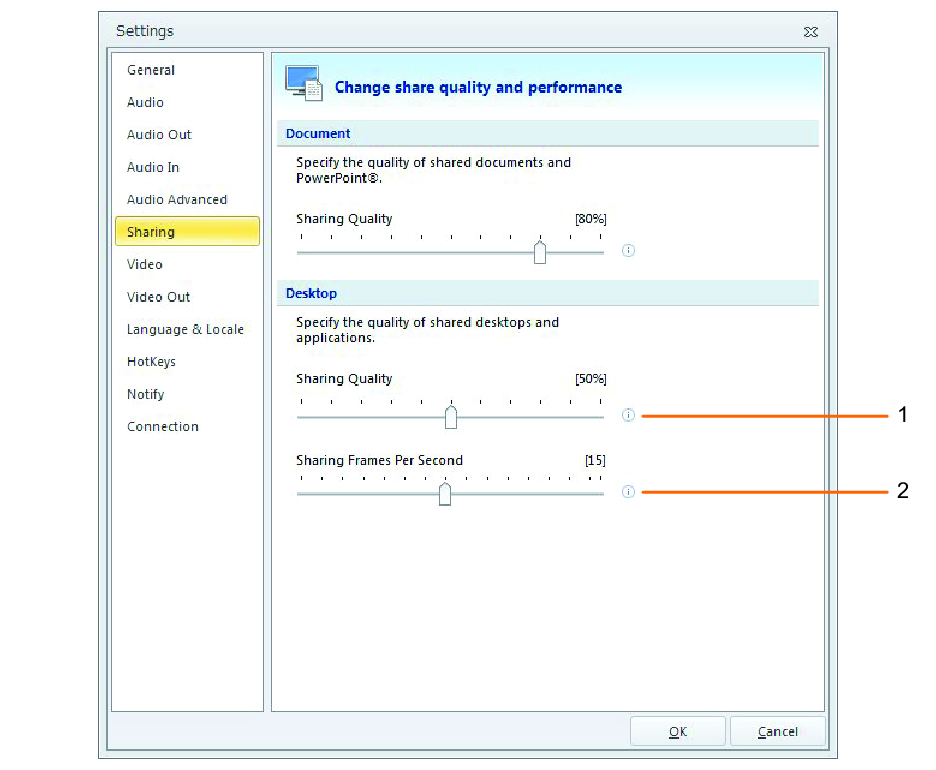
Desktop...
Rated out of 100%, these sliders control the overall quality and 'refresh rate' (frames per second) for live sharing such as [
desktop] or
[application] sharing.
(1)Desktop / Application Sharing Quality
This slider controls the visual quality of any desktop or application that you share to other attendees in the meeting.
(2)Desktop / Application Frames Per Second
You can use this slider to customize how often your screen refreshes when you share a desktop or application with other attendees in the meeting.
NOTE: Increasing the quality or the frame rate will increase the bandwidth required to share desktop and application. |
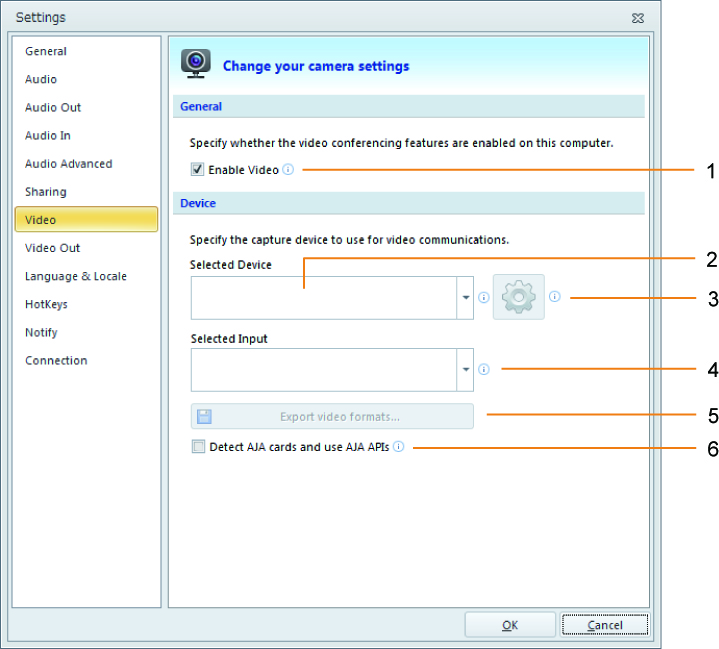
Video Settings
Specify the video device (webcam, video capture card) to use when in an OmniJoin meeting. You can also choose to completely disable the use of video in your own OmniJoin Meeting.
The following article will guide you through how to access and change your video settings.
1. While in an OmniJoin meeting...
2. Select the Help tab
3. Select Settings
4. Select Video
(1)Enable Video
Un-ticking this box will disable the use of all video features in your OmniJoin application.
(2)Selected Device
Allows you to choose the video device you want to use for all OmniJoin meetings.
This could be a USB webcam or even a video capture card.
(3)Check for Updated Video Formats
Checks online for pre-configured settings for certain video devices. Ideal for quickly configuring video capture cards or HD devices.
(4)Selected Input
If you've selected a device which has multiple inputs, you can choose a specific input to use (such as Composite or S-Video).
(5)Export Formats
You can export the video settings and formats to a file, which can help assist with troubleshooting potential problems.
(6)Detect AJA video capture cards and use AJA APIs
Automatically detects AJA video capture cards and configures AJA API cards to be used. (Only available when AJA video capture cards are used.)
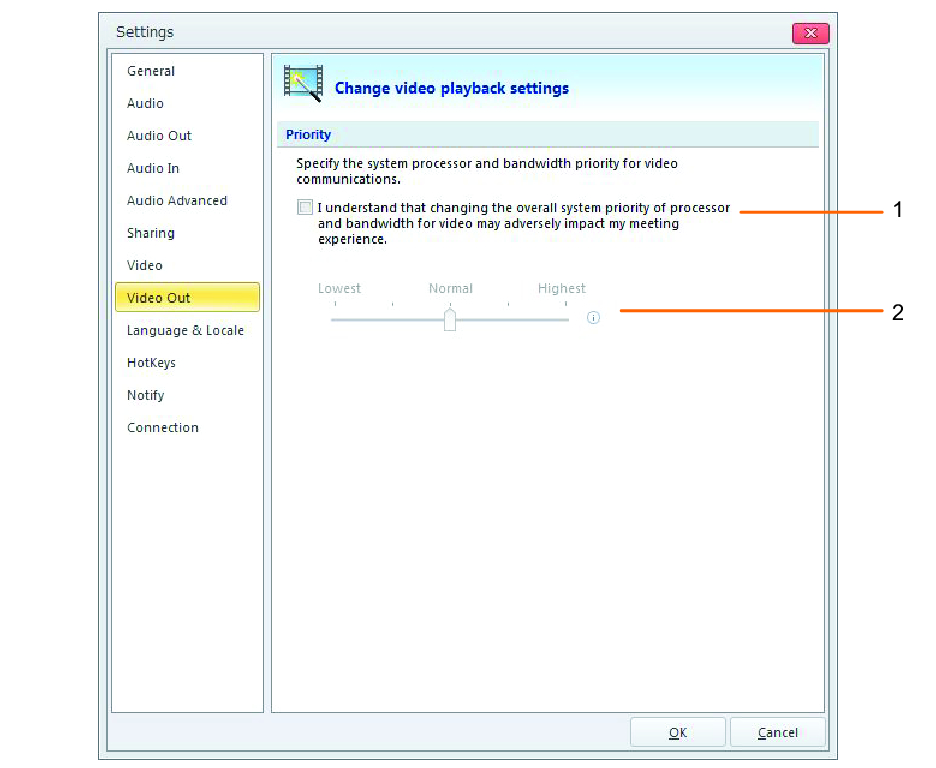
Video Out Settings
For most people, the standard setting is best as it allows OmniJoin to automatically manage the performance of your video / webcam. However, if you choose to prioritize the video performance - you can do so here.
The following article will guide you through how to access and change your video utilization settings.
1. While in an OmniJoin meeting...
2. Select the Help tab
3. Select Settings
4. Select Video Out
(1)Performance Impact
If you want to allow your computer to prioritize your camera (using more processing power and bandwidth), you must first tick this box.
(2)Prioritization Slider
After ticking the box, you can choose the level of prioritization of your computer's processing power and bandwidth that will be used solely for your video.
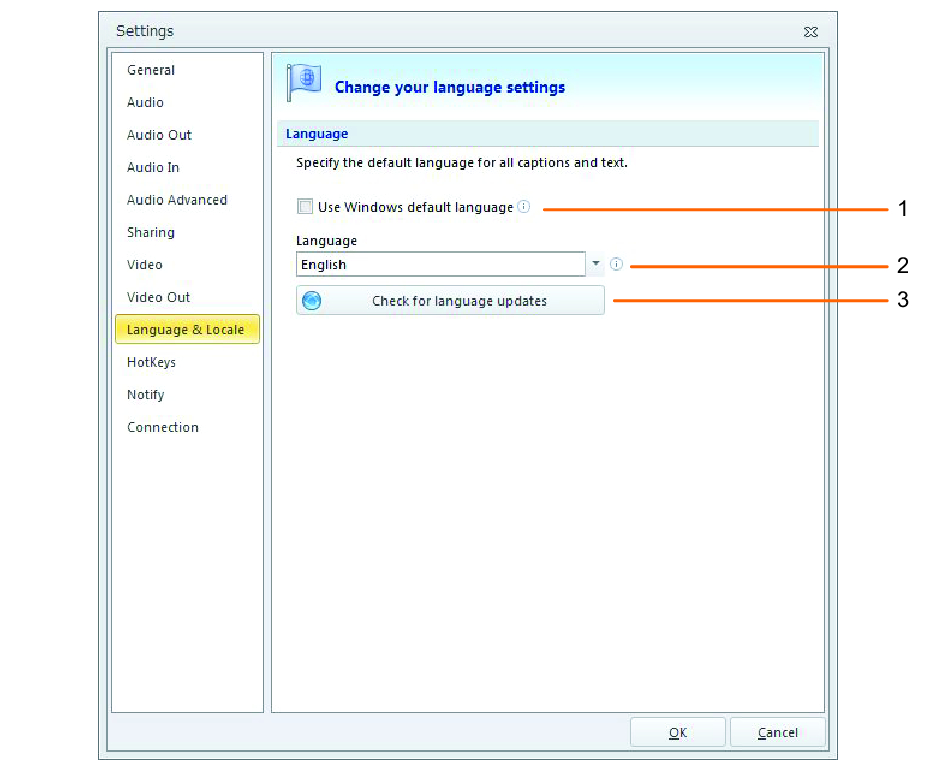
Language & Locale Settings
These settings allow you to choose what language and locale to use when in a OmniJoin meeting.
1. While in an OmniJoin meeting...
2. Select the Help tab
3. Select Settings
4. Select Language & Locale
1.Use Windows Default
By ticking this setting, it will attempt to use the language defined in Windows (if it's also supported in OmniJoin).
2.Language
To manually change the language used in OmniJoin, untick "Use Windows default language" and select the language from the list.
3.Check for Language Updates
Allows you to dynamically update OmniJoin with new languages (when available).
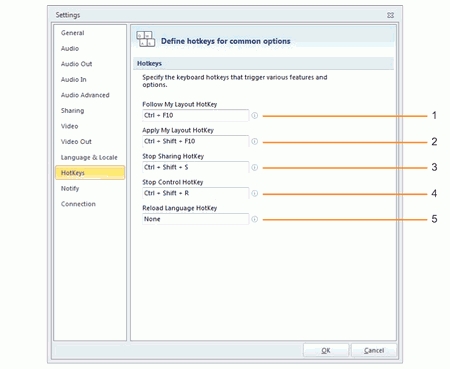
HotKeys Settings
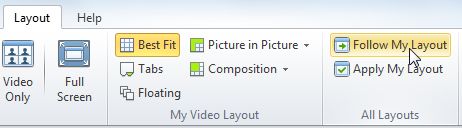
By setting hotkeys, you can assign keyboard shortcuts that trigger various features in OmniJoin. For example: Ctrl + F10 will enable or disable
[Follow My Layout]...
1. While in an OmniJoin meeting...
2. Select the Help tab
3. Select Settings
4. Select HotKeys
(1)Follow My Layout
Allows you to set a keyboard combination that when pressed, will turn on (or off) Follow My Layout.
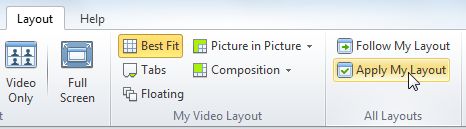
(2)Apply My Layout
A keyboard combination that allows you to mirror your current layout to all other meeting attendees.
(3)Stop Sharing
You can use a keyboard combination that when pressed, will "stop sharing" the current share.
(4)Stop Control
Allows you to set and use a keyboard combination that will quickly stop any remote control of your desktop or application.
(5)Reload Language
Useful to reset the language files if you previously made changes to them.
Notify Settings
Customize how OmniJoin notifies you when attendees join and leave. You can also turn on / off sounds for various meeting activities.
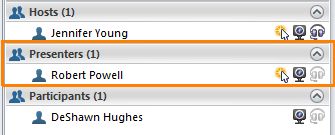
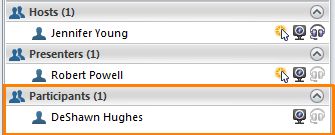
Messages are small notifications that appear towards the bottom-right of the meeting (for the
[Host] or
[Presenter] only) when attendees join or leave.
1. While in an OmniJoin meeting...
2. Select the Help tab
3. Select Settings
4. Select Notify
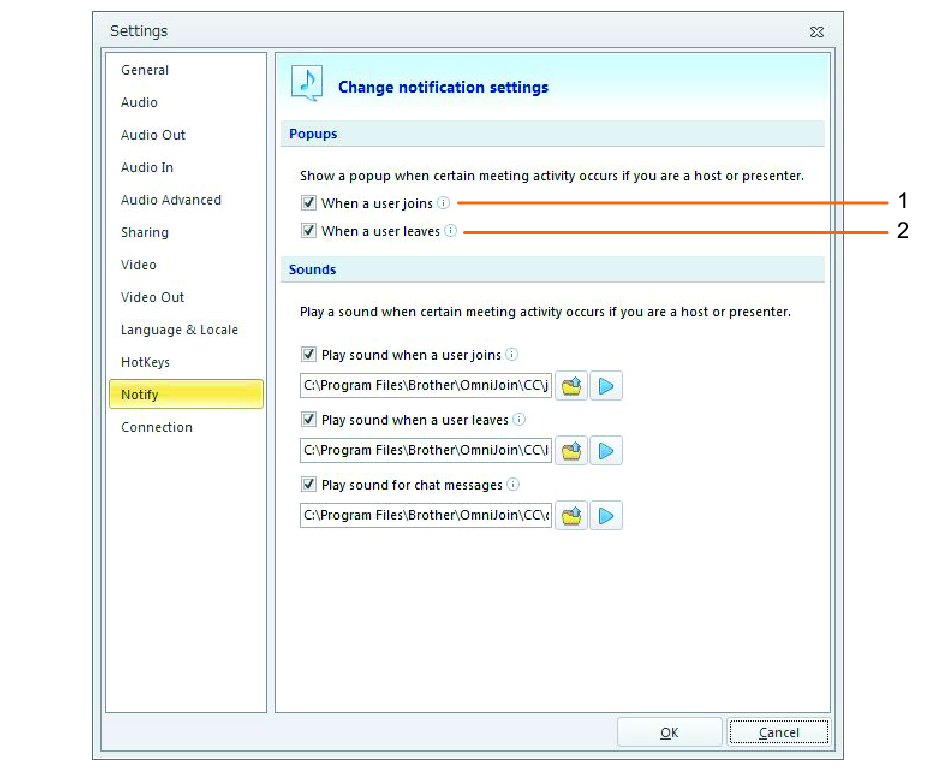
Popups...
(1)When a user joins
Tick this setting to get a visual notification in the bottom-right corner when someone joins your meeting. This can be useful if you're already in the meeting (but working on something else) and waiting for people to arrive.
(2)When a user leaves
Ticking this option will give you a visual notification in the bottom-right corner when someone leaves your meeting.
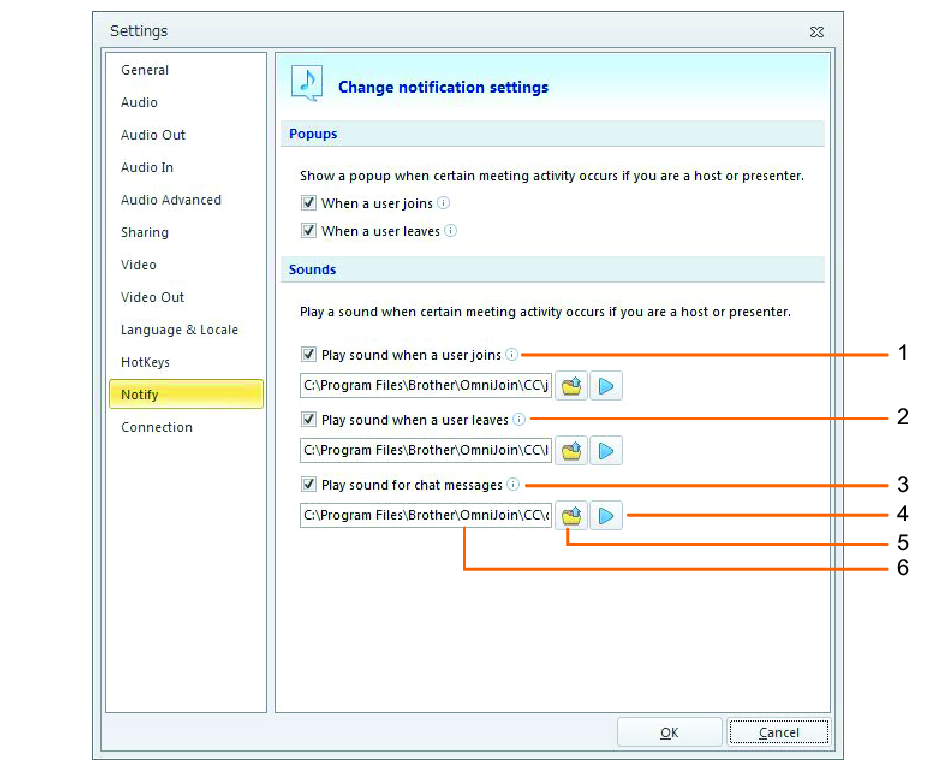
Sounds...
For
[Hosts] and
[Presenters], you'll also get notified with a sound when attendees join, leave and also for any chat messages that are sent during a meeting session.
(1)Play sound when user joins
Ticking this option will play a sound whenever someone joins your meeting.
(2)Play sound when user leaves
Ticking this option will play a sound whenever someone leaves your meeting.
(3)Play sound for chat messages
Ticking this option will play a sound whenever a message is sent via the chat feature.
(4)Play sound
Click the play icon to test the playback sound.
(5)Browse Files
Allows you to pick and choose any media file to play.
(6)Media file
Shows the media file that will be played.
Connection Settings
Contains connection settings for the meeting. OmniJoin will use "automatic" settings by default, however you can manually specify different settings.
1. While in an OmniJoin meeting...
2. Select the Help tab
3. Select Settings
4. Select Connection
(1)No Proxy
Instructs OmniJoin not to use any proxy settings.
(2)Automatically detect...
Selected by default. OmniJoin will try and automatically use settings defined in your web browser.
(3)Manual proxy settings
You can manually enter specific proxy settings and authentication details to use when meeting.
(4)Automatic proxy configuration URL
Select this option to use any pre-existing proxy script on your network, such as a PAC file.
(5)Enable DSCP
If your network uses Quality of Service (QoS), you can configure OmniJoin to tag its traffic with a Differentiated Services Code Point (DSCP) to help prioritize meeting traffic over your internal network.
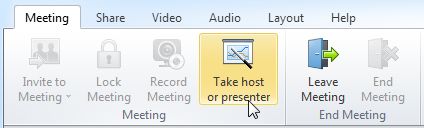
Take Host or Presenter
Overview...
A very useful feature if you want to quickly assume control of a web meeting. If you know (or have been given) a "Host" or "Presenter" password, you can use the Take host or presenter option in the Meeting tab to promote yourself and receive additional controls and privileges.
Step-by-Step...
1. While in an OmniJoin meeting...
2. Select the Meeting tab
3. Select Take host or presenter
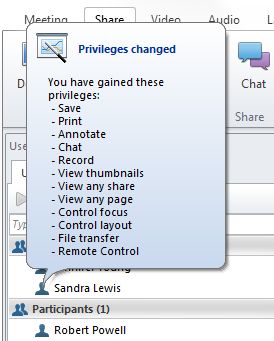
4. Enter the Host or Presenter password and click Submit
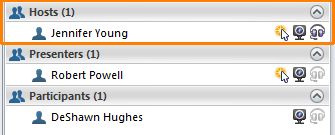
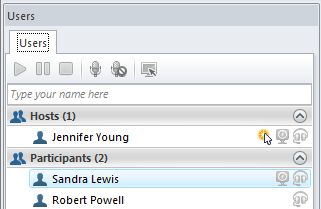
5. You'll now see a popup balloon over your name in the user-list confirming that you have been promoted with additional privileges (example below)
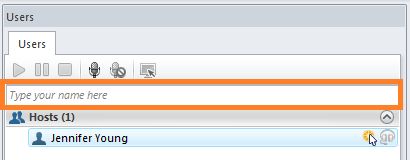
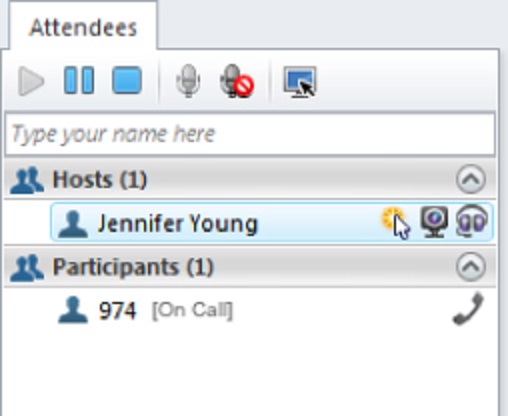
Change My Display Name
Overview...
Upon entering an OmniJoin meeting, you may want to set your display name to something friendly so that other meeting attendees know who you are. This can be easily achieved by following the steps below...
Step-by-Step...
1. While in an OmniJoin meeting...
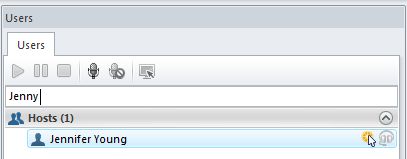
2. In the user-list, click in the box that states: "Type your name here"
3. Type your name and press <Enter> on the keyboard
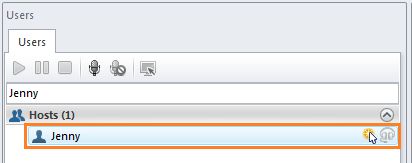
4. Your new name will now be displayed in the user-list ...
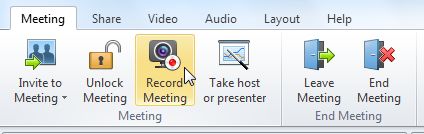
Record a Meeting
Overview...
If you have the
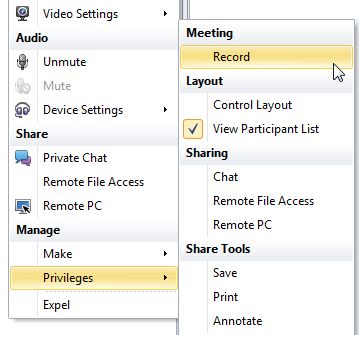
[Record privilege], you can choose to record the meeting session under the Meeting tab located in the top-left corner.
Step-by-Step...
Start a recording...
2. Select the Meeting tab
3. Select Record Meeting
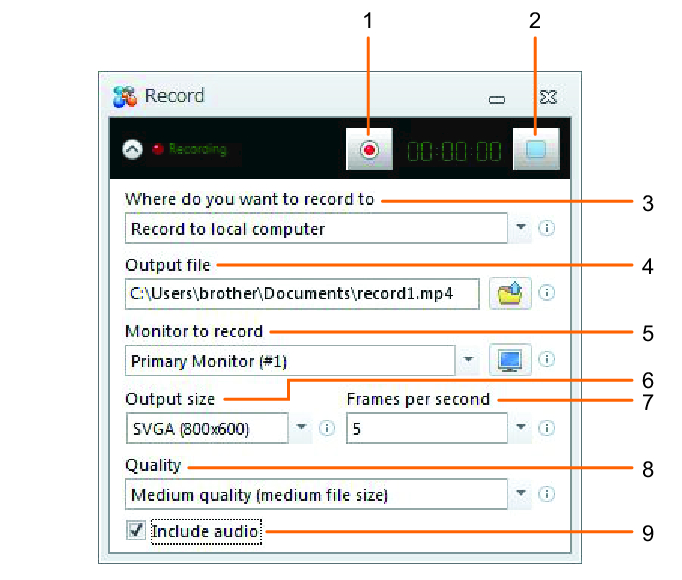
4. The record window will open, providing you with a list of options to customize the recording.
(1)Record
Starts the recording, using the settings provided.
(2)Stop
Stops the recording and automatically saves it to the location you specified.
(3)Where do you want to record to
Choose where to record the meeting to. You can record to your local computer for you to view later, or you can record to the OmniJoin cloud so that other attendees can also view the recording.
(4)Output file
Choose where to save the recording to, by clicking the folder icon. By default, it will be saved to your document folder. You can specify a name for the file.
(5)Monitor to record / What do you want to record
Monitor to record / What do you want to record You can record from one monitor at a time.
When you record to a local computer, select the monitor you want to record.
When you record to the OmniJoin cloud, select the screen part you want to record ("Videos only", "Share Only", or "Full layout (videos and share)".
(6)Output size
Select the resolution of the recording. Higher resolution provide more detail, but result in larger files.
(7)Frames per second
Choose the frames per second for the recording. Higher frames per second settings make smoother recordings, but also make larger files.
If the aero feature is enabled in Windows® 7, the upper limit of the frame rate is set to 15.
(8)Quality
Select the quality of the recording. Higher quality leads to sharper video but can dramatically increase the file size.
(9)Include audio
Tick this option to record the sounds during the meeting..
When you save the recording to the OmniJoin cloud, you will receive two emails shortly after ending the meeting that give you information about how to access your recording.
NOTE: The audio from OmniJoin Phone Conferencing is recorded only if it is set to OmniJoin Integrated Audio. |
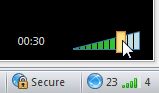
System & Connection Ratings
Overview...
System and connection ratings can help give you an idea on how your meeting experience will go. Generally any computer that conforms to OmniJoin's system requirements should receive a 5 out of 5 system rating. The connection rating monitors the quality of the connection between your computer and the OmniJoin meeting. This rating will fluctuate, as it is monitoring your connection in real-time! The higher the connection rating, the better quality the meeting will be.
Step-by-Step...
My own ratings...
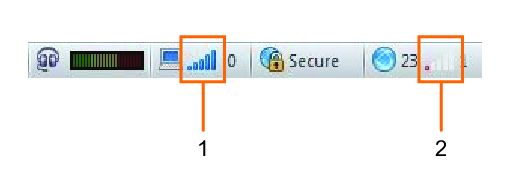
1. While in an OmniJoin meeting...
2. Locate the ratings towards the bottom-right of the meeting
(1)System rating
Gives your computer a performance rating out of 5. The higher the number, the better.
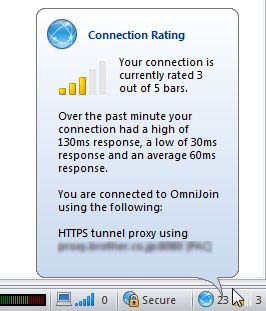
(2)Connection rating
Rated out of 5, this monitors the quality of the connection between your computer and the OmniJoin Meeting on the Internet. The higher the rating, the better your meeting experience.
3. You can move the mouse pointer over either of them to view more detailed information (example of a connection rating below)
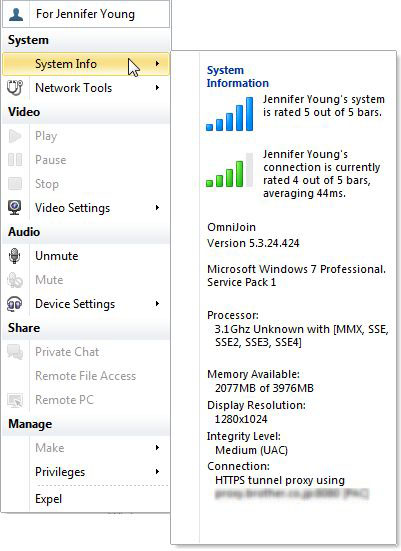
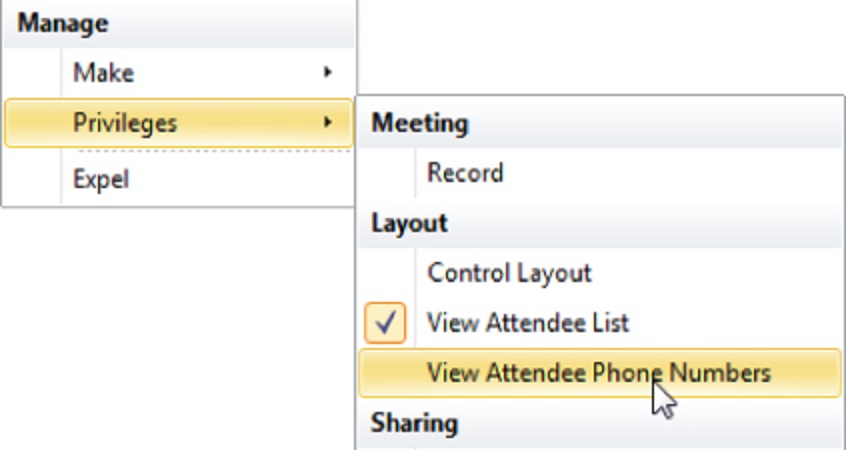
Other attendees' ratings...
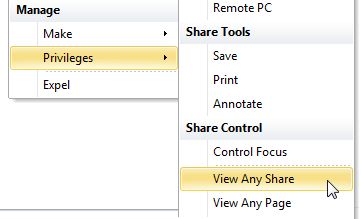
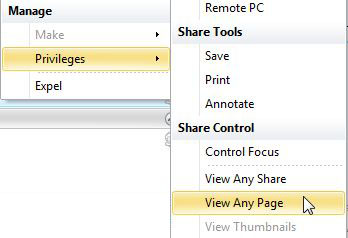
If you are a
[Host] in a meeting, you can remotely view system and connection ratings of other attendees!
1. While in an OmniJoin meeting (as a [Host])...
2. Right-click on an attendee in the user-list
3. Select System Info to display information relating to the person's computer and connection (example below)
Bandwidth Monitor
Overview...
The Bandwidth Monitor allows you to easily view the amount of data being sent from your computer to an OmniJoin meeting. It displays the total 'upload' bandwidth being used by OmniJoin and also individual usage for Video, Audio, Desktop, Document and Media shares.
The following article will guide you through how to view the Bandwidth Monitor.
Step-by-Step...
1. While in an OmniJoin meeting...
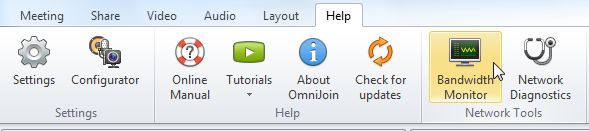
3. Select the Help tab
4. Select Bandwidth Monitor
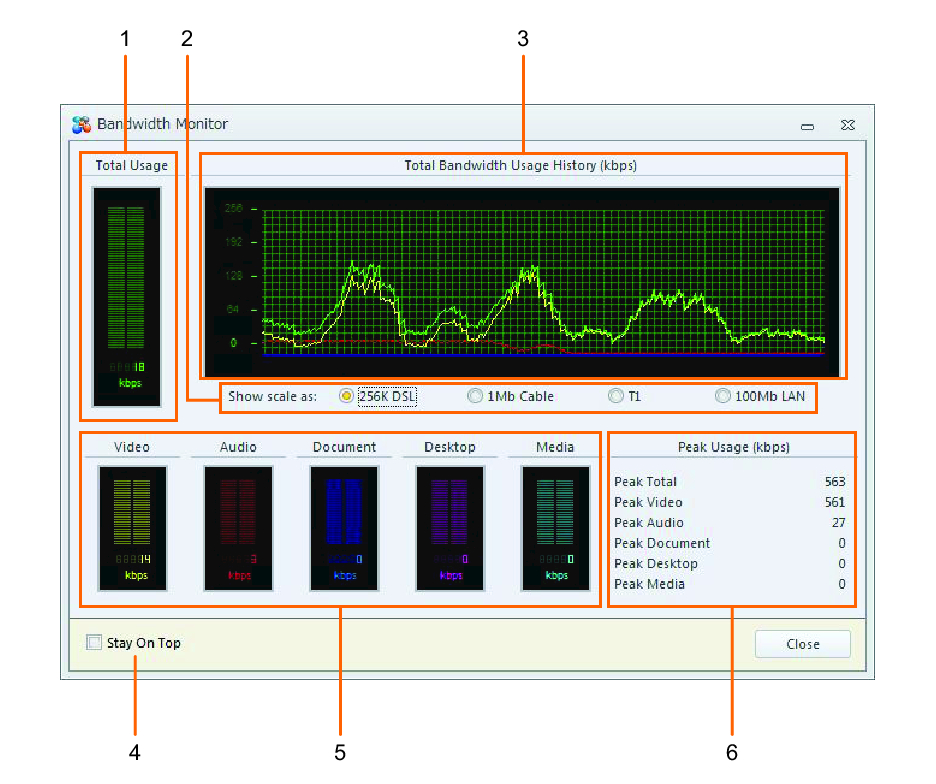
5. The Bandwidth Monitor will now open in a new window and will start monitoring.
(1)Total Usage
Displays in real-time, your total "upload" bandwidth usage in the meeting including any video, audio and sharing.
(2)Graph Scale
Use these options to change the scale of the bandwidth history graph.
(3)Bandwidth History
This graph displays the bandwidth history (since the monitor has been opened).
The different line colors, represent the different features and totals.
(4)Stay On Top
Tick this box to keep the bandwidth monitor on-top of other windows.
(5)Individual Feature Usage
Displays in real-time, your current "upload" bandwidth usage in the meeting for each individual feature.
(6)Peak Usage
Displays the highest bandwidth used for each feature (since the monitor has been opened).
NOTE: The Bandwidth Monitor will only monitor your 'upload' (i.e. the data you send to the meeting - such as your video, audio and anything you're sharing on your computer). |
Network Diagnostics
OmniJoin comes complete with its own set of diagnostic tools, which can help when trying to optimize your OmniJoin experience and locate possible network or Internet related issues. It comprises of 3 tests: bandwidth, latency and routing...
Network Diagnostics: Bandwidth
When the bandwidth test is run, OmniJoin will try to determine how much available bandwidth you have between the OmniJoin meeting and your computer. Generally, the higher your available bandwidth the better your meeting experience will be.
Bandwidth Test
1. While in an OmniJoin meeting...
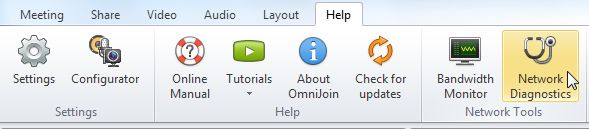
2. Select the Help tab
3. Select Network Diagnostics
4. The Network Diagnostics will now open in a new window.
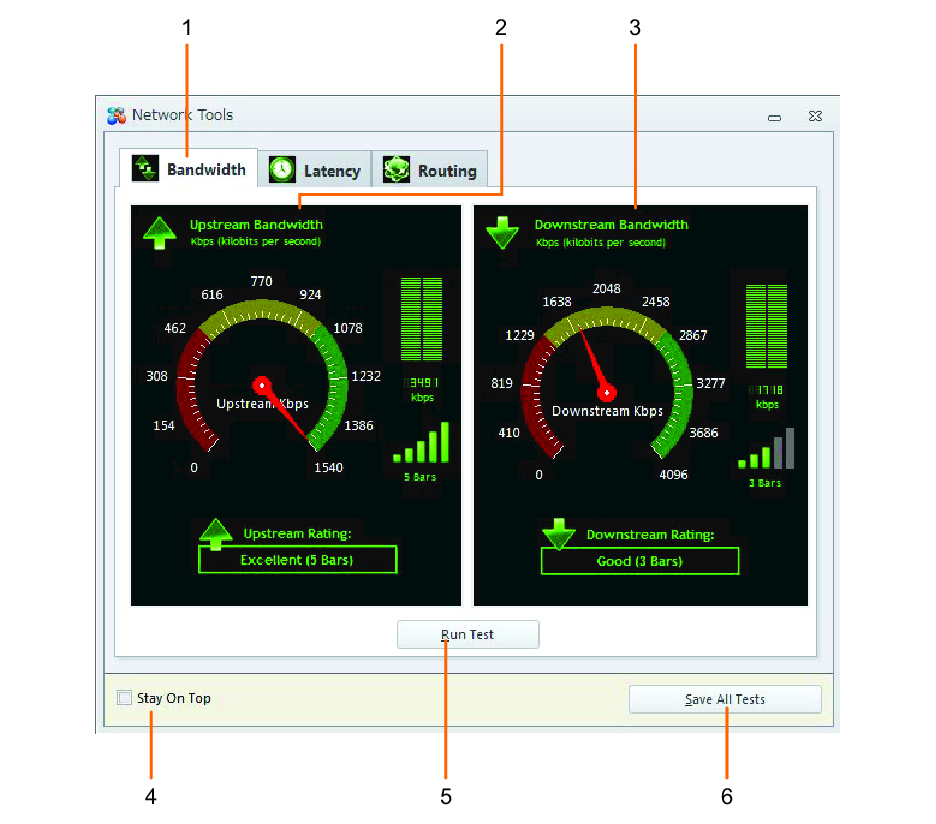
5. Click Run Test to test the current bandwidth availability between you and the OmniJoin Meeting (example of test results below)
(1)Tool tabs
Click on these tabs to choose which test to run.
(2)Upstream Results
After running a bandwidth test, the results will be displayed here in a variety of ways. The higher the better!
(3)Downstream Results
After running a bandwidth test, the results will be displayed here in a variety of ways. The higher the better!
(4)Stay On Top
Tick this box to keep the network diagnostics on-top of other windows.
(5)Run Test
Runs the selected test.
(6)Save All Tests
Save any tests that have been run to a text file. This can be useful tor technical assistance.
NOTE: Bandwidth is likely to vary with a number of scenarios, such as time of day, contention, length of line, other traffic etc, to which OmniJoin has no control over. |
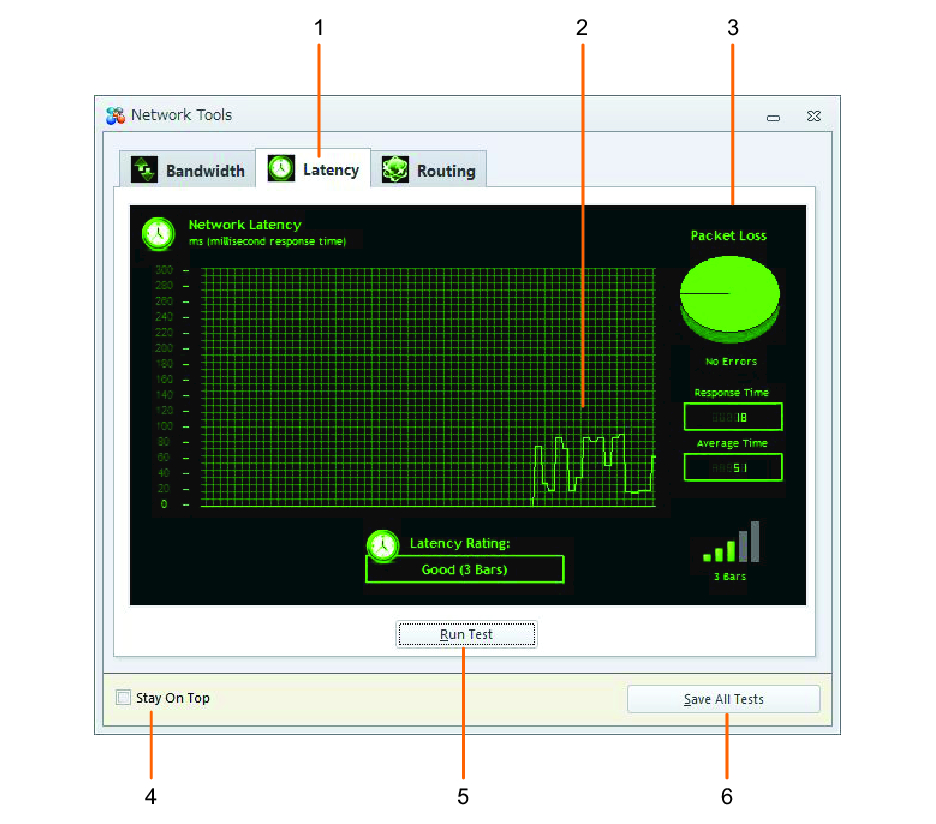
Network Diagnostics: Latency
A useful test which checks the 'delay' on your Internet connection to the OmniJoin meeting. The lower the latency (or delay), the better quality your meeting is going to be.
Latency Test
1. While in an OmniJoin meeting...
2. Select the Help tab
3. Select Network Diagnostics
4. The Network Diagnostics will now open in a new window.
5. Select the Latency tab
6. Click Run Test to test the quality of the connection between you and the OmniJoin Meeting (example of test results below)
(1)Tool tabs
Click on these tabs to choose which test to run.
(2)Latency graph
After running a latency test, the results will be displayed here. This will show the response time over a period of 10 seconds.
(3)Packet Loss
After running a latency test, this will show any packet or data loss along the way and also the response time over a period of 10 seconds.
(4)Stay On Top
Tick this box to keep the network diagnostics on-top of other windows.
(5)Run Test
Runs the selected test.
(6)Save All Tests
Save any tests that have been run to a text file. This can be useful tor technical assistance.
NOTE: Latency can vary with a number of scenarios, such as amount or weight of network traffic between you and the OmniJoin meeting. Typically, the heavier the traffic, the higher the latency - which can lead to poorer audio quality. |
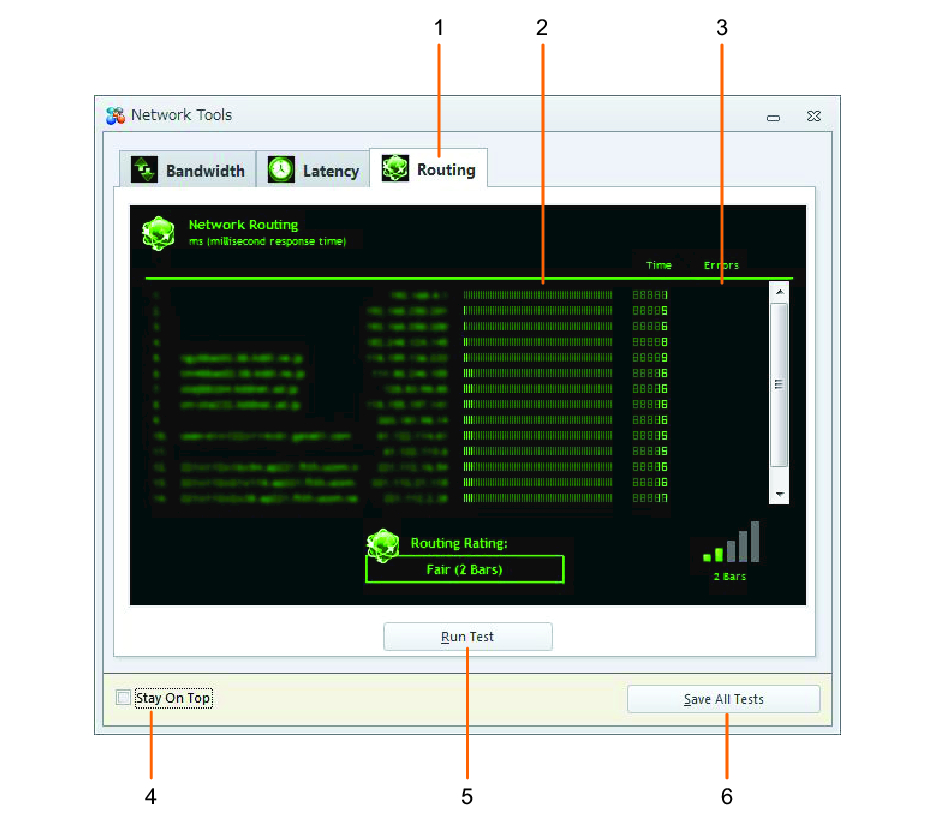
Network Diagnostics: Routing
A comprehensive test which will display the exact route your computer is taking to get the OmniJoin Meeting and your meeting. It will also take a snapshot of the response times at various points to help identify where delays are occuring.
Routing Test
1. While in an OmniJoin meeting...
2. Select the Help tab
3. Select Network Diagnostics
4. The Network Diagnostics will now open in a new window.
5. Select the Routing tab
6. Click Run Test to test the route and quality of the connection between you and the OmniJoin Meeting (example of test results below)
(1)Tool tabs
Click on these tabs to choose which test to run.
(2)Response Times
While running a routing test, each "hop" between you and the OmniJoin meeting will report a response time. The lower the response time the better!
(3)Packet Loss
After running a latency test, this will show any packet or data loss along the way and also the response time over a period of 10 seconds.
(4)Stay On Top
Tick this box to keep the network diagnostics on-top of other windows.
(5)Run Test
Runs the selected test.
(6)Save All Tests
Save any tests that have been run to a text file. This can be useful tor technical assistance.
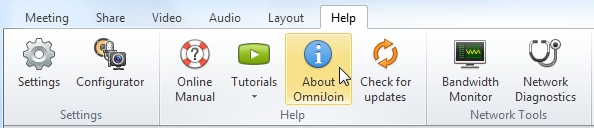
The About Box is Found in the Help Tab
Overview...
If you're ever asked what revision level or release number of OmniJoin you are using, click About OmniJoin.
Step-by-Step...
1. While in an OmniJoin meeting...
2. Select the the Help tab
3. Select About OmniJoin
Sharing & Collaboration
With OmniJoin you can share and collaborate on documents, PowerPoint® files, live applications and your entire desktop. You also have the ability to share media such as audio and video files!
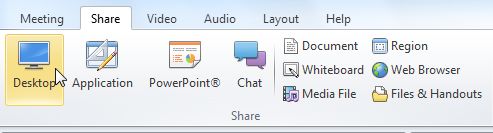
Share the Desktop
Overview...
You can share your computer's entire desktop by using the Share tab and selecting "Desktop". This is useful when you would like to share a number of different applications or windows that are currently open on your computer.
Step-by-Step...
Share the desktop...
2. Select the Share tab
3. Select Desktop
4. Click Share on the confirmation screen
Multiple Monitors? If you are using multiple monitors, you will get prompted to select which desktop to share with other particpants in the meeting. |
5. The OmniJoin Meeting will automatically minimize itself, so your desktop is shared and visible to everyone in the meeting.
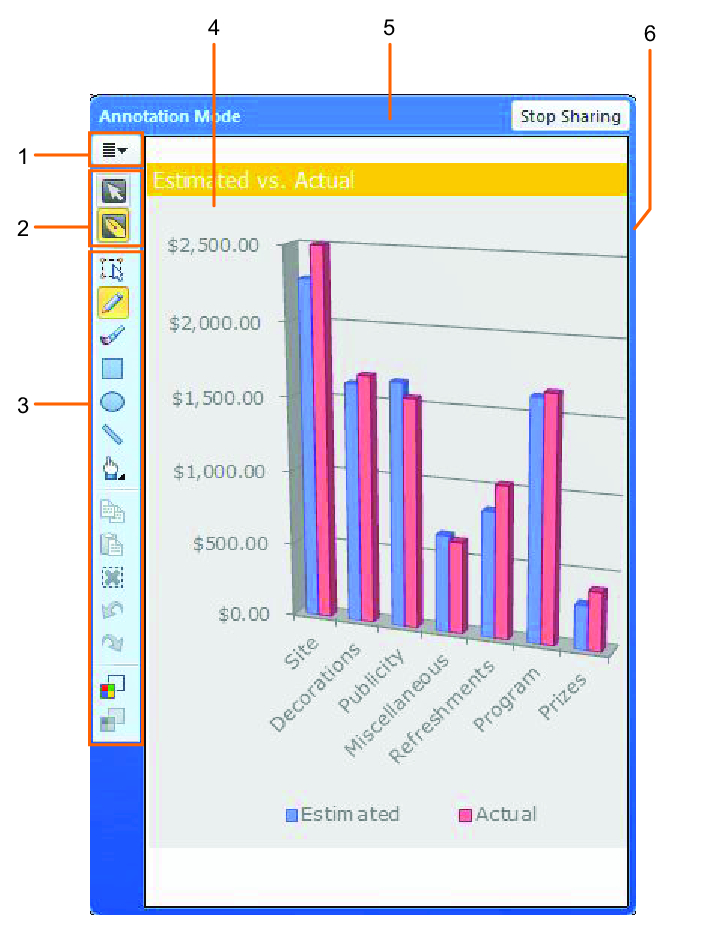
Controlling the desktop...
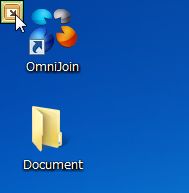
1. When your desktop is being shared - you can use your computer as you would normally. Anything you do on your desktop (such as opening an application), will be seen by other attendees.
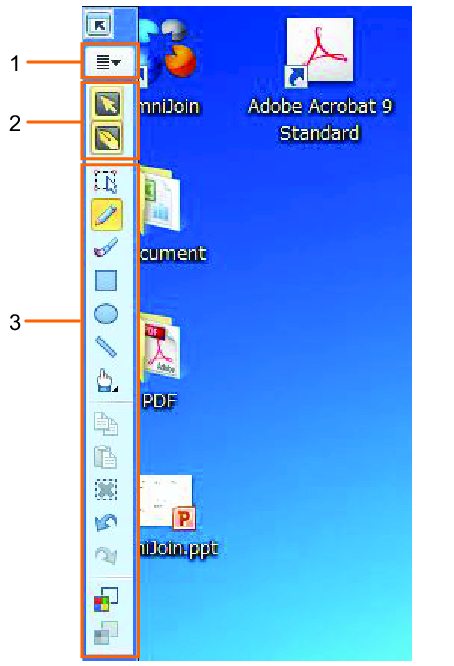
2. You have additional sharing controls and options available by clicking the button at the top-left corner of the desktop being shared.
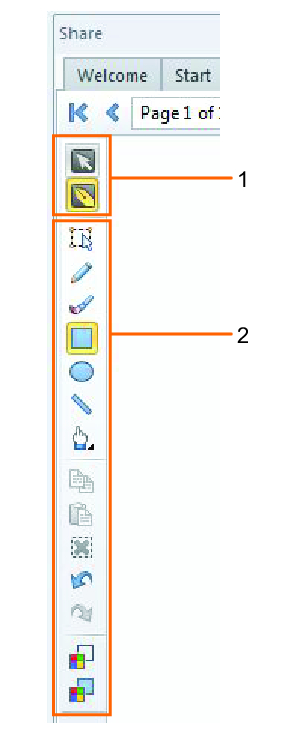
3. This will display a vertical toolbar on the left-side of your monitor with additional controls to choose from.
(1)Share OptionsYou can click

(Options) to stop desktop sharing, change sharing quality, give control of your desktop to other attendees, etc.
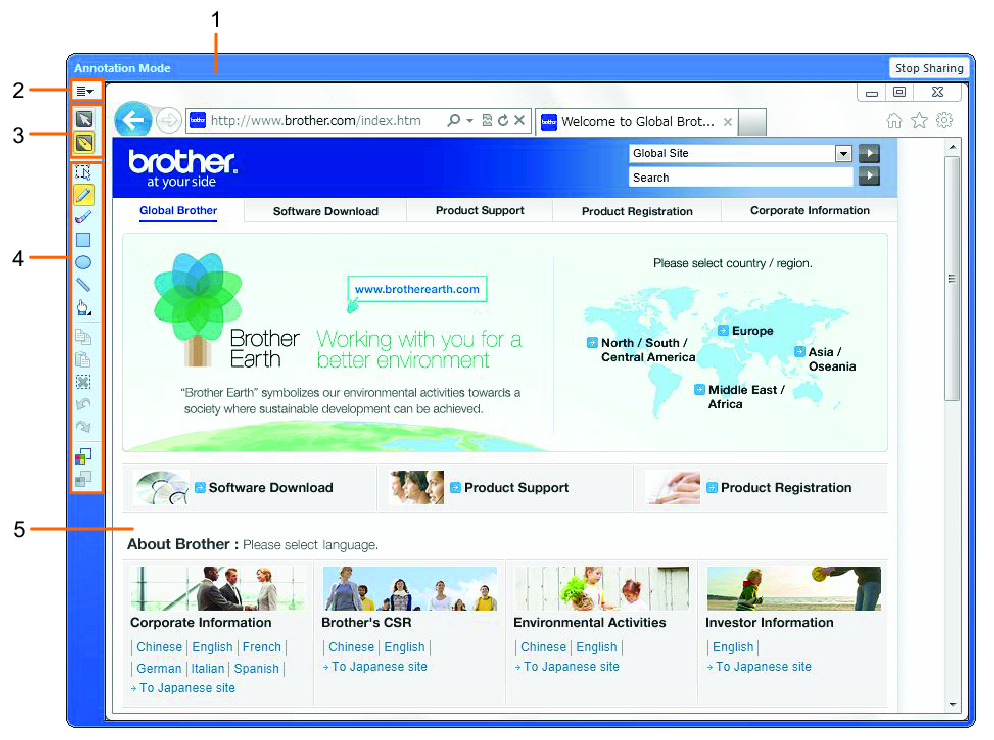
(2)Mode switchesYou can switch between the View/Control mode or the Annotation mode by clicking

or

.
Click
(View/Control mode) to control the desktop normally.
Click
(Annotation mode) to use various annotation tools.
(3)Annotation ToolsWhen you are in Annotation mode by clicking
, you can select and use various
[annotation tools], such as mouse pointers, highlighters and shapes.
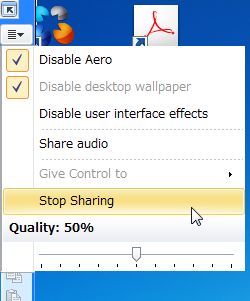
Stop Sharing...
Move the mouse over the hidden OmniJoin control toolbar (top-left corner of the monitor being shared).
1. Click and then Stop Sharing
Share an Application
Overview...
You can share any application on your computer (even if other attendees don't have the application on their computers) by using the Share Application feature.
The following article will guide you through how to share an application with other attendees...
Step-by-Step...
Share an application...
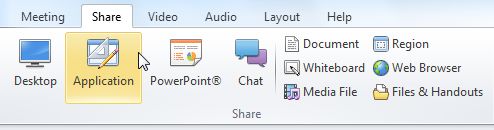
2. Select the Share tab
3. Select Application
Windows® 7 or Windows Vista®? If you are using the Aero interface (the glass effect), thumbnail previews of any applications that are currently running on your computer will be displayed - so you can easily see which application you would like to share. |
Windows® XP? If you're using Windows® XP, you will receive a list of applications running (without thumbnails). |
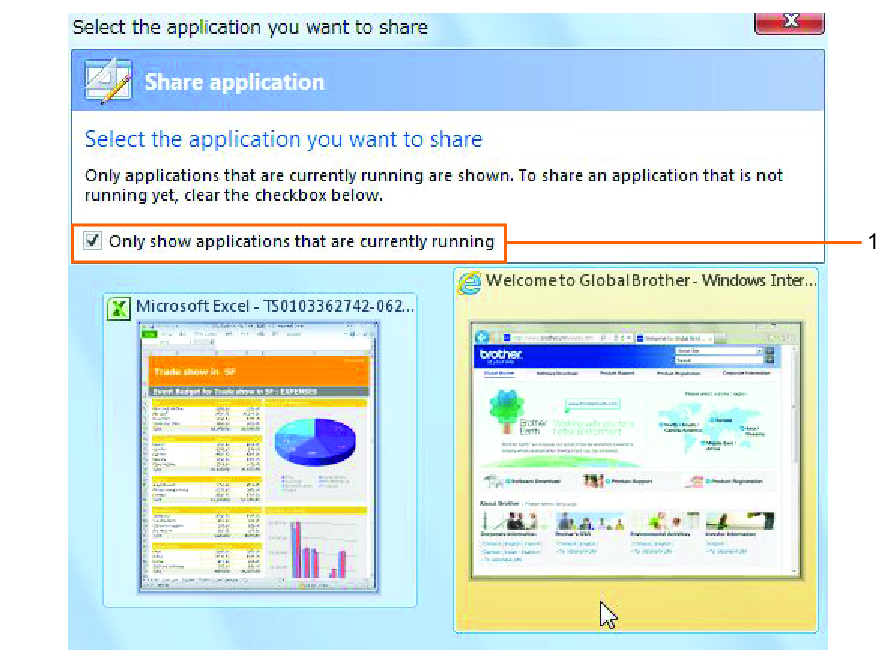
4. Select the currently running application you wish to share.
(1)Only show applications that are currently running
Did you know? By unticking "Only show applications that are currently running", you can display a list of all the applications installed on your computer. You can choose which applications to share from the displayed applications. |
5. The application selected will now be displayed and will visible to everyone in the meeting.
Controlling the application...
When the application is being shared - you can use it as you would normally. Anything you do in the application will be seen by other attendees.
You have additional sharing options available by clicking the button at the left the application being shared.
(1)Sharing Border
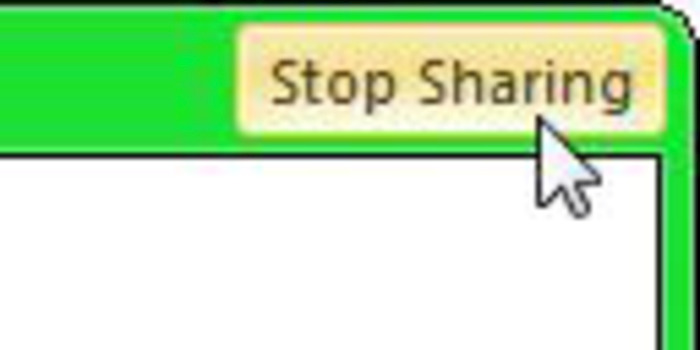
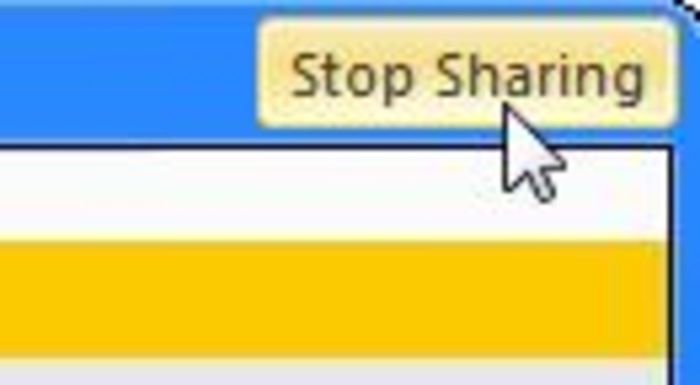
When an application is being shared, it will have a green border around it.
The green border turns blue during Annotation mode.
The border turns red during Non-Capture mode.
When in Non-Capture mode (e.g. when a different window is selected), shared contents will not be sent to other attendees.
(2)Share OptionsYou can click
(Options) to stop application sharing, change sharing quality, give control of your application to other attendees, etc.
(3)Mode switchesYou can switch between the View/Control mode or the Annotation mode by clicking
or
.
Click
(View/Control mode) to control the application normally.
Click
(Annotation mode) to use various annotation tools.
(4)Annotation ToolsWhen you are in Annotation mode by clicking
, you can select and use various
[annotation tools], such as mouse pointers, highlighters and shapes.
(5)Use the application
Use the application as you would normally!
For instance, navigate through a website.
Anything you do in the application will be shared with everyone else in the meeting.
Maximized the application? If the application takes up the entire screen, the sharing border will disappear and the share toolbar will be displayed on the left-side of your monitor. |
Stop Sharing...
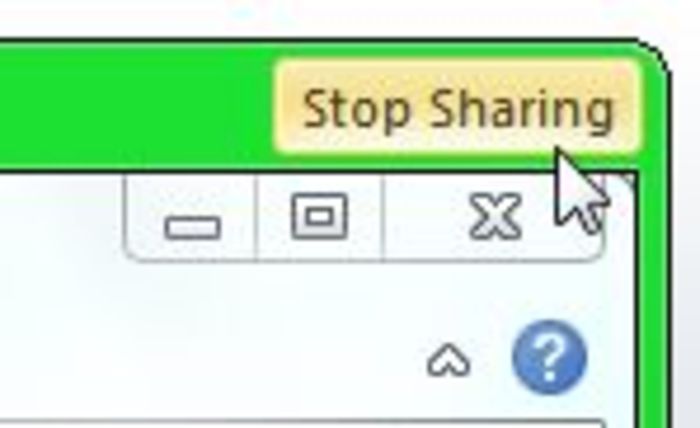
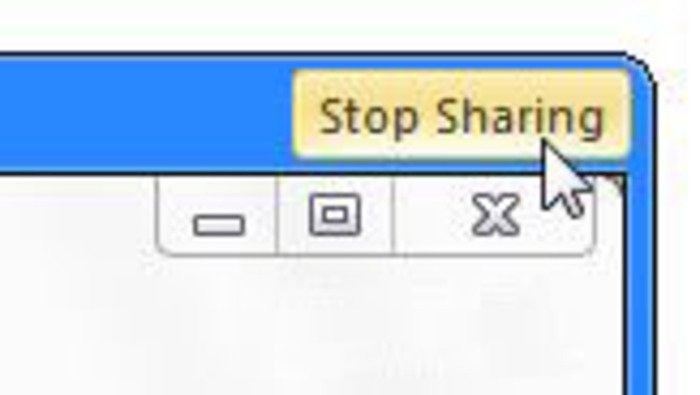
Click Stop Sharing at the top-right corner of the application
Alternatively...You can also stop sharing by clicking (Options), then select Stop Sharing.This method is recommended when the shared application screen is displayed full-screen. |
Share a PowerPoint® file
Overview...
You can share PowerPoint® files by using the Share tab and selecting "PowerPoint®". This is ideal when you do not need to make changes to it. It is generally faster and more efficient than sharing the application itself or your entire desktop.
You cannot share animations and sounds in the PowerPoint® file. If you want to share animations and sounds in the PowerPoint® file, use the "Share an Application" feature and select "Share Audio" option. |
Step-by-Step...
Share a PowerPoint® file
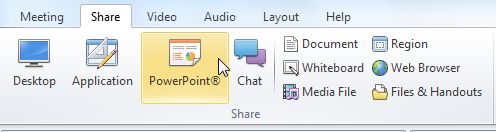
2. Select the Share tab
3. Select PowerPoint®
4. Select a PowerPoint® file to share and click Open
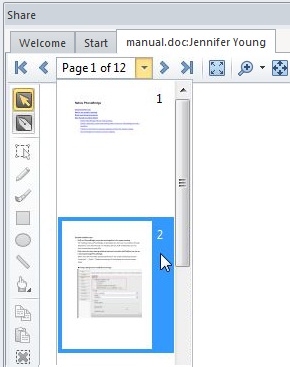
5. The PowerPoint® file will then be sent to the meeting for all other attendees to view...
Controlling the PowerPoint® file
With the PowerPoint
® file now being shared with everyone in the meeting, the
[Host],
[Presenter] (or anyone with the
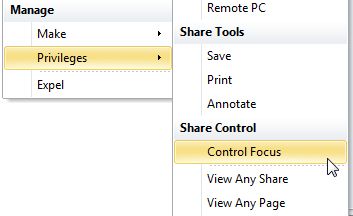
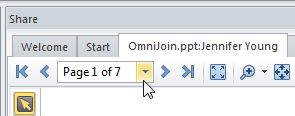
[Control Focus privilege]) can navigate through the PowerPoint
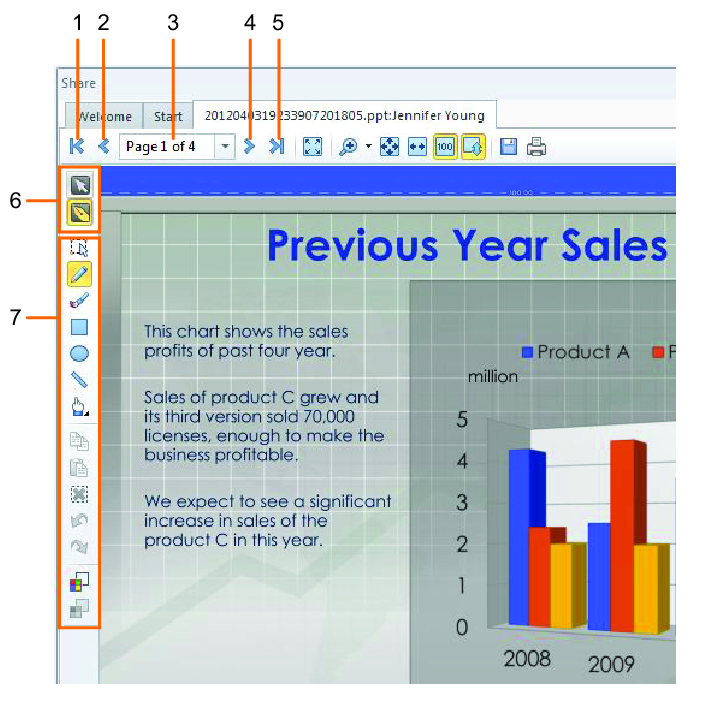
® file using the share controls towards the top-left corner.
(1)First page
Go to the beginning of the file.
(2)Previous page
Displays the previous page.
(3)Page Selector
Select a specific page to jump to.
(4)Next page
Displays the next page.
(5)Last page
Go to the end of the file.
(6)Mode switchesYou can switch between the View/Control mode or the Annotation mode by clicking
or
.
Click
(View/Control mode) to control the application normally.
Click
(Annotation mode) to use various annotation tools.
(7)Annotation ToolsWhen you are in Annotation mode by clicking
, you can select and use various
[annotation tools], such as mouse pointers, highlighters and shapes.
Stop Sharing...
Click Stop Sharing towards the top-right corner of the PowerPoint® file.
Share Chat
Overview...
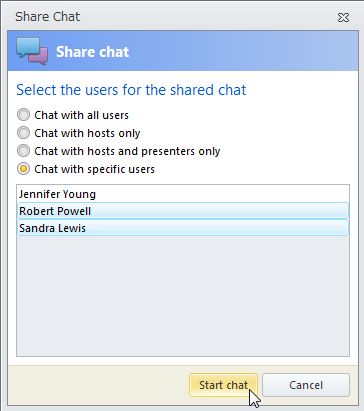
You can share or start a new chat with other attendees in the meeting by using the Share Chat feature.
Step-by-Step...
Share a chat...
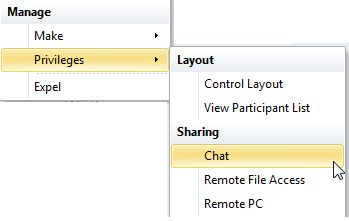
1. While in an OmniJoin meeting...
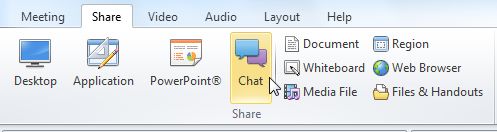
2. Select the Share tab
3. Select Chat
4. Choose the type of chat you want to start and click Start chat
Controlling the chat...
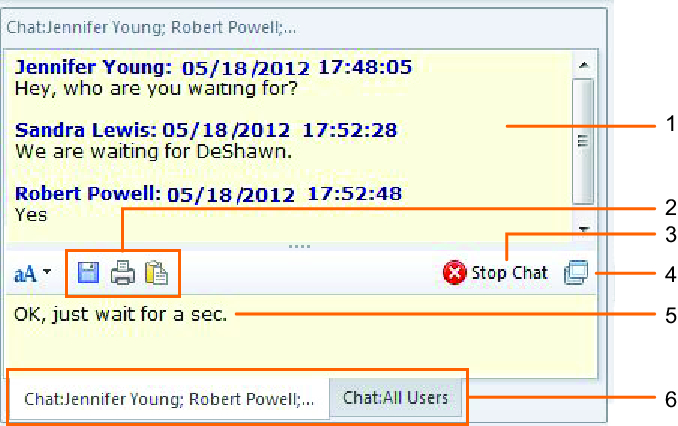
With a chat started, users (depending on the type of chat) can start sending messages, comments, feedback or questions to each other.
(1)Sent messages
Sent messages and anyone who has sent the message will appear in this section.
(2)Save, Print & Paste
Save the conversation to a text file, print it or paste text from your computer's clipboard by using these options.
(3)Stop Chat
Ends the current chat.
(4)Float/Dock Chat
Undocks/Docks the chat window.
(5)Type your message
To send a message in the chat, simply click in this section and start typing! Press ENTER or RETURN on the keyboard to send.
(6)Multiple Chats
If you have multiple chats open, you can choose which to participate in by selecting the appropriate tab.
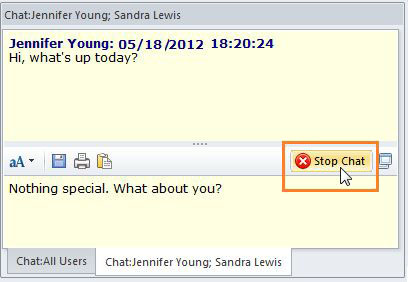
Stop a Chat...
Chat with a Specific Person
Overview...
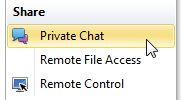
As a Host or Presenter (or with the
[Chat privilege]), you can start private textchats with specific meeting attendees. Simply right-click on the attendee in the user-list and select Chat...
Step-by-Step...
Share a chat...
2. Right-click on an attendee in the user-list
3. Select Private Chat
Controlling the chat...
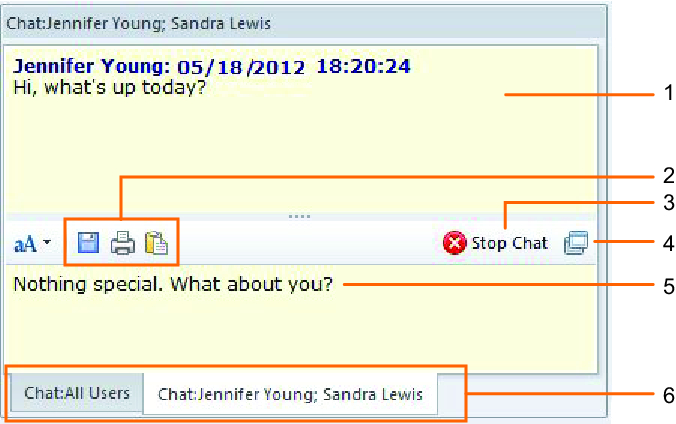
1. With a chat started, you can start sending messages, comments, feedback, questions to each other.
(1)Sent messages
Sent messages and anyone who has sent the message will appear in this section.
(2)Save, Print & Paste
Save the conversation to a text file, print it or paste text from your computer's clipboard by using these options.
(3)Stop Chat
Ends the current chat.
(4)Float/Dock Chat
Undocks/Docks the chat window.
(5)Type your message
To send a message in the chat, simply click in this section and start typing! Press ENTER or RETURN on the keyboard to send.
(6)Multiple Chats
If you have multiple chats open, you can choose which to participate in by selecting the appropriate tab.
Stop a Chat...
Share a Document
Overview...
You can share any document such as Word® documents and text files. This is ideal when you do not need to make changes to it. It is generally faster and more efficient than sharing the application itself or your entire desktop.
Step-by-Step...
Share a document...
2. Select the Share tab
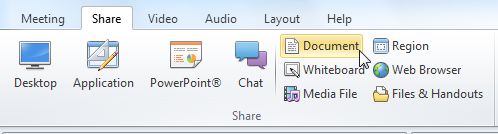
3. Select Document
4. Select a document to share and click Open
5. The document will then be sent to the meeting for all other attendees to view...
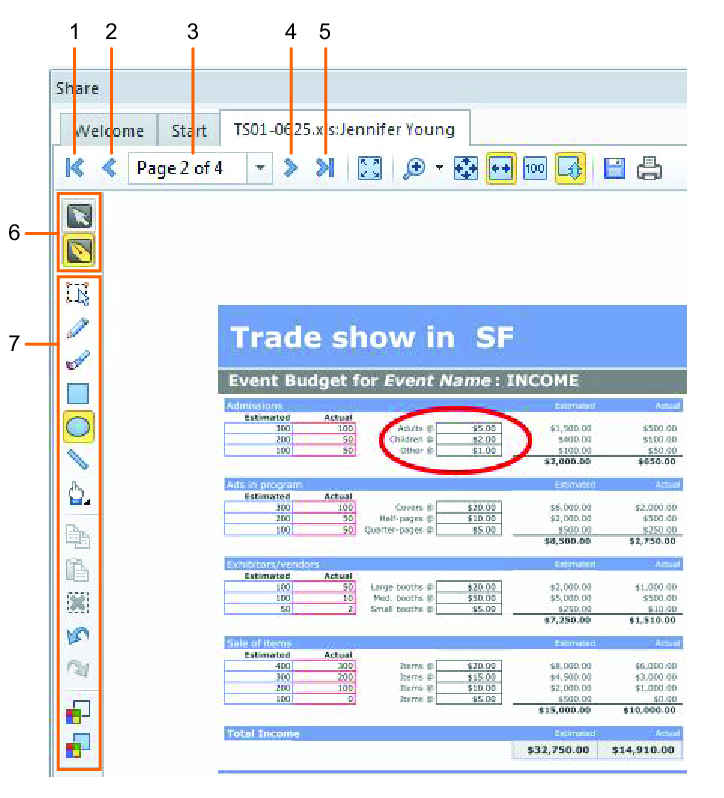
Controlling the document...
With the document now being shared with everyone in the meeting, the
[Host],
[Presenter] (or anyone with the
[Control Focus privilege]) can navigate through the document using the share controls towards the top-left corner of the page.
(1)First page
Go to the beginning of the file.
(2)Previous page
Displays the previous page.
(3)Page Selector
Select a specific page to jump to.
(4)Next page
Displays the next page.
(5)Last page
Go to the end of the file.
(6)Mode switchesYou can switch between the View/Control mode or the Annotation mode by clicking
or
.
Click
(View/Control mode) to control the document normally.
Click
(Annotation mode) to use various annotation tools.
(7)Annotation ToolsWhen you are in Annotation mode by clicking
, you can select and use various
[annotation tools], such as mouse pointers, highlighters and shapes.
Stop Sharing...
Click Stop Sharing towards the top-right corner of the document.
Share a Whiteboard
Overview...
You can share a whiteboard with other attendees in the meeting by using the Share tab and selecting "Whiteboard". Simple but effective when you want to annotate, draw diagrams and make anecdotal notes.
Step-by-Step...
Share a whiteboard...
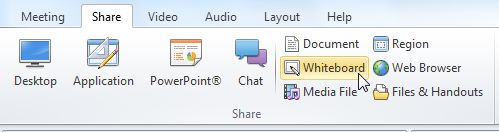
2. Select the Share tab
3. Select Whiteboard
4. A whiteboard will now be shared with everyone in the meeting.
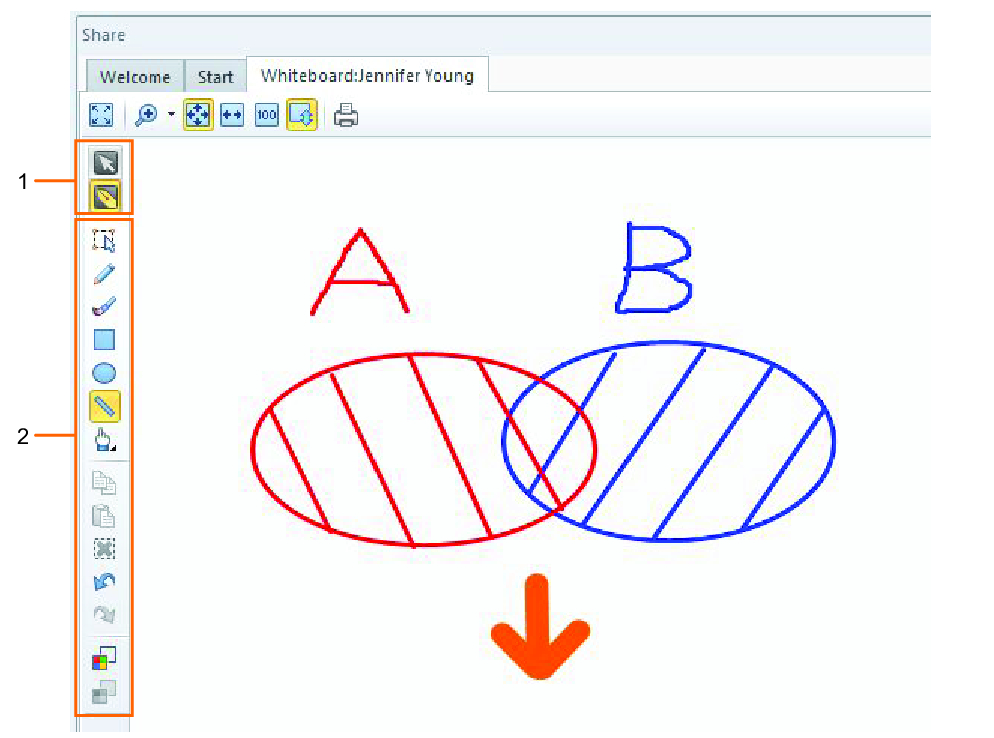
Controlling the whiteboard...
With a whiteboard being shared, any user with the
[Annotation privilege] can draw shapes and lines, use highlighters and animated pointers from the annotation toolbar next to the whiteboard.
When you have the "Annotation" privilege, the Annotation Toolbar is displayed and the Annotation mode becomes available.
(1)Mode switchesYou can switch between the View/Control mode and the Annotation mode by clicking
or
.
Click
(View/Control mode) to control the whiteboard normally.
Click
(Annotation mode) to use various annotation tools.
(2)Annotation ToolsWhen you are in Annotation mode by clicking
, you can select and use various
[annotation tools], such as mouse pointers, highlighters and shapes.
Stop Sharing...
Click Stop Sharing towards the top-right corner of the whiteboard.
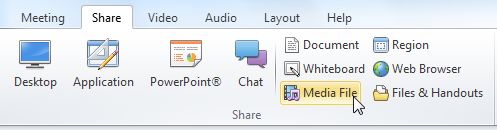
Share a Media File
Overview...
You can share a media file (such as an audio or video file) by using the Share a Media File feature.
Step-by-Step...
Share a media file...
2. Select the Share tab
3. Select Media File
4. Select a suitable media file to share and click Open
5. The media file will then be sent to the meeting for all other attendees to view...
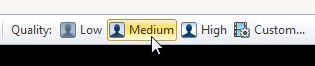
Controlling the media...
With the media file now being shared with everyone in the meeting, the Host or Presenter (who started the media share) can set the quaility of the playback by selecting options displayed at the top of the media file and play or pause using the media controls across the bottom of the media file.
1. Choose the quality of the media before playing the file, by selecting Low, Medium, High or Custom...
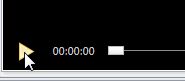
2. Select "play" icon to start playback to everyone in the meeting...
3. Adjust the media's volume, by dragging the volume slider left or right...
Stop Sharing...
Click Stop Sharing towards the top-right corner of the media file.
Media quality explained...
■ Low quality Ideal for people using residential ADSL or cable broadband.
■ Medium quality (default) The standard quality for media sharing, it is suited towards faster internet connections like leased or dedicated lines.
■ High quality Offers the best quality and is only recommended on high-performance internet connections or internal networks.
■ Custom quality Clicking "Custom" will give you some advanced video and audio options. This is only recommended for more advanced users; and allows you to set the bit-rate, frame rate and resolution of the media file (depending on the format).
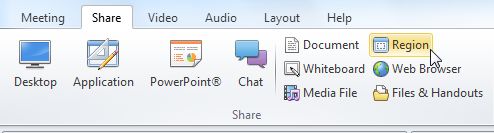
Share a Region
Overview...
Sharing a region can be useful if you just want to show a specific area of your screen.
Step-by-Step...
Share a region...
2. Select the Share tab
3. Select Region
4. A transparent window will now be displayed, which can be resized or moved around the screen.
Controlling the region...
When the region is started - anything displayed within the region area will be visible to everyone in the meeting.
(1)Share OptionsYou can click
(Options) to stop region sharing, change sharing quality, give control of your region to other attendees, etc.
(2)Mode switchesYou can switch between the View/Control mode or the Annotation mode by clicking
or
.
Click
(View/Control mode) to control the application normally.
Click
(Annotation mode) to use various annotation tools.
(3)Annotation ToolsWhen you are in Annotation mode by clicking
, you can select and use various
[annotation tools], such as mouse pointers, highlighters and shapes.
(4)View area
Anything displayed within the region will be shown to everyone else in the meeting.
(5)Move the region
Hold down the mouse button at the top of the region to drag it around the screen.
(6)Resize the region
Hold down the mouse button on any side of the region window and drag to resize the area.
Stop Sharing...
Click Stop Sharing in the top-right corner of the region.
Alternatively...You can also stop sharing by clicking (Options), then select Stop Sharing. |
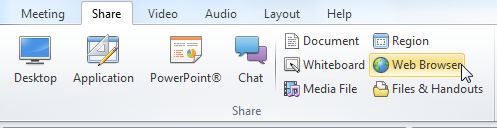
Share a Web Browser
Overview...
You can share your main web browser (even if other attendees don't have the web browser on their computers) by using the Share Web Browser feature.
The following article will guide you through how to share your web browser with other attendees...
Step-by-Step...
Share a web browser...
2. Select the Share tab
3. Select Web Browser
4. Your web browser will now be opened and will be shared with everyone in the meeting.
Controlling the web browser...
When your web browser is being shared - you can use it as you would normally. Anything you do in the browser (such as navigating through a website), will be seen by other attendees.
You have additional sharing controls and options available to the left of the web browser....
(1)Sharing Border
When a web browser is being shared, it will have a green border around it.
The green border turns blue during Annotation mode.
The border turns red during Non-Capture mode.
When in Non-Capture mode (e.g. when a different window is selected), shared contents will not be sent to other attendees.
(2)Share OptionsYou can click
(Options) to stop web browser sharing, change sharing quality, give control of your web browser to other attendees, etc.
(3)Mode switchesYou can switch between the View/Control mode or the Annotation mode by clicking
or
.
Click
(View/Control mode) to control the application normally.
Click
(Annotation mode) to use various annotation tools.
(4)Annotation ToolsWhen you are in Annotation mode by clicking
, you can select and use various
[annotation tools], such as mouse pointers, highlighters and shapes.
(5)Shared Web Browser
Use the web browser as you would normally!
For instance, navigate through a website.
Anything you do in the web browser will be shared with everyone else in the meeting.
Maximized the web browser? If the web browser takes up the entire screen, the sharing border will disappear and the share toolbar will be displayed on the left-side of your monitor. |
Stop Sharing...
Click Stop Sharing in the top-right corner of the web browser.
Alternatively...You can also stop sharing by clicking (Options), then select Stop Sharing. |
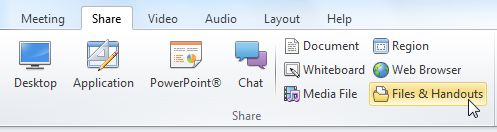
Share Files & Handouts
Overview...
You can share any files with other attendees in the meeting by using the Files & Handouts feature. Other attendees can then save the shared files on their own computers should they choose to.
Files of up to 5 MB can be shared.
Step-by-Step...
Share a file...
2. Select the Share tab
3. Select Files & Handouts
4. Select a file to share and click Open
5. The file will then be sent to the Files section of the meeting for all other attendees to obtain...
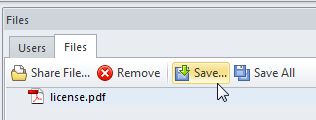
Obtaining shared files...
With the file now being shared with everyone in the meeting, attendees can obtain copies of the shared files by saving them to their computer.
1. Select the Files tab...
2. Select a file to save to your computer and click Save or Save All...
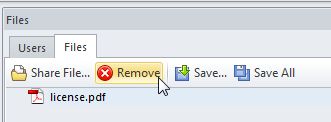
Remove shared files...
2. Select a file to delete from the meeting and click Remove...
Annotation Tools
Overview...
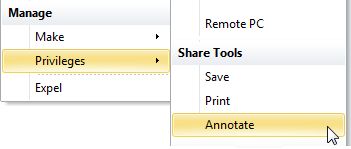
When you are a
[Host] or
[Presenter] in a meeting (or have the
[Annotate privilege]), you have access to a range of annotation tools which can be used over both static (documents, PowerPoint
® files) and live (desktop, application, web browser) shares. Annotations can be useful if you want to make annecdotal notes or drawings over shared material.
The following article will guide you through how to use the annotations tools in a meeting...
Step-by-Step...
Share something...
Start annotating...
When you are in Annotation mode by clicking
, you can choose from a varitey of tools...
(1)Mode switchesYou can switch between the View/Control mode and the Annotation mode by clicking
or
.
Click
(View/Control mode) to control the application normally.
Click
(Annotation mode) to use various annotation tools.
(2)Annotation ToolsWhen you are in Annotation mode by clicking
, you can select and use various
[annotation tools], such as mouse pointers, highlighters and shapes.
The annotation tool details
When you are in Annotation mode, you can choose from a variety of tools...
 Select:
Allows you to interact or use any of the annotations made over the shared material.
 Pen:
Pen:Allows you to draw a free-hand line, while holding down the mouse button.
 Highlighter:
Allows you to highlight areas of interest, while holding down the mouse button.
 Box:
Box:Draws a box or rectangle in a share window, while holding down the mouse button.
 Ellipse:
Draws an ellipse shape in a share window, while holding down the mouse button.
 Line:
Line:Draws a straight line in a share window, while holding down the mouse button.
 Pointers:
Changes your regular mouse pointer to the one of the following types. This can help get other attendees' attention to a specific area of the shared material.
 Circle Pointer
  Arrow Pointer
  Orb Pointer
  Hand Pointer
  Arrow Pointer
  Triangle Pointer
  Copy:
Copy:Copies the selected annotation, or text (if using a live share, such as desktop, application, web browser).
 Paste:
Pastes the last copied annotation or text onto the shared material.
 Delete:
Deletes the currently selected annotation.
 Undo:
Undo:Undoes the last annotation action.
 Redo:
Redo:Redoes the last annotation action that was undone.
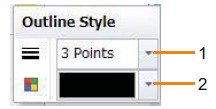
 Outline Style:
Gives you the ability to customize the width of the line and color (including opacity) of the selected annotations.
(1)Line Width
(2)Line Color
 Fill Style:
Gives you the ability to customize the fill color of any shape (including the opacity) of the selected annotations.
Delete all annotations...
You can easily delete all annotations, with these steps...
1. Right-click on the shared material and select Delete All
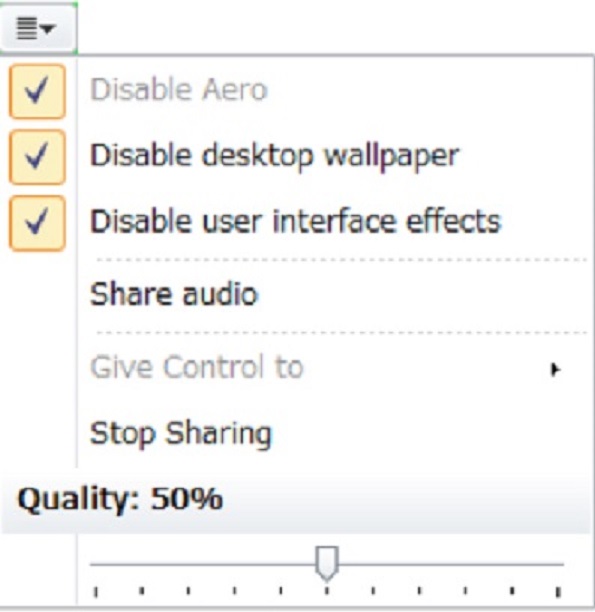
Sharing Options
Overview...
When you are sharing your desktop, applications, PowerPoint® file, whiteboard, region, and web browser, you can choose to enable / disable the Aero interface (the glass effect), the desktop wallpaper, and user interface effects used in Windows. By turning them off, the data volume is reduced and the performance will improve.
Share something...
Click
and then select options.
Disable the Aero interface (the glass effect) feature in Windows.
Disable desktop wallpaper
Disable the Windows desktop wallpaper.
Disable user interface effects
Disable user interface effects, such as an icon and application button animations.
Remote Control a Share
Overview...
When sharing a
[desktop],
[application],
[region] or
[web browser], you (as the sharer) can give control of it to other attendees in the meeting. This is useful if you want someone else to interact with the application or your computer (depending on what is being shared).
The following article will guide you through how to give control of a share to someone else in the meeting...
Step-by-Step...
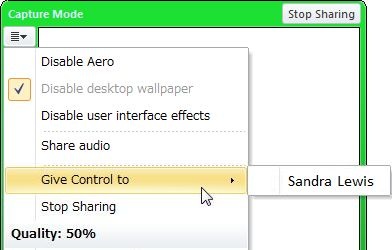
Give control to someone...
3. Select (Options)
4. Select Give Control to and the attendee to give the control to
Remote controlling the share...
With a "live" application being shared, the attendee is now able to move their own mouse around the application and fully interact with it - as if it was on their own computer!
Stop the remote control...
The Host or Presenter (whose application is being shared) can click Stop Control towards the top-right corner of the current share.
Save a Share
Overview...
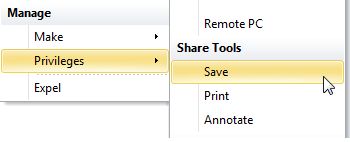
As a Host or Presenter (or with the
[Save privilege]), you can save a copy of the current share (PowerPoint
® file or document), excluding any annotations.
Step-by-Step...
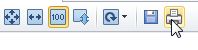
Save a share...
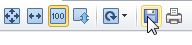
2. Click on the "save" icon towards the top of the share area
3. Select a suitable location on your computer to save it to - and click Save
4. A copy of the current share will now be saved to your computer as a PDF document (.pdf) 1. Adobe® Reader® is required for viewing PDF documents.
1 If you do not have the Adobe
® Acrobat
® software, click the following "Adobe
® Reader
®" link to download the software.
http://www.adobe.com/products/acrobat/readstep2.html
Print a Share
Overview...
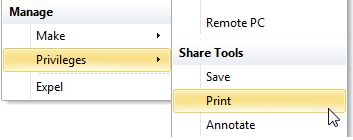
As a Host or Presenter (or with the
[Print privilege]), you can print a copy of the current share (PowerPoint
® file, document or whiteboard), including any annotations. You can also print a "screenshot" or "image" of a live share (such as a desktop, application or region).
Step-by-Step...
Print a share...
2. Click on the "print" icon towards the top of the share area
3. Choose the printer you would like to print to and click Print
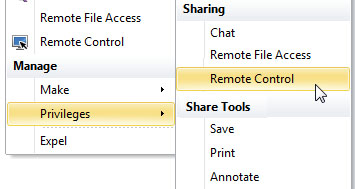
Remote Control
Overview...
When you are a
[Host] or
[Presenter] in a meeting (or have the
[Remote Control privilege]), you can request remote control of other attendees' computers. This is useful if you want to help them resolve a problem, or simply to guide them on how to do something on their computer.
The following article will guide you through how to remotely control someone else's computer in the meeting...
Step-by-Step...
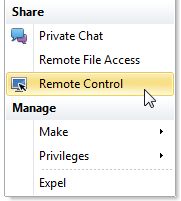
Request Remote control...
2. Right-click on an attendee in the user-list who you want to remote control, and then select Remote Control
3. The wait dialog appears until the attendee allows or denies the remote control request
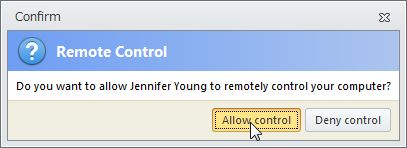
Attendee needs to Allow or Deny remote control...
Before you can remote control an attendee's computer, the attendee will need to either "allow" or "deny" the request from you (example below).
The attendee will need to select Allow control to permit the remote control
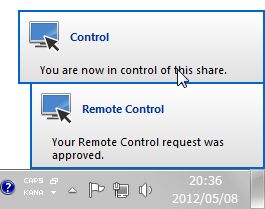
Remote controlling...
Once the attendee has allowed you to remote control their computer, you will see a couple of notifications in the bottom-right corner of your screen (example below).
You will now be able to remotely control the attendee's computer.
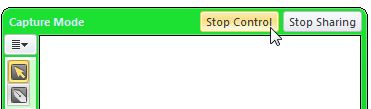
Stop the remote control...
You (the remote controller), can stop controlling the attendees' computer by clicking Stop Sharing.
Alternatively...The attendee (being remote-controlled), can also choose to stop the remote control by either of the following ways:Press Shift+Ctrl+R, or click the Stop Sharing button displayed on the top-right of the OmniJoin meeting room screen. |
Remote File Access
Overview...
When you are a
[Host] or
[Presenter] in a meeting (or have the
[Remote File Access privilege]), you can request to make remote file access between you and other attendees. This is useful if you want to send a copy of a file to someone, or even retrieve a file from someone.
NOTE: This feature lets you access and copy any file held on the attendee's computer. Use with caution. |
The following article will guide you through how to access to another attendee's files in the meeting...
Step-by-Step...
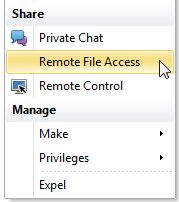
Request a Remote File Access...
2. Right-click on an attendee in the user-list whose files you want to access
3. Select Remote File Access.
4. Click Yes on the confirmation screen
5. The wait dialog appears until the attendee allows or denies the Remote File Access request
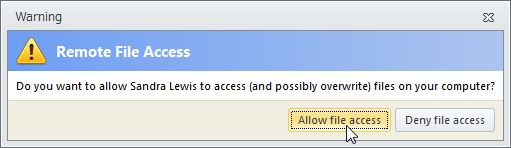
Attendee needs to Allow or Deny the Remote File Access request...
Before you can access to another attendee's computer, the attendee will need to either "allow" or "deny" the request from you (example below).
The attendee will need to select Allow file access to let you access their files.
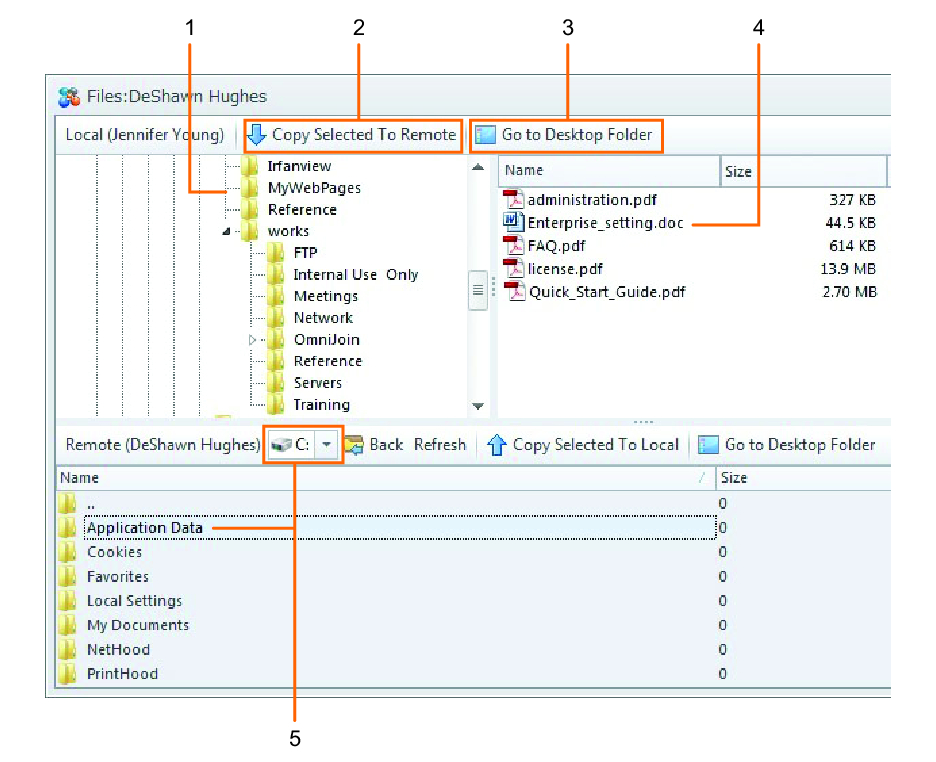
Accessing the attendee's computer...
Once the attendee has allowed you to access, a Remote File Access window will open, allowing you to have access to the files on the attendee's computer.
■ Copy to the attendee's computer
(1)Browse to a folder location
Browse through your own computer's folders to the location of the file(s) you want to copy to the attendee.
(2)Start the file copy
After you have selected the file(s) to copy to the attendee, use this button to copy the file(s) to the attendee.
(3)Go to Desktop Folder
Browse the folders located on your desktop.
(4)Select a file to copy
Select the file(s) from your computer to copy to the attendee's computer. Folders can not be copied.
(5)Choose the attendee's destination folder
You can choose where to copy the file(s) to on the attendee's computer, by using the drop-down list (to select a hard-drive) or by double-clicking on folders.
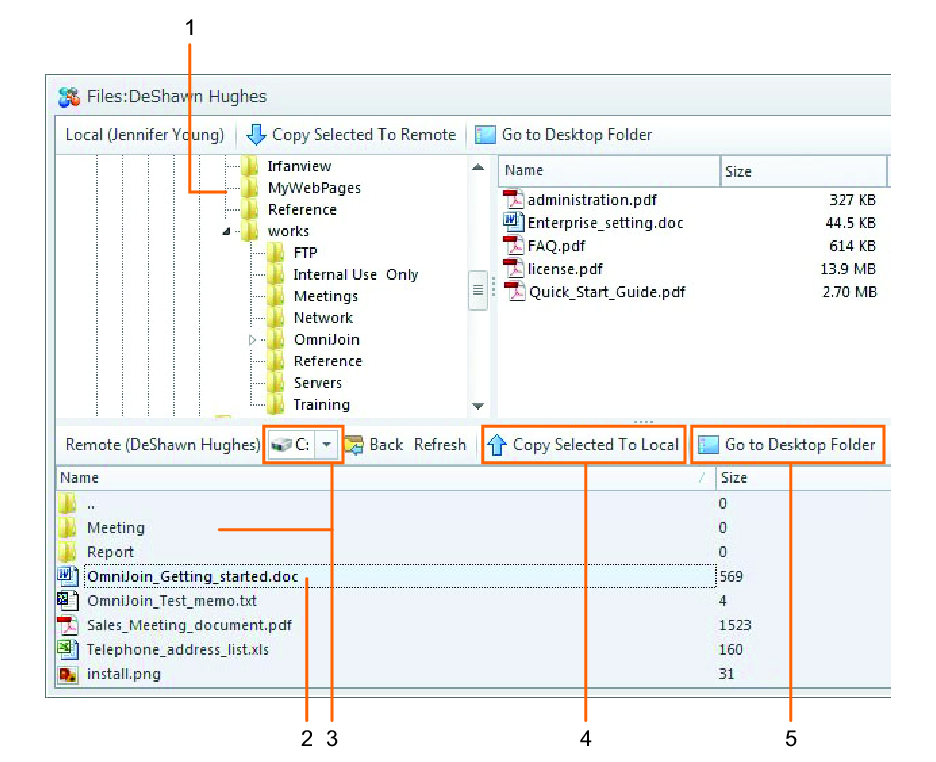
■ Copy from the attendee's computer
(1)Choose your destination folder
You can choose where to copy the file(s) to on your computer, by double-clicking on folders.
(2)Select a file to copy
Select the file(s) from the attendee's computer to copy to yours.
(3)Browse to a folder location
Browse through the attendee's computer by using the drop-down list (to select a hard-drive) or by
double-clicking on folders.
(4)Start the file copy
After you have selected the file(s) to copy, use this button to copy the file(s) from the attendee's
computer to yours.
(5)Go to Desktop Folder
Browse the folders located on attendee's desktop.
Stop the Remote File Access...
You can stop the file access by closing the Remote File Access window.
NOTE: For security reasons, you cannot delete, edit or rename files that are on the attendee's (remote) computer. |
Video
Everything video (webcam) related! In OmniJoin, you have complete control over videos in a meeting.
Play Video
Overview...
The following article will guide you through the various ways to play videos.
Step-by-Step...
Play my video
1. While in an OmniJoin meeting...
2. Select the Video tab
3. Select Play
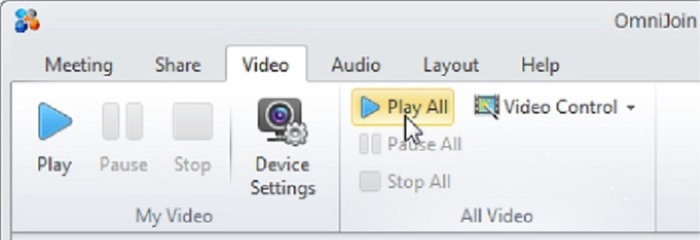
Play everyone's video
1. While in an OmniJoin meeting (as a [Host])...
2. Select the Video tab
3. Select Play All
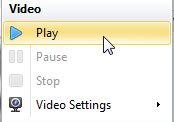
Play an individual's video
1. While in an OmniJoin meeting (as a [Host])...
2. Right-click on an attendee in the user-list
3. Select Play
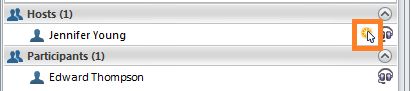
Alternatively...You can select the attendee in the user-list and click the Play icon |
Pause Video
Overview...
The following article will guide you through the various ways to pause videos.
Step-by-Step...
Pause my video
1. While in an OmniJoin meeting...
2. Select the Video tab
3. Select Pause
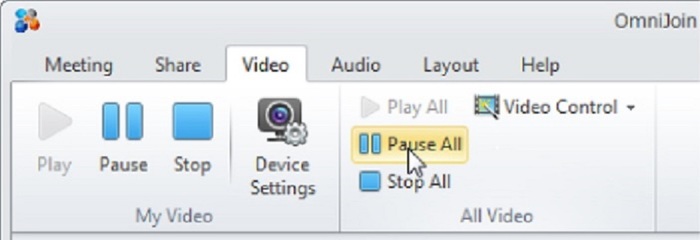
Pause everyone's video
1. While in an OmniJoin meeting (as a [Host])...
2. Select the Video tab
3. Select Pause All
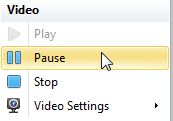
Pause an individual's video
1. While in an OmniJoin meeting (as a [Host])...
2. Right-click on an attendee in the user-list
3. Select Pause
Alternatively...You can select the attendee in the user-list and click the Pause icon |
Stop Video
Overview...
The following article will guide you through the various ways to stop videos.
Step-by-Step...
Stop my video
1. While in an OmniJoin meeting...
2. Select the Video tab
3. Select Stop
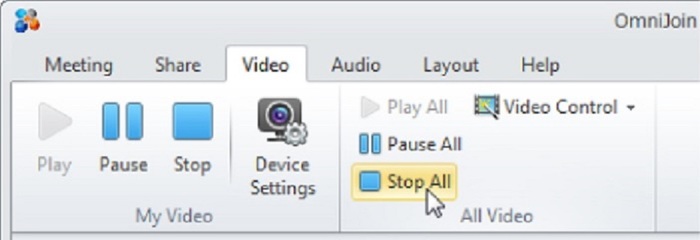
Stop everyone's video
1. While in an OmniJoin meeting (as a [Host])...
2. Select the Video tab
3. Select Stop All
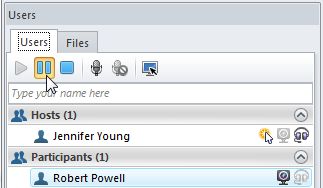
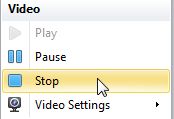
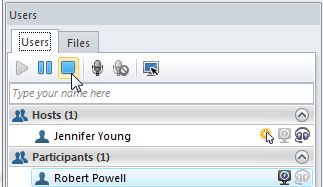
Stop an individual's video
1. While in an OmniJoin meeting (as a [Host])...
2. Right-click on an attendee in the user-list
3. Select Stop
Alternatively...You can select the attendee in the user-list and click the Stop icon |
Video Playback Options
Overview...
By default, video and audio in an OmniJoin meeting is "Always on for everyone". You can change this setting so that the host can control these features.
The following article will guide you through how to change the video playback options for the meeting...
Step-by-Step...
1. While in an OmniJoin meeting (as a [Host])...
2. Select the Video tab
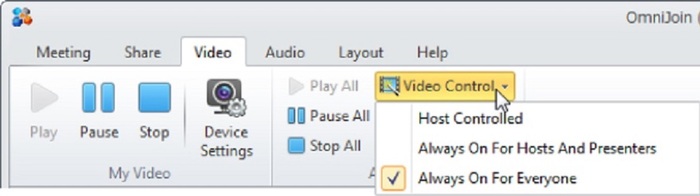
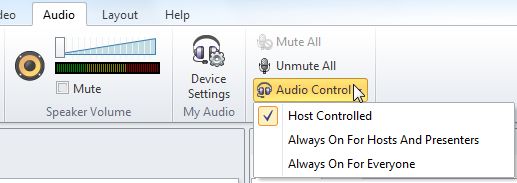
3. Select Video Control and choose the desired option for controlling video playback
4. The setting will then be saved for the meeting.
Video playback controls explained...
■ Host Controlled
Requires a Host to manually play the videos / webcams for the specific meeting. Useful when the meeting is used for a number of purposes and you don't always want the videos to play automatically when people join.
■ Always On For Hosts And Presenters
Whenever a Host or Presenter joins (or gets promoted), the video will be automatically played. However, a Host will still have to manually play any Participant's video.
■ Always On For Everyone
The standard and default setting for OmniJoin meeting. Configures the specific meeting so that all videos / webcams are played when anyone joins the meeting.
My Video Device Settings
Overview...
To adjust your own video in OmniJoin, you can access the video settings menu by going into the
[meeting settings].
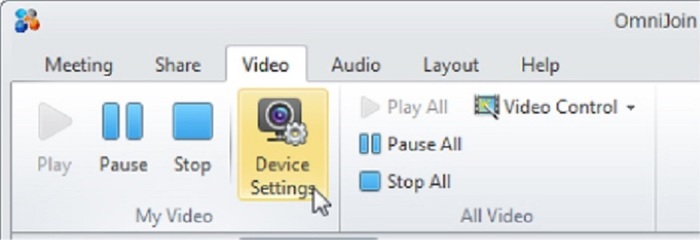
After clicking "Device Settings" in the Video tab, you can choose which device to use as your video image.
Step-by-Step...
1. While in an OmniJoin meeting...
2. Select the Video tab
3. Select Device Settings
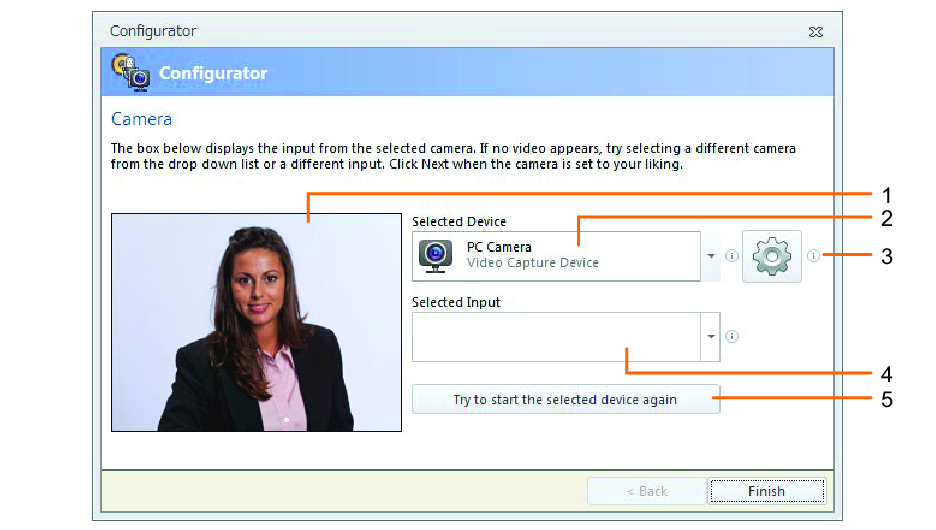
4. Choose and set the camera device you want to use.
(1)Video Preview
Displays a live preview of the currently selected webcam or video device.
(2)Selected Device
Allows you to choose the video device you want to use for OmniJoin meetings.
This could be a USB webcam or even a video capture card.
(3)Check for Updated Video Formats
Checks online for pre-configured settings for certain video devices. Ideal for quickly configuring video capture cards or HD devices.
(4)Selected Input
If you've selected a device which has multiple inputs, you can choose a specific input to use (such as Composite or S-Video).
(5)Try Again
Refreshes the webcam or video device, if you have closed other applications or re-connected the device.
No video preview? If there is no preview image, check your webcam (or video device) is plugged in properly and not in use by other applications; then click "Try Again" to refresh the device. |
Change Video Device & Settings
Overview...
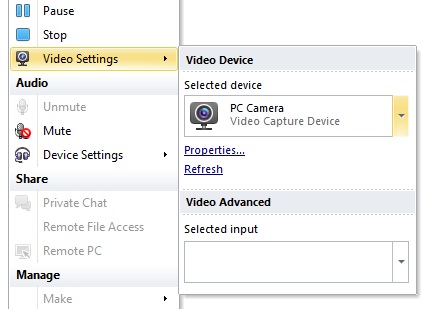
Should you ever need to change your own video device that is used in OmniJoin or another attendee's, you can right-click on an attendee in the user-list and select Video Settings to view a list of available devices and options.
Changing and adjusting video can be useful if a participant does not know how to do it themselves or if you prefer using a different device.
NOTE: A Host has the ability to play, pause or stop other attendees' video / webcam. |
Step-by-Step...
1. While in an OmniJoin meeting (as a [Host])...
2. Right-click on an attendee in the user-list
3. Point to Video Settings, you can now remotely change the attendee's video / webcam devices and other related options
4. Click anywhere outside of the menu for the settings to be saved.
Show Video Names
Overview...
Show video names is a useful feature if there are several people in the meeting with webcams. By showing video names, OmniJoin will display the name of each person over the top-left of their video - helping you to put a face to a name.
Step-by-Step...
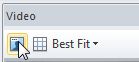
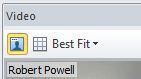
2. Select the "Show Names" icon above the video.
3. Once enabled, you will see each person's "meeting name" in the top-left corner of their video.
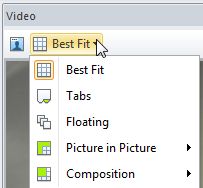
Change Video Style
OmniJoin allows you to display the webcams / videos in a number of different ways, depending on your requirements. OmniJoin even allows you to float the videos onto other monitors or screens!
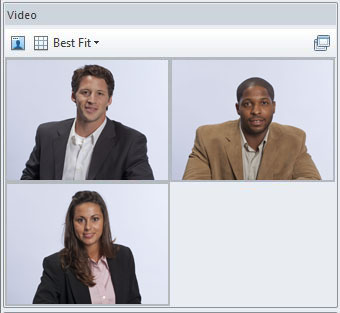
Best Fit Video Style
The Best Fit video style is generally the standard video layout and suits most needs. It will automatically resize the videos as people join or leave the meeting.
2. Select the video style menu and click Best Fit (if not already selected).
3. Once Best Fit is selected, you will see all videos neatly organized and the same size.
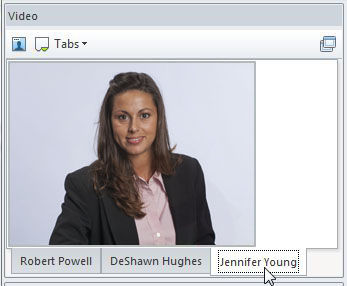
Tabs Video Style
With a tabbed video style in use, it will only display one video at a time - depending on what video tab is selected. Useful if you're in a meeting where everyone needs to give an update to the group or team. The Host of the meeting can switch between the videos depending on who's speaking / presenting.
2. Select the video style menu and click Tabs.
3. Once Tabs is selected, each video will appear individually with a corresponding tab underneath.
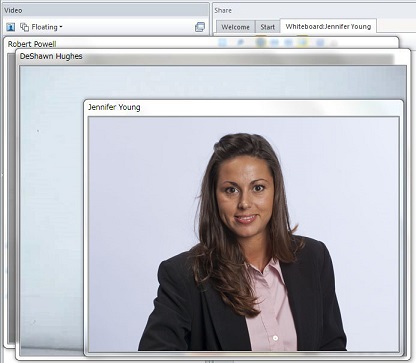
Floating Video Style
If you want to float all videos on your screen to have the flexibility to resize them or move them around; you can select the Floating video style.
2. Select the video style menu and click Floating.
3. Once Floating is selected, each video will display in a floating window, which can then be dragged around the screen and easily re-sized.
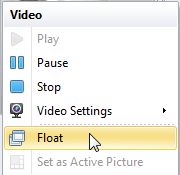
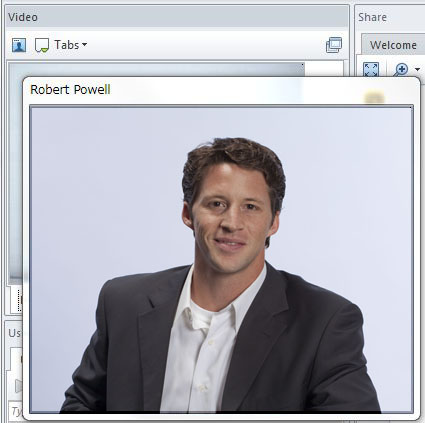
Floating Individual Videos
Want to invidually move a video around your screen or resize it? As a Host you can right-click on a live video and select Float to "un-dock" it. The video will then be floating separately from the meeting...
2. Right-click on a video and click Float.
3. Once a video is floating, it can be dragged around the screen and easily re-sized.
Float Entire Video Window
Really useful for those who have dual or multiple monitors; you can float (or un-dock) the entire video window containing all live videos. The entire video window can then be dragged around the screen - even onto a different monitor!
2. Click on the float video window icon (top-right corner of the video window)...
3. The video window (containing the videos) will now be floating, and can now be dragged around the screen and easily re-sized.
4. You can dock the video window back into the meeting by clicking the dock video window icon (top-right corner)...
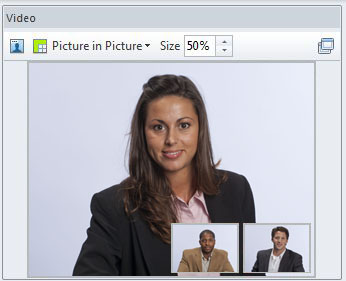
Picture in Picture Video Style
Choose an attendee to be the larger "active" video and all other live videos will automatically appear inset, in the bottom-right corner.
2. Select the video style menu.
3. Point to Picture in Picture and then select which video to be the active (bigger) one.
4. Once Picture in Picture is selected, the active video will appear bigger, with any other videos displayed in the bottom-right corner.
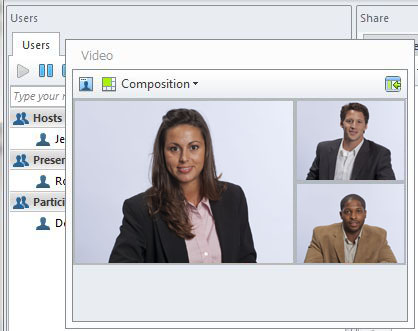
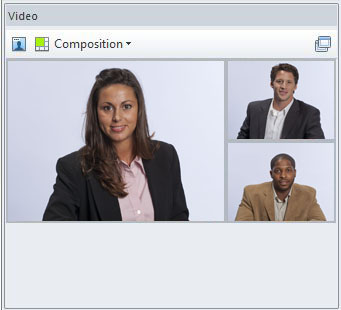
Composition Video Style
A useful style for videos where you want the main Host or Presenter of the meeting to be the larger "active" video. All other videos will then be neatly arranged around the edge.
2. Play everyone's video (select the Video tab and select Play All)
3. Select the video style menu.
4. Point to Composition and then select which video to be the active (bigger) one.
5. Once Composition is selected, the active video will appear bigger, with any other videos displayed neatly around it.
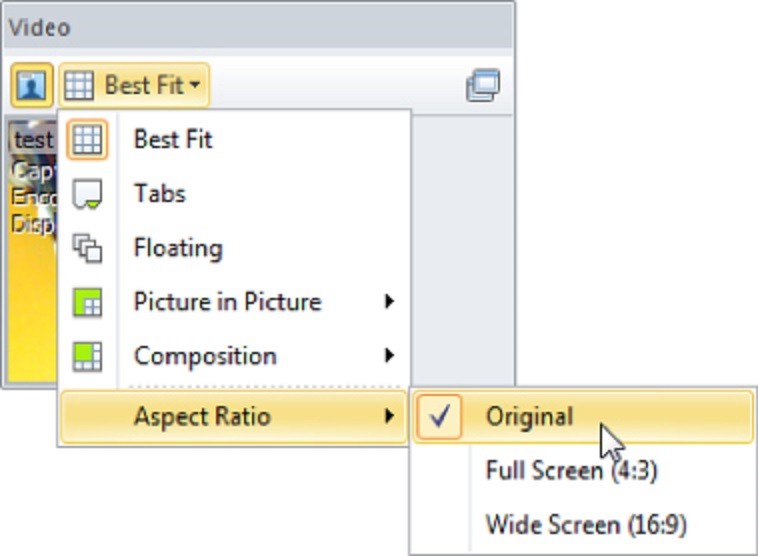
Change Video Aspect ratio
By default, video aspect ratio in an OmniJoin meeting will be Original regardless of the device (webcam) that each participant is using. However, you can change this settings if required.
1. While in an OmniJoin meeting (with [videos already being played])...
2. Select the video style menu and click Best Fit (if not already selected).
3. Click Aspect Ratio and choose video aspect ratio from either Original, 16:9 or 4:3.
Video aspect explained...
■ Original
Automatically adjusts the aspect ratio of the video to fit the layout of the screen.
■ Full Screen(4:3)
Each video will display at an aspect ratio of 4:3.
■ Wide Screen(16:9)
Each video will display at an aspect ratio of 16:9.
Audio
Audio (VoIP) is included in OmniJoin as standard. You can use
[USB headsets or external speakers and a microphone] to communicate with other meeting attendees.
Unmute Audio
Overview...
The following article will guide you through how to control the audio during a meeting.
NOTE: A Host has the ability to unmute or mute other attendees' audio device / microphone |
Step-by-Step...
Unmute my audio
1. While in an OmniJoin meeting...
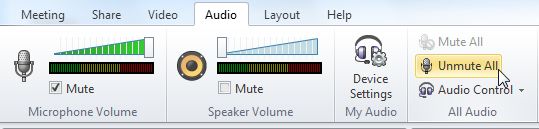
2. Select the Audio tab
3. Un-tick respective Mute button at the top-left corner of the screen for microphone.
Unmute everyone's audio
1. While in an OmniJoin meeting (as a [Host])...
2. Select the Audio tab
3. Select Unmute All
Unmute an individual's audio
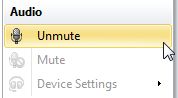
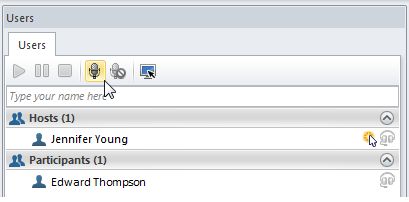
1. While in an OmniJoin meeting (as a [Host])...
2. Right-click on an attendee in the user-list
3. Select Unmute
Alternatively...You can select the attendee and click the "microphone" icon |
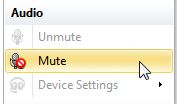
Mute Audio
Overview...
The following article will guide you through how to control audio during a meeting.
NOTE: A Host has the ability to unmute or mute other attendees' audio device / microphone |
Step-by-Step...
Mute my audio
1. While in an OmniJoin meeting...
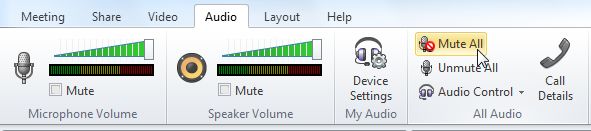
2. Select the Audio tab
3. Tick respective Mute buttons at the top-left corner of the screen for microphone and speaker
Mute everyone's audio
1. While in an OmniJoin meeting (as a [Host])...
2. Select the Audio tab
3. Select Mute All
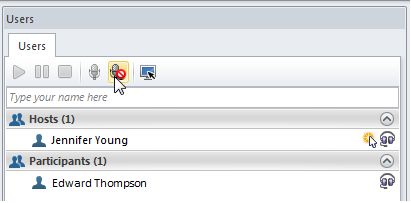
Mute an individual's audio
1. While in an OmniJoin meeting (as a [Host])...
2. Right-click on an attendee in the user-list
3. Select Mute
Alternatively...You can select the attendee and click the "mute microphone" icon |
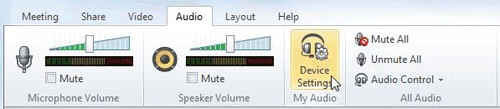
My Audio Device Settings (When VoIP is used)
Overview...
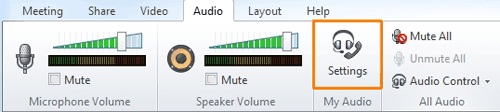
To adjust your own audio in OmniJoin, you can access the audio settings menu by clicking "Settings" in the Audio tab.
Step-by-Step...
1. While in an OmniJoin meeting...
2. Select the Audio tab
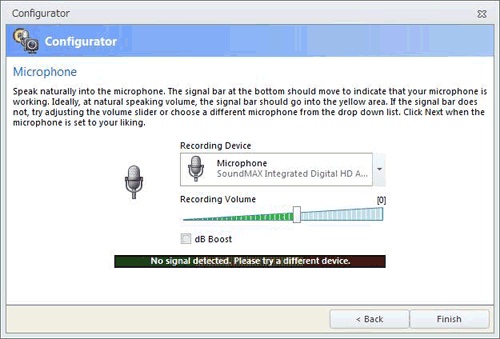
3. Select Device Settings
4. Follow the on-screen instructions to configure each device
5. Click Finish to save the settings.
Push-To-Talk Audio
Overview...
Best (and often) described as a "walkie-talkie" approach to using audio. It helps cut out any background noise or echo that is often experienced with people who work in a busy or loud environment; or using external speakers (computer or laptop) and a separate microphone.
NOTE: A Host has the ability to unmute or mute other attendees' microphone |
Step-by-Step...
Enable Push-To-Talk (PTT)
1. While in an OmniJoin meeting...
2. Select the Help tab
3. Select Settings
4. Select Audio
5. Un-tick Enable Voice Activation
6. Specify a "HotKey" (e.g. F1) to hold-down when speaking (optional)
7. Click OK to save changes
Using Push-To-Talk (PTT)
Once you have enabled Push-To-Talk, you will only be heard in the meeting when holding down the Push- To-Talk button (in the user-list) or by holding down the assigned "HotKey" (e.g. F1) if one was set.
1. Hold down the Push-To-Talk button in the user-list...
NOTE: Your display name will highlight green in the user-list whenever your voice is being sent to the meeting (example below). |
Voice Activation Audio
Overview...
Standard in all OmniJoin meetings, it allows you to easily converse with other attendees by just speaking into your microphone. Using Voice Activation will help avoid the need to hold down the Push-To-Talk button in order to speak.
NOTE: A Host has the ability to unmute or mute other attendees' microphone. |
Step-by-Step...
Enable Voice Activation
1. While in an OmniJoin meeting...
2. Select the Help tab
3. Select Settings
4. Select Audio
5. Tick Enable Voice Activation
6. Click OK to save changes
Using Voice Activation
Once you have enabled Voice Activation, your voice will be picked up by just speaking into your microphone.
NOTE: Your display name will highlight green in the user-list whenever your voice is being sent to the meeting (example below). |
Audio Control Options
Overview...
By default, video and audio in an OmniJoin meeting is "Always on for everyone". You can change this setting so that the host can control these features.
The following article will guide you through how to change the audio control options for the meeting...
Step-by-Step...
1. While in an OmniJoin meeting (as a [Host])...
2. Select the Audio tab
3. Select Audio Control and choose the desired option for controlling audio
4. The setting will then be saved for the meeting.
Audio controls explained...
■ Host Controlled
Requires a Host to manually unmute the audio / microphones for the specific meeting. Useful when the meeting is used for a number of purposes and you don't always want the audio to play automatically when people join.
■ Always On For Hosts And Presenters
Whenever a Host or Presenter joins (or gets promoted), the audio will be automatically unmuted. However, a Host will still have to manually unmute any Participant's microphones.
■ Always On For Everyone
The standard and default setting for OmniJoin meeting. Configures the specific meeting so that all audio / microphones are unmuted when anyone joins the meeting.
Change Audio Device & Settings
Overview...
Should you ever need to change your own audio device that is used in OmniJoin or another participant's, you can right-click on an attendee in the user-list and select Audio - Device Settings to view a list of available devices and options.
Changing and adjusting audio can be useful if a participant does not know how to do it themselves or if you prefer using a different device - such as a headset (instead of a webcam mic).
NOTE: A Host has the ability to unmute or mute other attendees' microphone |
Step-by-Step...
1. While in an OmniJoin meeting (as a [Host])...
2. Right-click on an attendee in the user-list
3. Point to Audio Settings, you can now remotely change the participant's audio devices and other related options
4. Click anywhere outside of the menu for the settings to be saved.
Change the Audio Mode (Only When OmniJoin Integrated Audio Is Available)
Overview...
While in a meeting that uses OmniJoin Integrated Audio, you can change your audio mode during the meeting. If the current audio quality is poor and you would like to select a different audio mode, or if you would like to change the settings for OmniJoin Phone Conferencing, follow the steps below.
Step-by-Step...
Change the audio mode...
1. While in an OmniJoin meeting...
2. Select the Audio tab
3. Click Settings to change the audio mode and setup
4. In the My Audio Settings window, select the audio mode and option you want to use.
5. Follow the on-screen instructions to setup the advanced settings for OmniJoin Phone Conferencing.
Layouts
Depending on the type of meeting you are in, you may want to change the layout to suit your requirements. A great example is using the "Video only" layout, when all you're after is a video meeting call with other colleagues.
Meeting Layouts
Overview...
You can change the layout of the meeting by selecting the Layout tab and clicking any of the layouts provided. "Style 1" is the standard layout in OmniJoin.
The following article will guide you through how to change the layout and what they're often used for.
Step-by-Step...
1. While in an OmniJoin meeting...
2. Select the Layout tab
3. Select a Layout style
My Video and Share Layout
■ Style 1
The standard (or default) layout in OmniJoin and is typically the most common and versatile for most people's needs. Any live videos, chat conversations and the user list will be displayed on the left with any shared material on the right.
■ Style 2
Essentially a mirror of the "Style 1" layout; where you have any live videos, chat and user list on the righthand side, with any shared files appearing on the left.
■ Style 3
Aligns all live webcams / videos horizontally across the top of the screen with any chats (if used) and the user list on the right-hand side. Any files that are being shared will be shown underneath the horizontal videos.
■ Webinar
Similar to the traditional broadcast or seminar - this layout will hide the user list and will just display any live videos or webcams and the shared application, PowerPoint® file, document or media file.
■ Share Only
Will hide all videos, chats, the user list and will only show what is currently being shared.
NOTE: Floating videos will not be hidden; only the video panel will be hidden. |
■ Video Only
Useful for the more traditional video meeting calls, when you're not interesting in collaborating or sharing files. Only videos / webcams will be shown in the meeting (and audio - if enabled and unmuted).
■ Full Screen
Will maximize the OmniJoin meeting to the full size of your screen.
My Video Layout
■ Best Fit
The Best Fit video style is generally the standard video layout and suits most needs. It will automatically resize the videos as people join or leave the meeting.
■ Tabs
With a tabbed video style in use, it will only display one video at a time - depending on what video tab is selected. Useful if you're in a meeting where everyone needs to give an update to the group or team. The Host of the meeting can switch between the videos depending on who's speaking / presenting.
■ Floating
If you want to float all videos on your screen - to have the flexibility to resize them or move them around; you can select the Floating video style.
■ Picture in Picture
Choose an attendee to be the larger "active" video and all other live videos will automatically appear inset, in the bottom-right corner.
■ Composition
A useful style for videos where you want the main Host or Presenter of the meeting to be the larger "active" video. All other videos will then be neatly arranged around the edge.
All Layouts
■ Follow My LayoutIf you're a Host or have been given the
[Control Layout privilege], you have the power to enable (or turn on)
[Follow My Layout]. This allows you to mirror your exact meeting layout to all other attendees!
■ Apply My LayoutIf you're a Host or have been given the
[Control Layout privilege]Control , you can mirror (or apply) your current layout to all other attendees. However, any further layout adjustments you make will not be replicated to other attendees, unless you click "Apply My Layout" again.
Follow My Layout
Overview...
You can use Follow My Layout so that any layout changes you make in OmniJoin will be mirrored to all other attendees in the meeting. As a Host, you can also assign the
[Control Layout privilege] to other attendees.
The following article will guide you through how to turn Follow My Layout on and off.
Step-by-Step...
Turn on Follow My Layout...
2. Select the Layout tab
3. Follow My Layout is a 'toggle button', so if it's already highlighted dark- range (example below), it means that Follow My Layout is currently on. If it is dark-orange; clicking on it will turn off Follow My Layout.
Using Layouts...
With Follow My Layout on (highlighted dark-orange), you can now change the layout and view for everyone in the meeting...
1. Select the Layout tab
2. Select a layout style - such as Style 3...
3. The layout you've chosen will now be immediately displayed to all other meeting attendees!
Apply My Layout
Overview...
Apply My Layout can be clicked on to mirror (or copy) your current layout to everyone else in the meeting.
However, any subsequent layout changes will not be reflected to other meeting attendees.
Step-by-Step...
Apply My Layout...
2. Select the Layout tab
3. Select Apply My Layout
NOTE: If [Follow My Layout] is selected (highlighed in darkorange), "Apply My Layout" will be disabled. These two options are mutually exclusive to one another, so you can either have [Follow My Layout] enabled or "Apply My Layout" enabled. |
4. Your current layout will now be copied to all other meeting attendees.
User Hierarchy
OmniJoin uses a simple hierarchy to allocate powers to attendees and to keep meetings organized.
Hosts
Overview...
A Host is typically the meeting owner (or the person who has started / organized the meeting). They have the highest level of rights in a meeting and generally have full control. As a Host, you can share files, control audio and video, invite, expel, promote or demote other attendees.
Step-by-Step...
What a Host can do...
A Host has the highest level of rights in a meeting...
1. Open Live Contact List/ OmniJoin IM
2. Select the Meeting tab
3. Click Enter my meeting room
You will now enter your personal meeting room as a "Host".
Already in a meeting...?
If you're already in a meeting, you can be promoted to a Host in a couple of ways:
■ Ask a Host (if one is already present) in the meeting to promote you...
■ Use the "
[Take host or presenter]" option in the Meeting tab to enter the "Host" password. This will promote you to a Host as well!
Presenters
Overview...
A Presenter has the same rights as a Participant with the added ability to share material (such as applications, documents) in a meeting.
Step-by-Step...
What a Presenter can do...
A Presenter has the ability to share material in a meeting.
A Host can promote you...
In order for you to become a Presenter, a Host in the meeting can promote you.
Already in a meeting...?
If you're already in a meeting, you can be promoted to a Presenter in a couple of ways:
■ Ask a Host (if one is already present) in the meeting to promote you...
■ Use the "
[Take host or presenter]" option in the Meeting tab to enter the "Presenter" password (if available). This will promote you to a Presenter as well!
Participants
Overview...
A Participant has the lowest rights in a meeting, and is unable to share files or control what is being displayed.
Step-by-Step...
What a Participant can do...
A Participant has the lowest rights in a meeting, and by default can only:
■ View what is being shared
■ Listen and communicate via the built-in audio (VoIP) (if enabled)
The features and controls below are
[privileges] that can be given or removed from participants by the
[Host] of the meeting. These privileges include...
1 By default, this privilege is given to all participants when they first join a meeting, so they can see who else is attending.
Join a meeting...
If you've been invited to join an OmniJoin meeting, you will join automatically as a Participant.
Already in a meeting...?
Ask a Host in the meeting to demote you...
Promote & Demote Attendees
Overview...
Every OmniJoin meeting has up to three levels of attendees called; Hosts, Presenters and Participants. Each of these has certain abilities and restrictions to help keep a meeting organized.
A Host can promote and demote attendees by following the steps below.
Step-by-Step...
Promote to a Host or Presenter
Ideal when you want to promote someone to share documents, PowerPoint® files etc., and be able to navigate through the pages or slides.
1. While in an OmniJoin meeting (as a [Host])...
2. Right-click on an attendee in the user-list
3. Select Make and then select Host with all Privileges or Presenter with all Privileges
NOTE: Only Hosts in the meeting can promote and demote other attendees. |
Demote to a Participant...
Should you choose to, the Host of the meeting can demote an attendee to a Participant to keep the meeting organized and to restrict the attendee's access to certain features.
1. While in an OmniJoin meeting (as a [Host])...
2. Right-click on an attendee in the user-list
3. Select Make and then select Participant with default Privileges or Participant without Privileges
NOTE: Only Hosts in the meeting can promote and demote other attendees. |
Privileges
Depending on how a meeting has been set up, there can be up to 13 different privileges in a meeting. These privileges can be given or taken away from any meeting attendee by a Host.
You can give or remove specific privileges from attendees by the following steps.
Save Privilege
The Save privilege allows the attendee to save the current shared PowerPoint® file.
Give the Save privilege...
1. While in an OmniJoin meeting (as a [Host])...
2. Right-click on an attendee in the user-list
3. Select Privileges and then select Save (so it is ticked)
NOTE: Only Hosts in the meeting can promote and demote other attendees. |
Remove the Save privilege...
1. While in an OmniJoin meeting (as a [Host])...
2. Right-click on an attendee in the user-list
3. Select Privileges and then select Save (so it is un-ticked)
NOTE: Only Hosts in the meeting can promote and demote other attendees. |
Print Privilege
The Print privilege allows the attendee to print the current shared PowerPoint® file, document or to capture the current view of a live application or desktop share. It will also print any annotations that have been made on the shared files.
Give the Print privilege...
1. While in an OmniJoin meeting (as a [Host])...
2. Right-click on an attendee in the user-list
3. Select Privileges and then select Print (so it is ticked)
NOTE: Only Hosts in the meeting can promote and demote other attendees. |
Remove the Print privilege...
1. While in an OmniJoin meeting (as a [Host])...
2. Right-click on an attendee in the user-list
3. Select Privileges and then select Print (so it is un-ticked)
NOTE: Only Hosts in the meeting can promote and demote other attendees. |
Annotate Privilege
With the Annotate privilege, the toolbar for "Annotation tools" is displayed to the left of the shared material.
This enables the user to open an "Annotation Toolbar" and annotate over documents, PowerPoint® files and applications.
Give the Annotate privilege...
1. While in an OmniJoin meeting (as a [Host])...
2. Right-click on an attendee in the user-list
3. Select Privileges and then select Annotate (so it is ticked)
NOTE: Only Hosts in the meeting can promote and demote other attendees. |
Remove the Annotate privilege...
1. While in an OmniJoin meeting (as a [Host])...
2. Right-click on an attendee in the user-list
3. Select Privileges and then select Annotate (so it is un-ticked)
NOTE: Only Hosts in the meeting can promote and demote other attendees. |
Chat Privilege
With the Chat privilege, the attendee can start a private chat with individuals in the meeting by right-clicking on an attendee in the user-list and selecting "Private Chat".
Give the Chat privilege...
1. While in an OmniJoin meeting (as a [Host])...
2. Right-click on an attendee in the user-list
3. Select Privileges and then select Chat (so it is ticked)
NOTE: Only Hosts in the meeting can promote and demote other attendees. |
Remove the Chat privilege...
1. While in an OmniJoin meeting (as a [Host])...
2. Right-click on an attendee in the user-list
3. Select Privileges and then select Chat (so it is un-ticked)
NOTE: Only Hosts in the meeting can promote and demote other attendees. |
Record Privilege
The Record privilege, allows the attendee to record the meeting by selecting "Record Meeting" via the Meeting tab.
Give the Record privilege...
1. While in an OmniJoin meeting (as a [Host])...
2. Right-click on an attendee in the user-list
3. Select Privileges and then select Record (so it is ticked)
NOTE: Only Hosts in the meeting can change the attendees' privileges. |
Remove the Record privilege...
1. While in an OmniJoin meeting (as a [Host])...
2. Right-click on an attendee in the user-list
3. Select Privileges and then select Record (so it is un-ticked)
NOTE: Only Hosts in the meeting can promote and demote other attendees. |
Control Focus Privilege
The Control Focus privilege gives the attendee the ability to choose what page or slide is being viewed. The privilege is shown as a yellow-and-white arrow next to your name in the user-list.
The Control Focus ensures that whatever page or slide you're on, will also be viewed by other meeting attendees.
Give the Control Focus privilege...
1. While in an OmniJoin meeting (as a [Host])...
2. Right-click on an attendee in the user-list
3. Select Privileges and then select Control Focus (so it is ticked)
NOTE: Only Hosts in the meeting can change the attendees' privileges. |
Remove the Control Focus privilege...
1. While in an OmniJoin meeting (as a [Host])...
2. Right-click on an attendee in the user-list
3. Select Privileges and then select Control Focus (so it is un-ticked)
NOTE: Only Hosts in the meeting can change the attendees' privileges. |
Control Layout Privilege
The Control Layout privilege allows the attendee to force their meeting layout onto all other attendees. With this privilege enabled, the attendee will have a "Follow My Layout" button available for use - located in the top right-corner of the meeting (and under the Layout tab).
Give the Control Layout privilege...
1. While in an OmniJoin meeting (as a [Host])...
2. Right-click on an attendee in the user-list
3. Select Privileges and then select Control Layout (so it is ticked)
NOTE: Only Hosts in the meeting can change the attendees' privileges. |
Remove the Control Layout privilege...
1. While in an OmniJoin meeting (as a [Host])...
2. Right-click on an attendee in the user-list
3. Select Privileges and then select Control Layout (so it is un-ticked)
NOTE: Only Hosts in the meeting can change the attendees' privileges. |
View Attendee List Privilege
Giving the View Attendee List privilege to an attendee enables them to see the attendee list.
Give the View Attendee List privilege...
1. While in an OmniJoin meeting (as a [Host])...
2. Right-click on an attendee in the user-list
3. Select Privileges and then select View Attendee List (so it is ticked)
NOTE: Only Hosts in the meeting can change the attendees' privileges. |
Remove the View Attendee List privilege...
1. While in an OmniJoin meeting (as a [Host])...
2. Right-click on an attendee in the user-list
3. Select Privileges and then select View Attendee List (so it is un-ticked)
NOTE: Only Hosts in the meeting can change the attendees' privileges. |
View Thumbnails Privilege
The View Thumbnails privilege will allow an attendee to view a list of thumbnail images of the current share.
Give the View Thumbnails privilege...
1. While in an OmniJoin meeting (as a [Host])...
2. Right-click on an attendee in the user-list
3. Select Privileges and then select View Thumbnails (so it is ticked)
NOTE: Only Hosts in the meeting can change the attendees' privileges. |
Remove the View Thumbnails privilege...
1. While in an OmniJoin meeting (as a [Host])...
2. Right-click on an attendee in the user-list
3. Select Privileges and then select View Thumbnails (so it is un-ticked)
NOTE: Only Hosts in the meeting can change the attendees' privileges. |
View Any Share Privilege
View Any Share privilege enables the attendee to individually view any documents, PowerPoint® files, applications which are currently shared in the meeting. This is achieved by selecting any tabs that are displayed towards the top of the meeting.
NOTE: If the attendee also has the [Control Focus privilege], changing shares will also change it for everyone else in the meeting. |
Give the View Any Share privilege...
1. While in an OmniJoin meeting (as a [Host])...
2. Right-click on an attendee in the user-list
3. Select Privileges and then select View Any Share (so it is ticked)
NOTE: Only Hosts in the meeting can change the attendees' privileges. |
Remove the View Any Share privilege...
1. While in an OmniJoin meeting (as a [Host])...
2. Right-click on an attendee in the user-list
3. Select Privileges and then select View Any Share (so it is un-ticked)
NOTE: Only Hosts in the meeting can change the attendees' privileges. |
View Any Page Privilege
View Any Page privilege enables the attendee to individually view any page or slide on the current shared PowerPoint® file or document. You will have access to a set of blue-arrows towards to the top-left corner of the share.
NOTE: If the attendee also has the [Control Focus privilege], changing pages or slides will also change it for everyone else in the meeting. |
Give the View Any Page privilege...
1. While in an OmniJoin meeting (as a [Host])...
2. Right-click on an attendee in the user-list
3. Select Privileges and then select View Any Page (so it is ticked)
NOTE: Only Hosts in the meeting can change the attendees' privileges. |
Remove the View Any Page privilege...
1. While in an OmniJoin meeting (as a [Host])...
2. Right-click on an attendee in the user-list
3. Select Privileges and then select View Any Page (so it is un-ticked)
NOTE: Only Hosts in the meeting can change the attendees' privileges. |
Remote File Access Privilege
NOTE: Attendees who have Remote File Access privilege can operate the computer files of the others. Host should be careful when giving this privilege. |
The Remote File Access privilege gives an attendee the ability to request a file transfer to any other attendee in the meeting. Anyone with the Remote File Access privilege can right-click on an attendee in the user-list and select Remote File Access to initiate it.
NOTE: In order to send files to other attendees, the recipient must first "allow" the file transfer request. |
Give the Remote File Access privilege...
1. While in an OmniJoin meeting (as a [Host])...
2. Right-click on an attendee in the user-list
3. Select Privileges and then select Remote File Access (so it is ticked)
NOTE: Only Hosts in the meeting can change the attendees' privileges. |
Remove the Remote File Access privilege...
1. While in an OmniJoin meeting (as a [Host])...
2. Right-click on an attendee in the user-list
3. Select Privileges and then select Remote File Access (so it is un-ticked)
NOTE: Only Hosts in the meeting can change the attendees' privileges. |
Remote Control Privilege
The Remote Control privilege gives an attendee the ability to request remote control over another attendee's computer. Anyone with the Remote Control privilege can right-click on an attendee in the user-list and select Remote Control to initiate it.
NOTE: In order to remotely control the other attendee's computer, the receipient must first "allow" the remote control request. |
Give the Remote Control privilege...
1. While in an OmniJoin meeting (as a [Host])...
2. Right-click on an attendee in the user-list
3. Select Privileges and then select Remote Control (so it is ticked)
NOTE: Only Hosts in the meeting can change the attendees' privileges. |
Remove the Remote Control privilege...
1. While in an OmniJoin meeting (as a [Host])...
2. Right-click on an attendee in the user-list
3. Select Privileges and then select Remote Control (so it is un-ticked)
NOTE: Only Hosts in the meeting can change the attendees' privileges. |
View Attendee Phone Numbers Privilege
Selecting the View Attendee Phone Numbers privilege will let other attendees see the phone numbers of people who dialed into or received a call from OmniJoin Phone Conferencing.
Give the View Attendee Phone Numbers privilege...
1. While in an OmniJoin meeting (as a [Host])...
2. Right-click on an attendee in the attendee list
3. Select Privileges and then select View Attendee Phone Numbers (so it is ticked)
NOTE: Only Hosts in the meeting can change the attendees' privileges. |
Remove the View Attendee Phone Numbers...
1. While in an OmniJoin meeting (as a [Host])...
2. Right-click on an attendee in the attendee list
3. Select Privileges and then select View Attendee Phone Numbers (so it is un-ticked)
NOTE: Only Hosts in the meeting can change the attendees' privileges. |
Expel an Attendee
Overview...
Should you need to expel an attendee from the meeting, you can do so by following the steps below. This will remove them from the meeting and close their OmniJoin Meeting.
Step-by-Step...
1. While in an OmniJoin meeting (as a [Host])...
2. Right-click on an attendee in the user-list
3. Select Expel