Home > Edit a Label > Use Block Layouts


Use Block Layouts
PT-D410
Example - Asset Tag 1:

- Press
 .
. - Press
 or
or  to display [Block Layouts], and then press OK.
 - Press or to select the tape width you want, and then press OK.
- Press or to select the block layout you want, and then press OK.
- Press, ,
 , or
, or  to select a text attribute, and then press OK.
 - Enter the text you want, and then press OK.
- Repeat these steps for each text field, and then press OK.
- Press OK to display the print menu.
- Do one of the following:
- Select [Print], and then press OK.
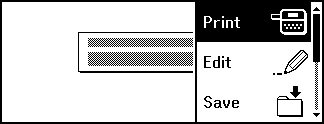
- Press or to select one of the following options:
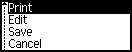
OptionDescriptionEditChange the text.
SaveSave the label.
For more information, see Related Topics: Use the File Memory.
CancelCancel the template printing.
PreviewPreview the label before printing.
Print OptionsSelect print options.
For more information, see Related Topics: Print Labels.
- Press or to select the number of labels you want to print, and then press
 or OK.

If the width of the current Tape Cassette does not match the set width for the selected layout, an error message appears when you try to print the label. Press  or any other key to clear the error message, and then insert the correct Tape Cassette.
PT-D460BT
- Press
 .
. - Press or to display [Auto Format], and then press OK.
- Press or to display [Block Layouts], and then press OK.
- Press or to select the tape width you want, and then press OK.
- Press or to select the block layout you want, and then press OK.
- Enter the text you want, and then press OK.
- Repeat these steps for each text field, and then press OK.
- Press OK to display the print menu.
- Do one of the following:
- Select [Print], and then press OK.
- Press or to select one of the following options:
OptionDescriptionEditChange the text.
SaveSave the label.
For more information, see Related Topics: Use the File Memory.
MenuChange the Font, Align, or Frame settings.
PreviewPreview the label before printing.
Print OptionsSelect print options.
For more information, see Related Topics: Print Labels.
- Press or to select the number of labels you want to print, and then press or OK.
If the width of the current Tape Cassette does not match the set width for the selected layout, an error message appears when you try to print the label. Press or any other key to clear the error message, and then insert the correct Tape Cassette.