Home > Printer Settings > Change Printer Settings Using the Printer Setting Tool (Windows)


Change Printer Settings Using the Printer Setting Tool (Windows)
- Make sure the printer driver has been installed correctly and you can print.
- Connect the printer to a computer with a USB cable.

- The Printer Setting Tool is installed in addition to the printer driver and other software when using the installer.
- Connect the printer you want to configure to the computer.
- Start the Printer Setting Tool.
Windows 10/Windows Server 2016/Windows Server 2019/Windows Server 2022:
Click .
Windows 8.1/Windows Server 2012/Windows Server 2012 R2:
Click the Printer Setting Tool icon on the Apps screen.
The main window appears.
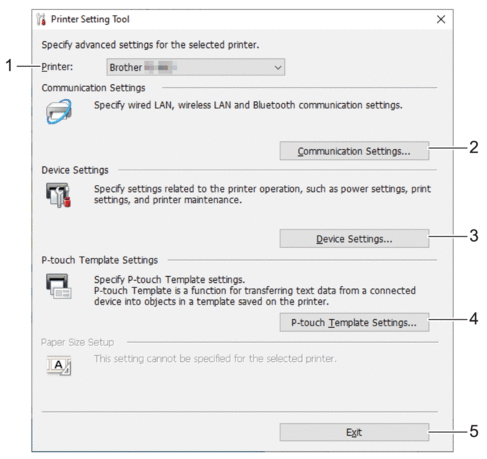
- Printer
- Lists the connected printers.
- Communication Settings (PJ-862/PJ-863/PJ-883)
- Specify communication settings.
- Device Settings
- Specify device settings.
- P-touch Template Settings
-
Specify P-touch Template settings.
For more information, see the P-touch Template Manual/Command Reference (English only). You can download the latest version from the Brother support website at support.brother.com/manuals.
- Exit
- Click to close the window.
- Make sure the printer you want to configure appears next to Printer.
If a different printer appears, select the printer you want from the drop-down list.
- Select the settings you want to change, and then specify or change the settings in the dialog box.
- Click Apply to apply the settings to the printer.
- Click Exit in the main window to finish specifying settings.
Use the Printer Setting Tool to configure the printer only when the printer is idle. The printer may malfunction if you try to configure it while it is processing or printing a print job.
Did you find the information you needed?