5234PRW
Preguntas frecuentes y solución de problemas |
5234PRW
Fecha: 08/18/2017 ID: faqh00000585_001
How to remove and install the needle
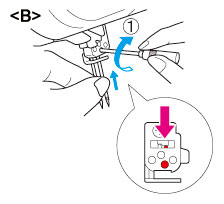
To remove the needle
- Turn the main power and light switch to the OFF position.
- Turn the hand wheel so that the mark on the hand wheel is aligned to the line on the machine.
-
Loosen the corresponding needle set screw with turning the included hexagonal driver toward
 in the figure, and remove the needle.
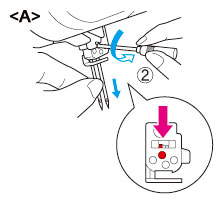
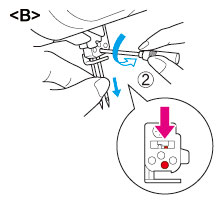
 Loosen
 Loosen
<A> Removing the left needle <B> Removing the right needle
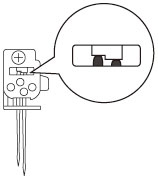
To install the needle
- Turn the main power and light switch to the OFF position.
- Turn the hand wheel so that the line on the hand wheel is aligned to the line on the machine.
- Hold the needle with its flat side away from you and insert it up as far as it will go.
-
Tighten the needle set screw securely with turning the included hexagonal driver toward
 in the figure.
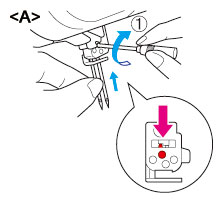
 Tighten
 Tighten
<A> Installing the left needle <B> Installing the right needle
Make sure to insert the needles to the highest point in the needle chamber.
If the needles have been inserted correctly, the right needle should be set slightly lower than the left one.
Always be sure to turn off the power before removing/ inserting the needle.
Do not drop the needle and needle set screw in the machine, otherwise it may be damaged.
Si necesita asistencia, contáctese con el servicio al cliente de Brother:
Comentarios sobre el contenido
Para ayudarnos a mejorar el soporte, bríndenos sus comentarios a continuación.
Paso 1: ¿Cómo lo ayudó la información en esta página?
Paso 2: ¿Quiere agregar otros comentarios?
Observe que este formulario solo se utiliza para comentarios.