PS5234
Preguntas frecuentes y solución de problemas |
PS5234
Fecha: 10/28/2022 ID: faqh00000526_001
To secure chains
There are two methods available to secure the chain.
Method 1
Secure the chains of the beginning and the end of a stitch with your machine.
At the beginning of a stitch
-
Sew a few stitches, after chaining-off for 5 cm (2 inches).
-
Stop the machine and raise the presser foot.
-
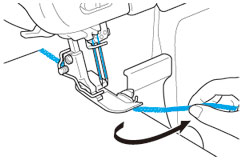
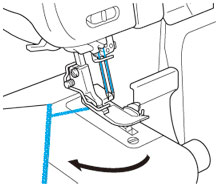
Put the chains under the presser foot, and serge over it pulling toward you.
-
After sewing a few stitches, cut off the extra chain with the upper knife as illustrated.
At the end of a stitch
-
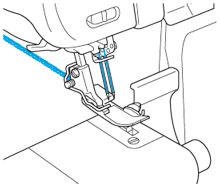
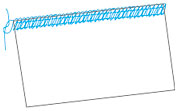
At the end of the seam, sew one stitch out of the fabric before stopping the machine.
-
Raise the presser foot and the needles, then reverse the fabric.
-
Lower the needles and the presser foot at the same position.
-
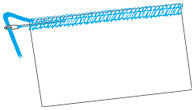
Serge over the seam, taking care not to cut the serged seam with the upper knife.
-
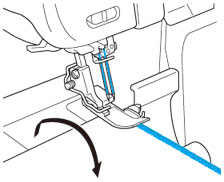
After sewing a few stitches, serge off the fabric as illustrated.
- Cut the chain with scissors.
Method 2
With this method, the chains at the beginning and the end of a stitch can be secured in the same manner.
-
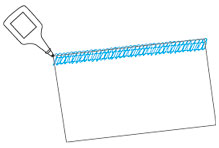
Tie the thread unpicked from chains.
-
Insert the chains into the end of the seam, using a hand sewing needle with large eye.
-
Fix the chains with a drop of fabric glue, and cut the extra stitches after dryin.
Si necesita asistencia, contáctese con el servicio al cliente de Brother:
Comentarios sobre el contenido
Para ayudarnos a mejorar el soporte, bríndenos sus comentarios a continuación.
Paso 1: ¿Cómo lo ayudó la información en esta página?
Paso 2: ¿Quiere agregar otros comentarios?
Observe que este formulario solo se utiliza para comentarios.