DCP-L5600DN
Preguntas frecuentes y Solución de problemas |
DCP-L5600DN
Fecha: 04/13/2016 ID: faq00100290_500
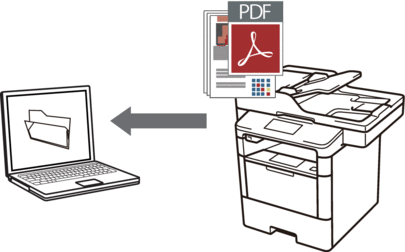
Save Scanned Data to a Folder as a PDF File Using ControlCenter4 Advanced Mode (Windows®)
Scan documents and save them to a folder on your computer as PDF files.
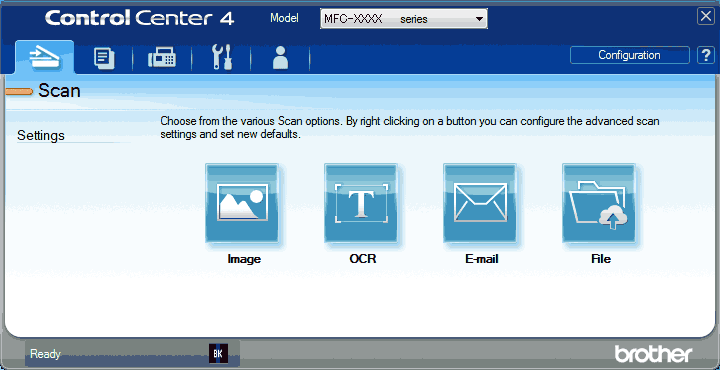
Select Advanced Mode as the mode setting for ControlCenter4.
- Load your document.
- Click the
 (ControlCenter4) icon in the task tray, and then click Open.
 - Click the Scan tab.
- Click the File button.The scan settings dialog box appears.
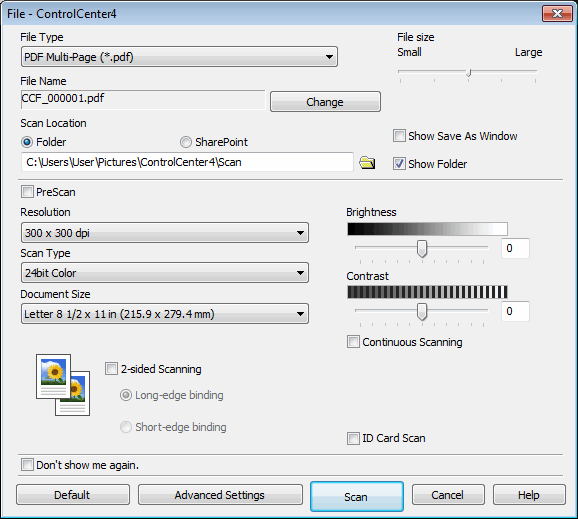
- Click the File Type drop-down list, and then select a PDF file.

To save the document as a password-protected PDF, select Secure PDF Single-Page (*.pdf) or Secure PDF Multi-Page (*.pdf) from the File Type drop-down list, click
 , and then type the password..
 - Click the folder icon to browse and select the folder where you want to save your scanned documents.
- Change the scan settings, such as file format, file name, resolution and color, if needed.
To preview and configure the scanned image, select the PreScan check box.
- Click Scan.The machine starts scanning. The file is saved in the folder you selected.
Preguntas frecuentes relacionadas
- Scan multiple pages into one file instead of each scan being saved as a separate file.
- Change the scan settings for scanning from ControlCenter2 or the SCAN key (For Macintosh)
- Change the scan settings for scanning from ControlCenter4 or the SCAN key (For Windows)
- Save Scanned Data to a Folder as a PDF File
- Save Scanned Data to a Folder as a PDF File Using ControlCenter4 Home Mode (Windows®)
DCP-L5500DN, DCP-L5600DN, DCP-L5650DN, MFC-L5700DW, MFC-L5800DW, MFC-L5850DW, MFC-L5900DW, MFC-L6700DW, MFC-L6800DW
Si necesita asistencia, contáctese con el servicio al cliente de Brother:
Comentarios sobre el contenido
Para ayudarnos a mejorar el soporte, bríndenos sus comentarios a continuación.
Paso 1: ¿Cómo lo ayudó la información en esta página?
Paso 2: ¿Quiere agregar otros comentarios?
Observe que este formulario solo se utiliza para comentarios.