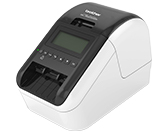
QL-820NWB/820NWBc
Întrebări frecvente şi depanare |

QL-820NWB/820NWBc
Dată: 18/10/2023 ID: faqp00001461_022
How do I connect the printer to my computer using a USB cable?
Use the following procedure to print using a USB cable.
For Windows:
- Check that the printer is turned off.
- Connect the USB cable to the USB Port on the back of the printer and to your computer, and turn on the printer.
- Download and install the Printer Driver and P-touch Editor from the [Downloads] section of this website.
- Start the Printer Driver installer or Software/Document Installer.
- Select [Local Connection (USB)] for the connection type, and then follow the installer instructions to complete the installation.
-
After installing the Printer Driver, install P-touch Editor. Then, start P-touch Editor to create and print labels.
For Mac:
> Printing from P-touch Editor (if available for your model)
> Printing using AirPrint
> Printing from CUPS Driver
Printing from P-touch Editor (if available for your model)
- Download and install P-touch Editor from the [Downloads] section of this website.
- Connect the USB cable to the USB Port on the back of the printer and to your computer, and turn on the printer.
-
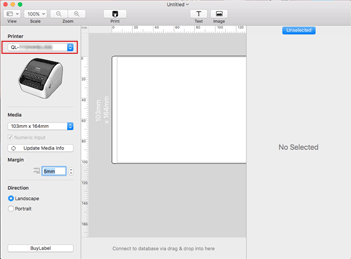
Start P-touch Editor and select your printer.

- Create and print labels.
- Connect the USB cable to the USB Port on the back of the printer, and then to your computer.
- Fom the Apple menu, open [System Settings]/[System Preferences] - [Printers & Scanners]/[Print & Scan].
- Click [Add Printer, Scanner, or Fax...] or the [+] button.
- Select your model, and click [Add].
- Select your model in your application to print.
- Do not connect the printer to your computer via the USB cable until you have installed the printer driver.
- On macOS 11 or later, only some models support the CUPS driver.
The following procedure uses QL-1100 as an example. Please replace it with your model.
- Download the Printer Driver from the [Downloads] section of this website, double-click the file, and then follow the on-screen instructions.
- When instructed, connect the USB cable to the USB port on the back of the printer, and then to your computer.
- After the installation is finished, open the Apple menu - [System Settings]/[System Preferences] - [Printers & Scanners]/[Print & Scan].
- Click [Add Printer, Scanner, or Fax...] or the [+] button.
- Click the [Default] icon, and select your model from the [Name] list.
- Make sure that the [model name + CUPS] is selected in the [Use] list, and click [Add].
- Select your model in your application to print.
PJ-722, PJ-723, PJ-762, PJ-763, PJ-763MFi, PJ-773, PJ-822, PJ-823, PJ-862, PJ-863, PJ-883, PT-P750W, QL-1100/1100c, QL-1110NWB/1110NWBc, QL-710W, QL-720NW, QL-800, QL-810W/810Wc, QL-820NWB/820NWBc, VC-500W
Dacă aveţi nevoie de asistenţă suplimentară, vă rugăm să contactaţi serviciul de asistenţă clienţi Brother:
Spuneţi-vă părerea despre conţinutul furnizat
Vă rugăm să ţineţi cont de faptul că acest formular este folosit numai pentru feedback.