TD-2135NWB
Perguntas mais frequentes e Resolução de problemas |

TD-2135NWB
Data: 24-01-2020 ID: faqp00100396_001
Installing a CA certificate
You can install a CA certificate into your printer using the following method.
Installing a CA certificate using EWS (Embedded Web Server)
- Make sure the printer and your computer are connected via Wi-Fi®.
- Start your web browser.
-
Type "http://machine's IP address/" in the browser's address bar (where "machine's IP address" is the machine's IP address).
E.g. http://192.168.1.2/ -
Enter the password, and then press
 (Right arrow button).
You may be asked for the default login password depending on your model.
The default login password is preceded by "Pwd" and located either on the bottom of the printer or in the battery or media compartment.
For more information, see [IMPORTANT – Network Security Notice: Default Login Password Change] on the [Manuals] page. - Click Network.
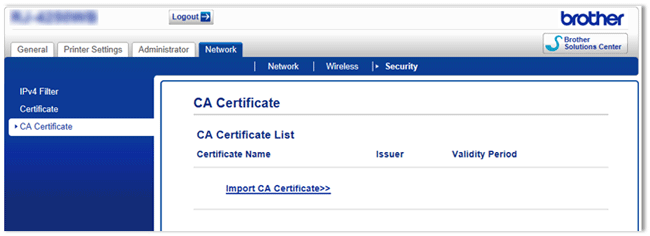
- Click Security.
-
Click CA Certificate.

- Click Import CA Certificate.
-
Select the CA certificate you want to install and import.
Setting a password:
We recommend changing a login password to prevent unauthorized access to EWS.- Click Administrator.
- Type the password you want to use (up to 32 characters).
- Re-type the password in the Confirm new password box.
-
Click Submit.
The next time you access EWS, enter a password in the Login box, and then click .
.
After configuring the settings, logout by clicking .
.
You can also set a password by clicking Please configure the password. on the printer’s web page if you are not setting a login password.
Se precisar de mais ajuda, contacte o serviço ao cliente da Brother:
Feedback sobre o conteúdo
Tenha em atenção que este formulário é utilizado apenas para feedback.