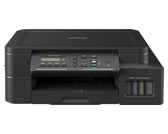
DCP-T520W
Odpowiedzi na często zadawane pytania i rozwiązywanie problemów |

DCP-T520W
Data: 28/10/2020 Identyfikator: faq00000299_518
Set the Date and Time
(MFC models)
The LCD displays the date and time. If they are not current, re-enter them. You can add the date and time to each fax you send by setting your Station ID.
(DCP models)
If the machine's power has been off, the machine's date and time may not be current. Re-enter them.
DCP-T520W/DCP-T525W/DCP-T720DW/DCP-T725DW/DCP-T820DW/DCP-T825DW
- Press Menu.
- Press
 or
or  to make your selections:
 - Select [Initial Setup]. Press OK.
- Select [Date & Time]. Press OK.
- Select [Date & Time]. Press OK.
- Press
 or
or  on the control panel to set the last two digits of the year. Press OK. Repeat these steps for setting the month and day.
 - Press
 or
or  on the control panel to set the hour. Press OK. Repeat these steps for setting the minute.
 - Press Stop/Exit.
MFC-T920DW/MFC-T925DW
- Press Settings.
- Press
 or
or  to make your selections:
 - Select [Initial Setup]. Press OK.
- Select [Date & Time]. Press OK.
- Select [Date]. Press OK.
- Enter the last two digits of the year using the dial pad, and then press OK.
- Enter the two digits for the month using the dial pad, and then press OK.
- Enter the two digits for the day using the dial pad, and then press OK.
- Press
 or
or  to select [Time], and then press OK.
 - Enter the time (in 24-hour format) using the dial pad, and then press OK.
- Press Stop/Exit.
DCP-T520W, DCP-T525W, DCP-T720DW, MFC-T920DW
Jeśli potrzebujesz dalszej pomocy, skontaktuj się z działem obsługi klienta firmy Brother:
Opinie dotyczące treści
Aby pomóc nam udoskonalać naszą pomoc techniczną, przekaż poniżej swoją opinię.
Krok 1: Na ile informacje na tej stronie były dla Ciebie pomocne?
Krok 2: Czy chcesz dodać własne komentarze?
Prosimy pamiętać, że niniejszy formularz służy wyłącznie do wyrażania opinii.