TD-4520TN
Preguntas frecuentes y solución de problemas |
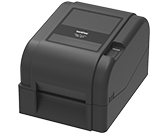
TD-4520TN
Fecha: 09/01/2024 ID: faqp00100455_000
How to attach the External Roll Mount (Optional)
Movie: How to attach the External Roll Mount (Optional)
*The video clip is being streamed from YouTube.
-
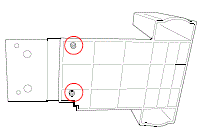
Tighten the screws of the metal fittings of the extended plate.
-
Attach the extended plate to the bottom of the printer.

-
Insert a 76.2 mm (3") Label Spindle into the paper roll. Then, install it on the External Roll Mount.
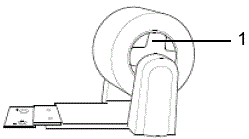
1. 76.2 mm (3") Label Spindle -
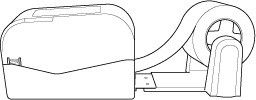
Feed the media through the Rear Label Feed Slot.
-
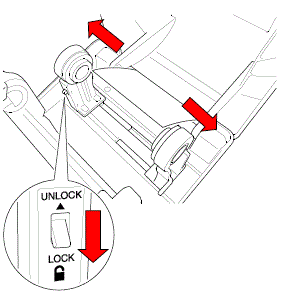
Open the Roll Compartment Cover. Slide the Roll Guides outwards, and then align the paper width with the Roll Guides. Push down the LOCK switch to lock the Roll Guides.
-
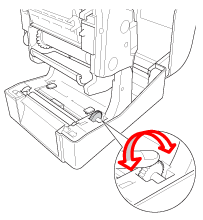
Install the label. Turn the Media Guide Hub, and match the media guide width to the paper width.
-
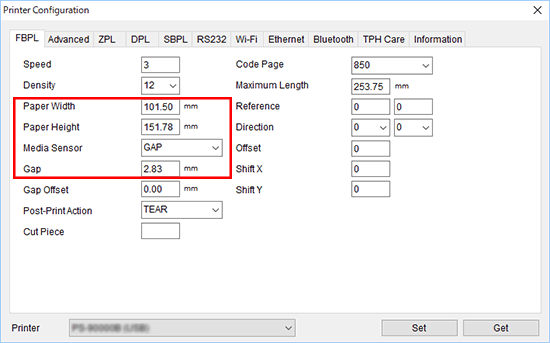
Use the BPM (Brother Printer Management Tool) to set the paper size and the media sensor type, and calibrate the selected sensor.
-
Start the BPM. > Click the Printer Configuration button. > Set the Paper Width, Paper Height, Media Sensor and Gap in the FBPL tab, and click the Set button. > Make sure that the settings is activated by clicking the Get button.
-
Click the Printer Function button. > Set the media sensor type, and click the Calibrate button.
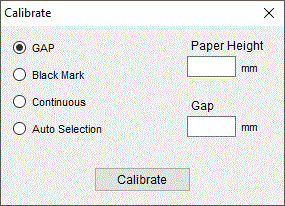
Calibrate the Gap/Black Mark Sensor when changing media.
-
Start the BPM. > Click the Printer Configuration button. > Set the Paper Width, Paper Height, Media Sensor and Gap in the FBPL tab, and click the Set button. > Make sure that the settings is activated by clicking the Get button.
En el caso de que necesite ayuda adicional, póngase en contacto con el servicio de atención al cliente de Brother:
Comentarios sobre el contenido
Con el fin de mejorar nuestro servicio de asistencia, facilite sus comentarios a continuación.
Paso 1: ¿Considera que la información de esta página le ha resultado útil?
Paso 2: ¿Desearía añadir algún comentario?
Tenga en cuenta que este formulario solo se utiliza para comentarios.