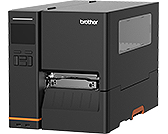
TJ-4420TN
常见问题解答与故障排除 |

TJ-4420TN
日期: 2020-09-28 ID: faqp00100471_004
How to execute the printer configuration (Self-test) to debug
To print the printer configuration (Self-Test), do the following:
- Turn off the printer.
- Press and hold the right Selection button, and then turn on the Power Switch.
-
Release the button when Self-test appears on the screen.
You can also release the button when the LED is flashing in amber (5 times).
The LED color will change in the following order:
Amber > red (5 times) > amber (5 times) > green (5 times) > green/amber (5 times) > red/amber (5 times) > green (lit) -
The printer calibrates the sensor and detects the label length, prints the internal settings, and then enters the Dump Mode.
To turn off the Dump Mode after debugging, turn the printer off and back on again.To select the sensor for calibration, send the correct command to the printer:
- For the Gap Sensor: the GAP command
- For the Black Mark sensor: the BLINE command
You can also print the printer configuration (Self-test) by using the BPM (Brother Printer Management Tool).
如果需要更多的帮助,请联系 Brother 客户服务中心:
内容反馈
请在下方提供您的反馈,帮助我们改进支持服务。