HL-2460
FAQ & Fehlerbehebung |
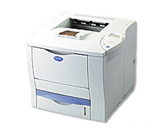
HL-2460
Datum: 16.10.2006 Kennnummer: faq00002167_000
How do I install the Lower Mailbox Unit? (MX-4100)
Be sure to switch off the power and unplug the power cord from the outlet before carrying out the operations. If not, you might get an electrical shock.
Follow the procedure below to install the Lower Mailbox Unit.
- Turn off the printer power switch.
- Pull out the power cord from the AC power outlet/socket and then the printer.
- Remove the 3 protective parts from the top of the printer.
- Hold the release button of the Mailbox unit and slowly insert it into the printer until it clicks fully into position.
For safety reasons, 2 people are required for this oparation.
Make sure that the flap on the rear of the Mailbox unit inserts correctly into the printer when installing the Mailbox.
- Plug the power cord into the AC outlet, and then turn the printer power switch on.
When you instal the Mailbox, do not hold the Mail box in the shaded area shown otherwise it might hurt your hand.
If you need to move the Mailbox unit, do so by holding the main body of the Mailbox unit and not by holding the bins.
You can use the stacker function by removing the two paper trays from the #2 bin and #4 bin positions or the two trays from the #6 and #8 positions.
The paper stoppers are handed differently between the left sides of the #1 bin and #5 bin or #6 bin and #10 bin.
Wenn Sie weitere Unterstützung benötigen, wenden Sie sich an den Brother-Kundendienst:
Rückmeldung zum Inhalt
Bitte beachten Sie, dass dieses Formular nur für Rückmeldungen verwendet wird.