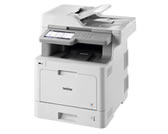
MFC-L9577CDW
FAQ & Fehlerbehebung |

MFC-L9577CDW
Datum: 12.09.2022 Kennnummer: faq00002145_512
Secure Print (Windows)
Use Secure Print to ensure that confidential or sensitive documents do not print until you enter a password on the machine's control panel.
-
The secure data is deleted from the machine when you turn off the machine.
-
Select the print command in your application.
-
Select Brother [model name], and then click the printing properties or preferences button.The printer driver window appears.
-
Click the Advanced tab.
-
Click the Settings button in the Secure Print field.
-
Select the Secure Print check box.
-
Type your four-digit password in the Password field.

You must set a separate password for each document.
-
Type the User Name and Job Name in the text field, if needed.
-
Click OK, to close the Secure Print Settings window.
-
Click OK.
-
Complete your print operation.
-
On the machine's control panel, swipe left or right or press
 or
or  to display the [Secure Print] option, and then press [Secure Print].
-
Swipe up or down or press
 or
or  to display user names, and then press your user name.
The LCD displays the list of secured jobs for your name.
 -
Swipe up or down or press
 or
or  to display the print job, and then press it.
-
Enter your four-digit password, and then press [OK].
-
Enter the number of copies you want.
-
Press [Start].The machine prints the data.
After you have printed the secured data, it will be cleared from the machine's memory.
DCP-L8410CDW, MFC-L8690CDW, MFC-L8900CDW, MFC-L9570CDW(T), MFC-L9577CDW
Wenn Sie weitere Unterstützung benötigen, wenden Sie sich an den Brother-Kundendienst:
Rückmeldung zum Inhalt
Helfen Sie uns dabei, unseren Support zu verbessern und geben Sie uns unten Ihre Rückmeldung.
Schritt 1: Wie hilfreich sind für Sie die Informationen auf dieser Seite?
Schritt 2: Möchten Sie noch ein paar Bemerkungen hinzufügen?
Bitte beachten Sie, dass dieses Formular nur für Rückmeldungen verwendet wird.